manualshive.com logo in svg
background image

METAL CUTTING BAND SAW

MODEL BS-126G

Assembly & Operating Instruction

Содержание BS-126G

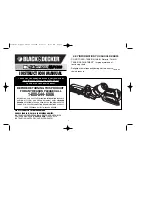
Страница 1: ...METAL CUTTING BAND SAW MODEL BS 126G Assembly Operating Instruction...

Страница 2: ...a tie or gloves 10 Don t overreach Keep your proper footing and balance at all times 11 Secure work Always use the vise to hold work Clamp securely Never hand hold the work with saw in horizontal pos...

Страница 3: ...y to the operator The index of the chapters and the index of the drawings diagrams and tables are contained in chapter 3 and can be used to help the location of specific information CAUTION BEFORE INS...

Страница 4: ...es Chap 4 Description of the machine Safety standards complied with during the design and construction of the machine Description of the machine and its components Chap 5 Main technical data Chap 6 Ha...

Страница 5: ...MACHINE The machine produced by us is in compliance with 98 37 EEC Machinery Directive ex 89 392 EEC as amended by the 91 368 EEC 93 94 ECC and 93 68 EEC Directives The following Standards apply EN 29...

Страница 6: ...ons providing the cutting unit with the necessary strength and precision The vice unit is made of cast iron and clamps the material to be cut securely The bar stop device allows the length required to...

Страница 7: ...achine and to avoid creating safety risks for the operator MOTOR Three phase or single phase Motor power 0 75 kw 1 1 kw Blade size 2825 x 27 x 0 9 mm Cutting angle 60 right Drive gear Packing size 163...

Страница 8: ...ith the correct direction of teeth as shown in drawing enclosed document Make sure that the band type dimensions 2825 25 4 0 9 mm and its teeth pith are suited to the material to be cut 7 4 ELECTRICAL...

Страница 9: ...the hand indicates the required cutting angle vice scale C Make sure that the bow and the vice are locked by means of the lever D With the motor off lower the bow and check that at the end of stroke t...

Страница 10: ...order to accelerate the cutting operation without using excessive force C With selector 151 in CSO position Turn the main switch 161 to the position required After having started the unit by pressing...

Страница 11: ...nor should it have parts which could easily get caught Sleeves should contain elastic Belts rings or chains should not be worn Long hair should be kept in a net B Avoid unstable operating positions F...

Страница 12: ...keys for doors that provide access to the hydraulic or electrical parts or keys to lockable switches in easy of reach of unauthorized personnel E Repairs should only be carried out by authorized pers...

Страница 13: ...ving the crucible 104 DRAW 1 ENCL 1 Empty the coolant from the tank and collect the coolant in a container for future disposal Clean away the shavings and the metallic powder taking care not to scatte...

Страница 14: ...2 10 Axis BS315G 0010 1 29 Mat 6 2 10A Antenna BS315G 0011 1 30 Electrical box bracket BS 315G 0031 1 11 clamp connecting seat BS315G 0009 1 31 Mat 8 2 12 Lower clamp BS315G 0012 1 32 Bolt M8X20 2 13...

Страница 15: ...sher 6 2 56 Nut M30X1 5 1 89 Hexagon screw M6X10 2 57 Mat 10 4 90 Pressure board BS315G 0001 1 58 Hexagon screw M10X25 4 91 Hexagon bolt M12X35 1 59 Nut M8 4 92 Hexagon screw M5X8 2 60 Mat 8 8 93 Guar...

Страница 16: ...137 Pressure spring 1 114 Connecting board BS315G 0030 1 138 Shaft 1 115 Shield board BS315G 0029 1 139 Block washer 12 2 116 Wire brush 50 140 Shaft 1 117 Wire brush bracket BS315G 0024 1 141 Sleeve...

Страница 17: ......

Страница 18: ......

Страница 19: ......

Страница 20: ...tic as it can cause rust due to the humidity condensation 5 Store the machine in a closed dust free place 12 2 DISMANTLING If the machine must be definitively dismantled its components must be sub div...

Отзывы: