k-mojo DIGIMASTER, Instruction Manual
Introducing the k-mojo DIGIMASTER, an innovative gadget accompanied by a comprehensive Instruction Manual for users' convenience. This manual is available for free download from manualshive.com – allowing users to effortlessly access all the necessary information they require to maximize their DIGIMASTER experience.
Share
Download


Reviews:
No comments
Related manuals for DIGIMASTER

Proceed
Brand: Madrigal Audio Pages: 28
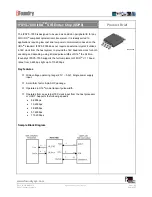
IrDA SIR Endec Chip (SOP8) IFSYS -7000
Brand: IFoundry Systems Pages: 2

KM 250 C1
Brand: Kompernass Pages: 54

DB6400
Brand: DEVA Broadcast Pages: 4

MA2J727
Brand: Panasonic Pages: 3

HR 2831/B
Brand: Philips Pages: 4

Essence HR7768
Brand: Philips Pages: 8

HL 1650
Brand: Philips Pages: 12

Essence HR7768
Brand: Philips Pages: 88

Cucina HR7735
Brand: Philips Pages: 108

Cortex-R4
Brand: ARM Pages: 436

DT 2006S
Brand: Selenium Pages: 10

DSP.3S
Brand: HELIX Pages: 28

DSP PRO MK2
Brand: HELIX Pages: 28

DSP PRO MK3
Brand: HELIX Pages: 32

VT-1604
Brand: Vitek Pages: 4

VT-1604 PR
Brand: Vitek Pages: 32

MG-213
Brand: Magio Pages: 14


