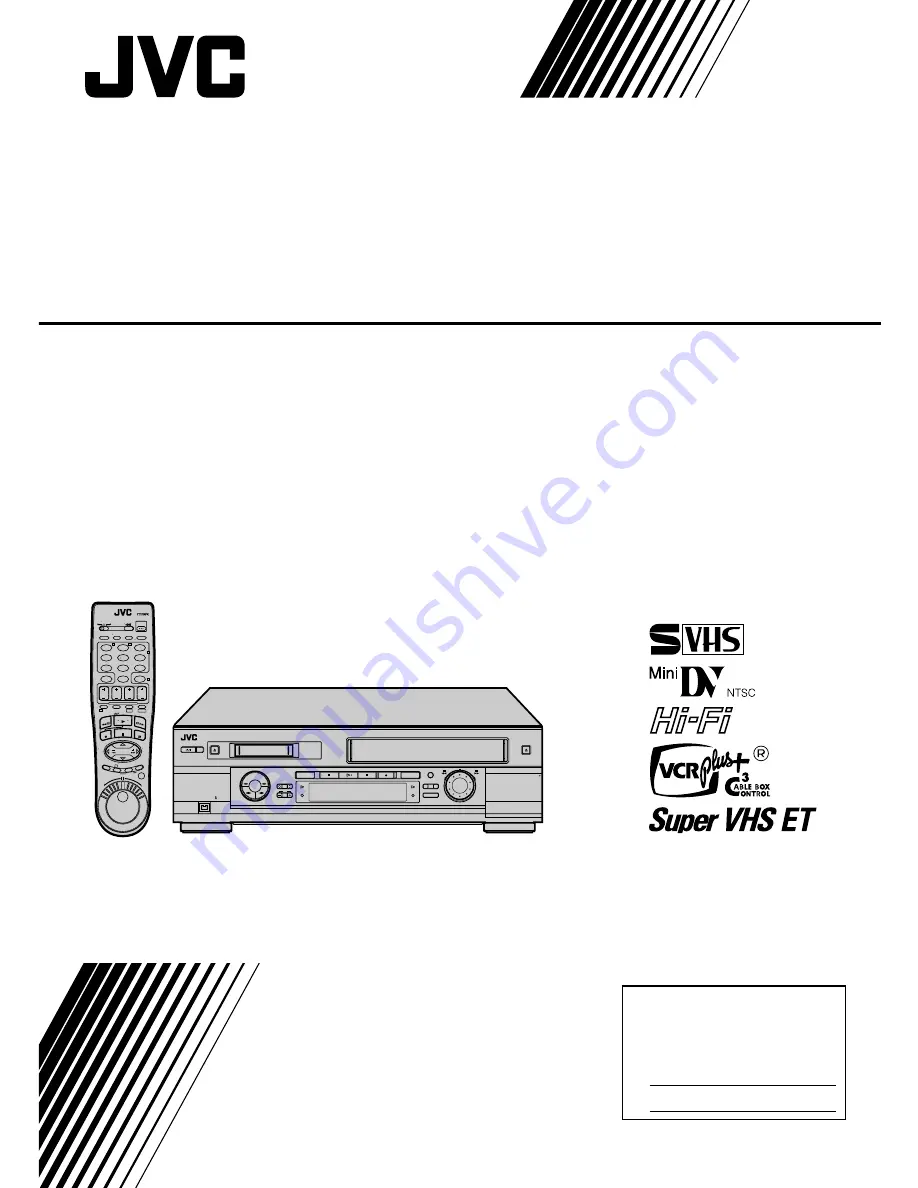
background image

HR-DVS2U

Mini DV/S-VHS
VIDEO CASSETTE RECORDER

INSTRUCTIONS

LPT0575-001A

For Customer Use:

Enter  below  the Model No. and 
Serial  No. which are located on the 
rear of cabinet. Retain this 
information for future reference.
     
Model No.      


Serial No.    

1

2

3

4

5

6

7

8

9

0

2

4

1

3

T

W

DV

S-VHS

POWER

TV/VCR

A/B

DISPLAY

ENTER/OSD

A.MONITOR

VCR TV CABLE/DBS

CANCEL

TIMER

START

STOP

DATE

CH

C. RESET

DBS

DAILY(M-F)

AUX

WEEKLY

PROG

EXPRESS PROGRAMMING

PROG

CHECK

SP/LP
SP/EP

PLAY

REW

REC

STOP

PAUSE

FF

TV CH + 

TV CH — 

TV 
VOL 

  + 

TV 
VOL 

  — 

MENU

OK

JOG/

SHUTTLE

T

I

D

E

.

A

.

R

T

U

O

/

N

I

T

R

A

T

S

DV IN/OUT

S-VHS

DV

A.DUB

INSERT

CH

DUB

DV

S-VHS

START

R.A.EDIT

IN/OUT

S-VHS ET

PULL - OPEN

REC

PAUSE

PLAY

STOP

EJECT

EJECT

POWER

Summary of Contents for HR-DVS2U

Page 1: ...4 5 6 7 8 9 0 2 4 1 3 T W DV S VHS POWER TV VCR A B DISPLAY ENTER OSD A MONITOR VCR TV CABLE DBS CANCEL TIMER START STOP DATE CH C RESET DBS DAILY M F AUX WEEKLY PROG EXPRESS PROGRAMMING PROG CHECK SP LP SP EP PLAY REW REC STOP PAUSE FF TV CH TV CH TV VOL TV VOL MENU OK JOG SHUTTLE T I D E A R T U O N I T R A T S DV IN OUT S VHS DV A DUB INSERT CH DUB DV S VHS START R A EDIT IN OUT S VHS ET PULL O...

Page 2: ...ng transport MOISTURE CONDENSATION Moisture in the air will condense on the VCR when you move it from a cold place to a warm place or under extremely humid conditions just as water droplets form on the surface of a glass filled with cold liquid Moisture condensation on the head drum will cause damage to the tape In conditions where condensa tion may occur keep the VCR s power turned on for a few h...

Page 3: ... paying particular attention to cords at plugs convenience receptacles and the point where they exit from the product 5 Ventilation Slots and openings in the cabinet are provided for ventilation To ensure reliable operation of the product and to protect it from overheating these openings must not be blocked or covered Do not block the openings by placing the product on a bed sofa rug or other simi...

Page 4: ...plained in the manual This section also illustrates the controls and connections on the front and rear panel the front display panel and the remote control The 墌 mark signals a reference to another page for instructions or related information Operation buttons necessary for the various procedures are clearly indicated through the use of illustrations at the beginning of each major section BEFORE Y...

Page 5: ...0 Preparation 10 Semi Auto 11 Manual 12 Tuner 13 Set Receivable Channels 13 Add Or Delete A Channel 14 Cable Box Control 15 Situate And Connect Controller 15 Set Cable Box Output Channel Cable Box Brand 16 DBS Receiver Control 18 Situate And Connect Controller 18 Set DBS Receiver Output Channel DBS Receiver Brand 19 SIMPLE PLAYBACK AND RECORDING 21 Simple Playback 21 Simple Recording 22 VHS deck 2...

Page 6: ...u have a TV with S VIDEO input terminals see S VIDEO Connection on page 7 CONNECT VCR TO POWER SOURCE 4 Connect the AC power plug to an AC outlet The clock and tuner channels will automatically be set when the antenna is connected and when the AC is first connected to the VCR 墌 pg 8 If Auto or CH is displayed on the front display panel before the VCR is powered on the clock and tuner channels are ...

Page 7: ...the TV VCR button on the VCR s remote control to set your TV to the AV mode 墌 pg 64 S VIDEO Connection CONNECT VCR TO TV a Connect both the RF cable and the AV cables to the TV as explained in step 3 of Basic Connections 墌 pg 6 b Connect the S Video cable between the S VIDEO OUT 2 jack on the rear of the VCR and the S VIDEO IN jack on the TV S VIDEO IN Antenna or Cable Flat Feeder Coaxial Cable AC...

Page 8: ...irst connected to the VCR The antenna cable must be connected for the Plug Play function The time and date can be set automatically from clock setting data that is transmitted by one of the regular TV broadcast channels We call this TV channel the Host Channel and it is a PBS channel in your area PLUG PLAY SETUP 1 Connect the antenna cable to the VCR 墌 pg 6 Then connect the VCR s power plug to an ...

Page 9: ...L SET SCREEN 3 At the Main Menu screen move the highlight bar arrow to INITIAL SET by pressing fi then press OK or SELECT LANGUAGE 4 Move the highlight bar arrow to LANGUAGE by pressing fi then press OK or to select the desired language RETURN TO NORMAL SCREEN 5 Press MENU Turn on the TV and select the AV mode POWER MENU POWER O K MAIN MENU MODE SET VHS MODE SET DV MODE SET TUNER SET INITIAL SET PRE...

Page 10: ...nu screen move the highlight bar arrow to INITIAL SET by pressing fi then press OK or ACCESS CLOCK SET SCREEN 4 Move the highlight bar arrow at the Initial Set screen to CLOCK SET by pressing fi then press OK or CABLE BOX USERS SET CLOCK MANUALLY appears on the screen for about 5 seconds then the Clock Set screen appears 1 2 3 4 5 6 7 8 9 0 2 4 1 3 T W DV S VHS POWER POWER Turn on the TV and select ...

Page 11: ...ansmit clock setting data SELECT D S T MODE 7 You have three choices a Select AUTO and the adjustment to your VCR s clock will be made according to the incoming signal from the host channel b Select ON and the adjustment will be made based on the clock itself c Select OFF if Daylight Saving Time does not apply to you Move the highlight bar to D S T by pressing OK or then press fi to select the desi...

Page 12: ...the item you want to change blinks then press fi SELECT TIME ZONE 8 You can select the time zone automatically or manually Move the highlight bar to TIME ZONE by pressing OK or then press CH or fi to select AUTO or the desired time zone AUTO ATLANTIC HAWAII EASTERN ALASKA CENTRAL PACIFIC MOUNTAIN NOTE If an incorrect time is displayed by the Plug Play function you may be receiving the clock setting ...

Page 13: ...screen If the scan was unsuccessful SCAN COMPLETED NO SIGNAL appears on screen Check the connections and start again RETURN TO NORMAL SCREEN 5 Press MENU INFORMATION The VCR detects the band TV or CATV and selects the correct band automatically during Auto Channel Set The selected band will be displayed on the right side of BAND on the Tuner Set screen 1 2 3 4 5 6 7 8 9 0 2 4 1 3 T W DV S VHS POWE...

Page 14: ...ED CHANNEL 4 Input the channel number using the NUMBER keys or by pressing CH or fi then press OK or to set to SKIP Repeat for each channel you want to skip Input the channel number using the NUMBER keys then press OK or to set to ADD the channel RETURN TO NORMAL SCREEN 5 Press MENU 1 2 3 4 5 6 7 8 9 0 2 4 1 3 T W DV S VHS MENU O K NUMBER C H TUNER SET BAND CATV AUTO CHANNEL SET MANUAL CHANNEL SET ...

Page 15: ...er to the same channel as the cable box RF output see page 16 also NOTE When connecting your cable box refer to its instruction manual CONNECT CONTROLLER TO VCR 4 Connect to the CABLE BOX connector on your VCR Suggested Location Place the cable box on top of the VCR Attach the VCR s Controller to the top of the VCR with the Controller s transmitter pointed towards the cable box s remote sensor ATT...

Page 16: ...HANNEL 6 Your selection depends on how your cable box is connected to your VCR If your cable box is connected to your VCR using an RF connection press fi until the channel number represent ing the cable box s output CH2 CH9 appears on the screen If your cable box is connected to your VCR s REAR AUDIO VIDEO IN connectors press fi until ON L 1 REAR appears on the screen 1 2 3 4 5 6 7 8 9 0 2 4 1 3 T W...

Page 17: ...though the supplied Controller is compatible with many different cable box brands it is possible that it will not work with your cable box If your cable box doesn t respond to any code between 1 and 25 you can t use the Controller to change cable box channels In this case make sure to leave the cable box turned on and tuned to the proper channel before the scheduled start of timer recording Please...

Page 18: ...ontrol the power and channel functions of your DBS Receiver For these functions the need for a separate DBS Receiver Control Unit is eliminated The VCR s Controller can also control your DBS Receiver This allows the VCR to change your DBS receiver s channel number during timer recording Each method must be set up separately To set up the VCR s Remote Control unit refer to page 66 To set up the Con...

Page 19: ...ress OK or SELECT DBS RECEIVER OUTPUT CHANNEL 6 Your selection depends on how your DBS receiver is connected to your VCR If your DBS receiver is connected to your VCR using an RF connection press fi until the channel number representing the DBS receiver s output CH3 CH4 appears on the screen If your DBS receiver is connected to your VCR s REAR AUDIO VIDEO IN connectors press fi until ON L 1 REAR app...

Page 20: ...ODE JVC DISH Network 51 ECHOSTAR DISH Network 51 PRIMESTAR 50 SONY DSS 41 RCA DSS 40 NOTES It is possible that the Controller will not work with all types of DBS receiver If your DBS receiver doesn t respond to the code you can t use the Controller to change satellite channels In this case make sure to leave the DBS receiver turned on and tuned to the proper channel before the scheduled start of t...

Page 21: ... START PLAYBACK 4 Press PLAY The VHS or DV play indicator light VIDEO CALIBRATION appears on the screen when VIDEO CALIBRATION is set to ON VHS deck only pg 34 STOP PLAYBACK 5 Press STOP The VHS or DV play indicator goes off Then press EJECT on the VHS deck or DV deck to remove the cassette REW Rewind FF Fast Forward STOP Turn on the TV and select the AV mode EJECT EJECT S T O P D V D V P L A Y Us...

Page 22: ...rding after inserting the cassette when Video Calibration is set to ON pg 34 PAUSE RESUME RECORDING 6 Press PAUSE Press PLAY to resume recording During record pause you can change the recording channel by using the CH buttons or NUMBER keys Video Calibration will not take place if the tape speed is changed while in record pause mode STOP RECORDING 7 Press STOP The VHS record indicator goes off The...

Page 23: ... Press PLAY to resume recording During record pause you can change the recording channel by using the CH buttons or NUMBER keys STOP RECORDING 7 Press STOP The DV record indicator goes off Then press EJECT on the DV deck to remove the cassette PAUSE STOP REC PLAY CH ENTER NUMBER EJECT DV D V SP LP NOTES It is not possible to record a TV program on both the VHS deck and the DV deck simultaneously I...

Page 24: ...old for forward slow motion or press and hold for reverse slow motion Release to return to still picture VHS deck only To resume normal playback press PLAY ACTIVATE HIGH SPEED SEARCH 1 During playback or still turn the SHUTTLE ring to the right for forward high speed search or to the left for reverse high speed search OR During playback or still press FF for forward high speed search or REW for re...

Page 25: ...e Motion Playback VHS deck only On the Remote Control Shuttle Ring Modes VHS DV Forward search 3 steps 3 steps Normal playback Slow motion 2 steps 1 steps Reverse slow motion 2 steps 1 steps Reverse playback Reverse search 3 steps 3 steps You can also use the remote control s JOG dial SHUTTLE ring for the operations described on this page First press the JOG SHUTTLE button on the remote control so...

Page 26: ...ture you can override this and make the adjustment manually ENGAGE MANUAL TRACKING MODE 1 During playback press the CH and buttons on the VCR s front panel simultaneously to cancel the automatic tracking mode and enable manual tracking adjust ADJUST MANUAL TRACKING 2 Press CH or on the VCR s front panel or remote Press briefly for fine adjust or press and hold for coarse adjust Watch the screen an...

Page 27: ...for 5 seconds After that the counter information and RECORD PAUSE if in the Record Pause mode are left displayed on the screen 2 Press OSD again to clear the display The RECORD PAUSE indication is left displayed on the screen 1 Tuned in channel or AUX iliary mode When the channel is changed the new channel is displayed on the screen for 5 seconds Dubbing Direction DV VHS VHS DV indication 2 Clock ...

Page 28: ...splay to show the counter reading channel number clock time or tape remaining time Channel number is not displayed during playback Counter Reset VHS deck only NOTES The presence of a blank unrecorded portion in the middle of a tape can result in misoperation A blank portion of a tape is a section where nothing is recorded on the tape If you start making a recording in a blank portion of a tape the...

Page 29: ...e quality When VIDEO CALIBRATION is set to OFF pg 34 you can only select NORM instead of AUTO EDIT Select when you dub tapes SOFT Select when you want to soften the picture SHARP Select when you want to sharpen the picture NOTES When you select EDIT SHARP or SOFT the selected mode will not change until you select again When you select EDIT to dub tapes be sure to select AUTO or NORM when VIDEO CAL...

Page 30: ... 4 Press MENU NOTES When you finish viewing the tape be sure to set it back to OFF Regardless of the setting this function has no effect during recording and during special effects playback The Superimpose mode indications may jitter vertically when VIDEO STABILIZER is set to ON To watch recordings with close caption it is necessary to set the Video Stabilizer function to OFF 1 2 3 4 5 6 7 8 9 0 2...

Page 31: ...e Digital TBC NR is off when you want to use Video Stabilizer ACCESS MAIN MENU SCREEN 1 Press MENU ACCESS VHS MODE SET SCREEN 2 Move the highlight bar arrow to VHS MODE SET by pressing fi then press OK or SELECT DIGITAL TBC NR SET MODE 3 Move the highlight bar arrow to DIGITAL TBC NR by pressing fi then press OK or to set to ON RETURN TO NORMAL SCREEN 4 Press MENU Digital R3 VHS deck only Digital R3...

Page 32: ...l Mix Hi Fi ACCESS MAIN MENU SCREEN 1 Press MENU ACCESS VHS MODE SET SCREEN 2 Move the highlight bar arrow to VHS MODE SET by pressing fi then press OK or SELECT AUDIO MONITOR 3 Move the highlight bar arrow to AUDIO MONITOR by pressing fi then press OK or to select HI FI HI FI L HI FI R NORMAL or MIX RETURN TO NORMAL SCREEN 4 Press MENU On the Screen On the remote control MAIN MENU MODE SET VHS MODE...

Page 33: ...DE by pressing fi then press OK or to select 12BIT or 16BIT RETURN TO NORMAL SCREEN 4 Press MENU Sound Mode Selection DV deck only 12BIT Mode Setting Audio dubbed Mini DV Tape ACCESS MAIN MENU SCREEN 1 Press MENU ACCESS DV MODE SET SCREEN 2 Move the highlight bar arrow to DV MODE SET by pressing fi then press OK or SELECT 12BIT MODE 3 Move the highlight bar arrow to 12BIT MODE by pressing fi then pre...

Page 34: ... SET then press OK or SELECT VIDEO CALIBRATION MODE 4 Press fi to move the highlight bar arrow to VIDEO CALIBRATION then press OK or to set to ON or OFF NOTE When recording or when playing back tapes recorded on this VCR set the Video Calibration to ON RETURN TO NORMAL SCREEN 5 Press MENU POWER POWER Turn on the TV and select the AV mode MENU O K PLAYBACK AND RECORDING FEATURES cont MAIN MENU MODE ...

Page 35: ...deo Calibration function is operative To display the Video Calibration screen SUPERIM POSE must be set to ON or the Video Calibration screen will not appear pg 27 START RECORDING 1 Press and hold REC and press PLAY on the remote control or press REC on the VCR s front panel The VCR takes about 7 seconds to assess the quality of the tape in use then recording begins with the picture level optimized...

Page 36: ...t status are displayed for 5 seconds The counter display remains on the screen indicating the elapsed time DISPLAY TAPE REMAINING TIME 2 Press DISPLAY repeatedly until REMAIN appears on screen The approximate tape remaining time appears on the TV screen and also on the VCR display panel with a indicator The tape remaining time is calculated based on the tape speed SP or EP being used The indicated...

Page 37: ...T 2ND AUDIO RECORD SET MODE 3 Move the highlight bar arrow to 2ND AUDIO RECORD by pressing fi then press OK or to set to ON RETURN TO NORMAL SCREEN 4 Press MENU Retake VHS deck only You can cut out unnecessary parts of a TV program while you re recording it ENGAGE RECORD PAUSE MODE 1 Press PAUSE during recording LOCATE START POINT 2 Turn the JOG dial to the left or right or hold down REW or FF and ...

Page 38: ...DE to ON then insert a cassette marked S VHS the S VHS indicator will light on the display panel The S VHS recording mode will be automatically selected To record in S VHS ET on a VHS high grade cassette press S VHS ET and set to ON Super VHS ET on page 39 To record in VHS insert a cassette marked VHS press S VHS ET on the VCR You can check the current setting S VHS ET ON or S VHS ET OFF if SUPERI...

Page 39: ...rdings S VHS ET recordings can also be played back on an S VHS VCR or a VHS VCR equipped with SQPB S VHS QUASI PLAYBACK function However there may be cases where S VHS ET playback is not possible on a particular VCR Frequent still frame by frame and slow motion playback may damage the tape and cause picture degradation With some tapes better picture quality may not be obtained even with S VHS ET r...

Page 40: ...HS cassette with the record safety tab intact or a Mini DV cassette with the erase protection switch set to REC The VCR s power comes on automatically ACCESS VCR PLUS SCREEN 3 Press PROG on the remote control The clock must be set in order to access the VCR Plus screen If you haven t set the clock the Main Menu screen appears after an error message is displayed Refer to page 8 for the Plug Play pr...

Page 41: ...ram which has already passed ERROR is displayed for about 5 seconds and the VCR Plus screen reappears SET TAPE SPEED 7 Press SP EP SP LP for the DV deck RETURN TO NORMAL SCREEN 8 Press PROG or OK PROGRAM COMPLETED appears on the screen for about 5 seconds then normal screen appears If PROGRAM NOT COMPLETED PROGRAM OVERLAP appears on the TV screen see page 47 ENGAGE TIMER MODE 9 Press TIMER The VCR...

Page 42: ...s have a section usually a chart indicating the Guide Channel numbers assigned to each station For accurate VCR Plus programming the VCR Plus Guide Channel number for each station should match the channel number on which it is received in your area NOTES In many instances the VCR Plus Guide Channel numbers for cable and broadcast TV stations DO NOT match the channel number on which it is received ...

Page 43: ...R 6 Press CH fi or the appropriate NUMBER keys to input the number of the channel on which the Guide Channel s broad casts are received Then press OK or Repeat steps 5 and 6 for each instance RETURN TO NORMAL SCREEN 7 Press MENU Ex When inputting the Guide Channel number 6 for WNJU Ind Ex If WNJU Ind is received on channel 47 1 2 3 4 5 6 7 8 9 0 2 4 1 3 T W DV S VHS NUMBER MENU O K INITIAL SET CLOC...

Page 44: ...ART TIME 4 Press START to enter the time you want recording to start Press and hold START to move in 30 minute increments or press and release repeatedly to move 1 minute at a time SET PROGRAM STOP TIME 5 Press STOP to enter the time you want recording to stop Press and hold STOP to move in 30 minute increments or press and release repeatedly to move 1 minute at a time SET PROGRAM DATE 6 Press DAT...

Page 45: ... goes off automatically You can program the timer while a regular recording is in progress the on screen menu will not be recorded If the end of tape is reached during timer recording the cassette is automatically ejected When timer recording cable or satellite channels through an external tuner be sure to keep the cable box or satellite receiver s power ON ATTENTION FOR DBS RECEIVER USERS If you ...

Page 46: ...OGRAM 4 To cancel a program press CANCEL at the appropriate program screen To revise a program press the appropriate button START STOP DATE CH SP EP RETURN TO NORMAL SCREEN 5 Press PROG CHECK as many times as necessary If there are still programs remaining go to step 6 RE ENGAGE TIMER 6 Press TIMER To Cancel Or Revise A Program TIMER PROG CHECK CH CANCEL START STOP DATE S P E P POWER POWER TIMER R...

Page 47: ...icting programmes will be shown on the Program Check screen again Repeat the above steps again until the overlap is solved NOTE If the programme you have just made and DV are blinking there is a conflicting programme on the DV deck 1 Press fi to move the highlight bar to DV then press OK or DV Programme Check screen appears 2 Cancel or change programme setting as described in step 2 and 3 in the le...

Page 48: ...tes EP mode Total 140 minutes ACCESS MAIN MENU SCREEN 1 Press MENU ACCESS VHS MODE SET SCREEN 2 Move the highlight bar arrow to VHS MODE SET by pressing fi then press OK or SELECT AUTO SP EP TIMER SET MODE 3 Move the highlight bar arrow to AUTO SP EP TIMER by pressing fi then press OK or to set to ON RETURN TO NORMAL SCREEN 4 Press MENU NOTES If you have programmed the VCR to timer record 2 or more ...

Page 49: ...front panel After you set the ITR time the previous display reappears To check the remaining time press REC once during record ing and the remaining time will be displayed for about 5 seconds Be careful not to press REC again within these 5 seconds or you will round the recording time up to the next 30 minute increment You can play a tape on one deck while using the other deck for Instant Timer Re...

Page 50: ... deck goes into Record Pause mode and the playback deck goes into Pause mode When both decks have finished rewinding dubbing begins automatically After dubbing is completed the decks rewind both tapes automatically and eject them The VCR then shuts off NOTES If you set the dubbing direction incorrectly you could erase an important recording that you wanted to copy We recommend conducting a test wi...

Page 51: ...recording deck enters the Record Pause mode START DUBBING 5 Press START Dubbing from DV to VHS DV play indicator and VHS record indicator light Dubbing from VHS to DV VHS play indicator and DV record indicator light PAUSE DUBBING 6 Press START END DUBBING 7 Press STOP Then press S VHS or DV to select the playing deck and press STOP Normal Dubbing NOTES There may be a discrepancy of several seconds...

Page 52: ... screen select the programme number then press CANCEL for more than 2 seconds LOCATE EDIT IN POINT 5 Press PLAY to start playback and find the point from where you want the edited scene to begin then press PAUSE Then press IN OUT The edit in point appears on the screen LOCATE EDIT OUT POINT 6 Press PLAY to start playback Find the point where you want the edited scene to end then press PAUSE Then p...

Page 53: ...econds the time code total time may not match the total programme time exactly To quit Random Assemble Editing while it is still in progress press R A EDIT again to return to the R A EDIT screen Press R A EDIT once more to return to the normal screen To use Random Assemble Editing consecutively for two or more programmes press START for each programme When dubbing from another Mini DV cassette swa...

Page 54: ... connecting to a camcorder with a monaural output connect the audio output connector on the camcorder to AUDIO IN L of the VCR B If the camcorder has a DV OUT IN connector Connect the camcorder s DV OUT IN connector to the VCR s DV IN OUT connector LOAD A CASSETTE 2 Insert the cassette to be recorded on into the recorder SELECT RECORDING DECK 3 Press S VHS or DV Recorder Your VCR PAUSE connector M...

Page 55: ...K or SELECT REAR AUX INPUT SET MODE 9 a REAR S VIDEO IN Move the highlight bar arrow to REAR AUX INPUT by pressing fi then press OK or to set to S VIDEO b REAR VIDEO IN Move the highlight bar arrow to REAR AUX INPUT by pressing fi then press OK or to set to VIDEO SELECT EDIT FOR PICTURE CONTROL SET MODE VHS DECK ONLY 10 Follow the Picture Control section on page 29 then select EDIT NOTE When you sel...

Page 56: ...player set OUTPUT1 to VHS or DV depending on the deck being selected pg 57 Recorder Another VCR AUDIO IN Audio Video cable supplied VIDEO IN Player Your VCR VIDEO OUT AUDIO OUT Advantages Of S VHS Editing S VHS allows you make high resolution video recordings when dubbing from one VCR to another You can edit from VHS to S VHS from S VHS to VHS or from S VHS to S VHS From VHS to S VHS Record VHS pl...

Page 57: ...ubbing the tapes START PLAYER 6 Set to its play mode NOTE If the player is equipped with a superimpose OSD disable feature then set SUPERIMPOSE to OFF before pressing PLAY pg 27 START RECORDER 7 Set to its record mode 1 2 3 4 5 6 7 8 9 0 2 4 1 3 T W DV S VHS NUMBER 0 C H OUTPUT1 Setting Set OUTPUT1 to the appropriate mode depending on the selection of the playing deck VHS or DV for editing 1 Press...

Page 58: ...naural equipment use only the VCR s AUDIO IN L connector SELECT RECORDING DECK 2 Press S VHS or DV When using the DV deck as the recording deck press so that the audio signals from the AUDIO L R input connectors can be recorded The dubbing direction S VHS indicator lights SET INPUT MODE 3 Press the remote control s NUMBER key 0 and CH so that F 1 appears in place of a channel number LOCATE START P...

Page 59: ...sh to hear VHS deck only Audio dubbing stops automatically when the counter reaches 0 00 00 and the VCR enters the Play mode Check the counter reading before dubbing VHS deck only Audio dubbing is also possible using the rear AUDIO IN connectors Audio dubbing cannot be performed on a VHS S VHS cassette that has had its record safety tab removed or on a Mini DV cassette that has had its erase prote...

Page 60: ...deo and audio signals from the VIDEO S VIDEO and AUDIO L R input connectors can be recorded The dubbing direction S VHS indicator lights SET INPUT MODE 3 Press the NUMBER key 0 and CH so that F 1 appears in place of a channel number Be sure to select the correct FRONT AUX INPUT VIDEO or S VIDEO To select the correct AUX INPUT follow steps 5 7 from the Edit From A Camcorder section pg 55 LOCATE END...

Page 61: ...V deck Press STOP to stop the tape in the DV deck FOR AV INSERT EDITING VHS deck only If you want to replace the picture Hi Fi audio soundtrack and normal audio soundtrack all at the same time In step 7 above after you press INSERT press A DUB also and blink and lights up on the display panel NOTES Once the Insert Editing starts you can not use the other deck Insert Editing cannot be performed on ...

Page 62: ... ENGAGE RECORD PAUSE MODE 6 Press DV or S VHS for the recording deck then press and hold PAUSE and press REC so that the recording deck enters its Record Pause mode START PLAYBACK 7 Press DV or S VHS for the playing deck then press PLAY START RECORDING 8 Press DV or S VHS for the recording deck then press REC at the point from where you want to start record ing ENTER TITLE 9 Enter a title at the p...

Page 63: ...deck Press beside the DUB button The dubbing direction S VHS indicator lights START PLAYBACK 3 Press PLAY The image being displayed on the TV screen is output to the digital printer Any on screen displays are not output DV IN OUT To DV IN connector Your recorder Digital printer 1 2 3 4 5 6 7 8 9 0 2 4 1 3 T W DV S VHS D V NUMBER 0 PLAY DV Cable VC VDV204U not provided NOTE When connecting this rec...

Page 64: ...two codes If the TV does not function with one code try entering the other OPERATE TV 4 First press POWER on the remote to see if the TV s power goes off as it should If it does try other operations The POWER TV VCR TV CH TV VOL AUDIO MONITOR TV Muting and NUMBER keys on the remote can all be used to operate the TV For some brands of TV you must press ENTER after having pressed the NUMBER keys To ...

Page 65: ...ND CODE ARCHER 01 05 17 CABLETENNA 01 17 CABLEVIEW 15 16 17 21 25 CITIZEN 15 16 17 21 25 CURTIS 02 08 DIAMOND 01 17 EASTERN 19 GC BRAND 15 16 17 21 25 GEMINI 15 GENERAL INSTRUMENTS 01 04 06 11 12 15 HAMLIN 10 18 19 23 JASCO 15 JERROLD 01 04 06 11 12 15 NOVAVISION 02 08 OAK 07 20 PANASONIC 13 14 PULSER 15 16 17 21 25 RCA 13 14 REGAL 10 18 19 23 REGENCY 19 REMBRANDT 01 16 17 SAMSUNG 05 16 24 SCIENTI...

Page 66: ... DBS receiver you must press ENTER after having pressed the NUMBER keys To return the remote to VCR control set the VCR TV CABLE DBS switch to VCR DBS BRAND NAME BRAND CODE JVC DISH Network 51 ECHOSTAR DISH Network 51 PRIMESTAR 50 SONY DSS 41 RCA DSS 40 NOTES You must set the DBS receiver brand for your remote control and the DBS receiver brand for your Controller pg 19 separately Depending on the...

Page 67: ...d of 2 in step 2 You can control two VCRs with the same remote control by switching the remote s code between A and B Step 2 pressing 1 for A code commands and 2 for B code commands Control Two JVC VCRs The remote control is capable of controlling two JVC VCRs independently one set to respond to your remote control s A code control signals and another set to respond to B code control signals The r...

Page 68: ...SIBLE CAUSE The TV receiver is set to the wrong mode This is normal Automatic tracking is engaged The video heads may be dirty The soundtrack option was set incorrectly CORRECTIVE ACTION Set the TV receiver to its AV mode Disengage Auto Tracking and adjust the tracking manually 墌 pg 26 Use a dry cleaning cassette TCL 2UX for the VHS deck or consult your JVC dealer Press A MONITOR to select HI FI 墌...

Page 69: ...ts off and and won t stop blinking POSSIBLE CAUSE The clock and or the timer have been set incorrectly The timer is not engaged The VCR has not been set up properly Timer Recording may not work when the VCR s input mode is set to F 1 for recording on the DV deck because the recorder is waiting for the signals through DV IN OUT i Link connector Timer recording is in progress The timer is engaged bu...

Page 70: ...switched during timer recording 8 Satellite channels are not automati cally switched during timer recording 9 Timer recording begins as sched uled but the channel is always incorrect 10 We moved and now the VCR Plus system doesn t work properly 11 PROGRAM FULL is displayed on the screen POSSIBLE CAUSE The Controller is not properly connected to the VCR The output channel selected in the Cable Box ...

Page 71: ...e VCR can t find the program I want to see Why not A There may be index codes too close together Q During playback on screen operational indicators sometimes jitter Why does this happen A If the condition of the tape being played back is not good jittering of the video including on screen indicators may occur RECORDING Q When I pause and then resume a recording the end of the recording before the ...

Page 72: ...墌 pg 54 i Link refers to the IEEE1394 1995 industry specifi cation and extensions thereof The logo is used for products compliant with the i Link standard Dubbing Direction DV S VHS Indicators 墌 pg 50 Dubbing DUB Button 墌 pg 50 Dubbing Direction Buttons 墌 pg 50 INSERT Button 墌 pg 60 CH Buttons 墌 pg 22 23 Audio Dubbing A DUB Button 墌 pg 58 DV Play Indicator 墌 pg 21 DV Record Indicator 墌 pg 23 q Dis...

Page 73: ...IN 5 2 1 4 6 7 3 8 STILL SLOW RECORD RECORD PAUSE PLAY FF REW VARIABLE SEARCH AUDIO DUBBING AUDIO DUBBING PAUSE INSERT INSERT PAUSE AV INSERT AV INSERT PAUSE DISPLAY PANEL SP 5 6 7 1 2 3 4 1 Symbolic Mode Indicators 2 Tape Speed Indicators 墌 pg 22 23 3 Timer Mode Indicator 墌 pg 41 45 4 Tape Remaining Time Indicator VHS deck only 墌 pg 36 5 S VHS Indicator VHS deck only 墌 pg 38 39 6 Cassette Loaded ...

Page 74: ...hen try again INDEX cont 1 VCR TV CABLE DBS Switch 墌 pg 64 65 66 2 TV VCR Button 墌 pg 64 3 A B Code Button 墌 pg 67 4 NUMBER Buttons 墌 pg 22 23 40 64 65 66 5 DBS Button 墌 pg 45 6 CANCEL Button 墌 pg 46 Counter C RESET Button 墌 pg 28 7 START Button 墌 pg 44 8 STOP Button 墌 pg 44 9 PROG Button 墌 pg 40 44 0 Recording Speed SP LP SP EP Button 墌 pg 22 23 Rewind REW Button 墌 pg 21 Record REC Button 墌 pg 22...

Page 75: ... 14 Manual Clock Setting 12 Manual Tracking 26 MBR Multi Brand Remote Code Setting 64 N Next Function Memory 28 Normal Dubbing 51 O On Screen Display 27 P PBS Channel 8 Playback 21 Plug Play 8 R Random Assemble Editing 52 Record Safety Tab 37 Recording 22 23 Recording Resume Function 49 Repeat Playback 28 Retake 37 Reverse Motion Playback 24 Reverse Slow Motion Playback 24 S SAP Second Audio Progr...

Page 76: ...UHF Channels 14 69 CATV 113 Channels TIMER Clock reference Quartz Program capacity 1 year programmable timer 6 programs each on the VHS and DV deck Memory backup time Approx 60 min ACCESSORIES Provided accessories RF cable F type Infrared remote control unit AA battery x 2 Audio Video Cable S Video cable 4 pin Controller Specifications shown are for SP mode unless otherwise specified E O E Design ...

Page 77: ...purchase accessories for your JVC product you may contact your local JVC Dealer From the 48 Continental United States call toll free 1 800 882 2345 or on the web at www JVC com Dear customer In order to receive the most satisfaction from your purchase please read the instruction booklet before operating the unit In the event that repair is necessary or for the address nearest your location within ...

Page 78: ...affixed to any attachment not provided with the products or if the model or serial number has been altered tampered with defaced or removed 2 Initial installation and installation and removal for repair 3 Operational adjustments covered in the Owner s Manual normal maintenance video and audio head cleaning 4 Damage that occurs in shipment due to act of God and cosmetic damage 5 Signal reception pr...

Page 79: ...EN 79 MEMO ...

Page 80: ...HR DVS2U COPYRIGHT 2001 VICTOR COMPANY OF JAPAN LTD U Printed in Japan 0301 IYV ID VP VICTOR COMPANY OF JAPAN LIMITED ...

Reviews: