background image

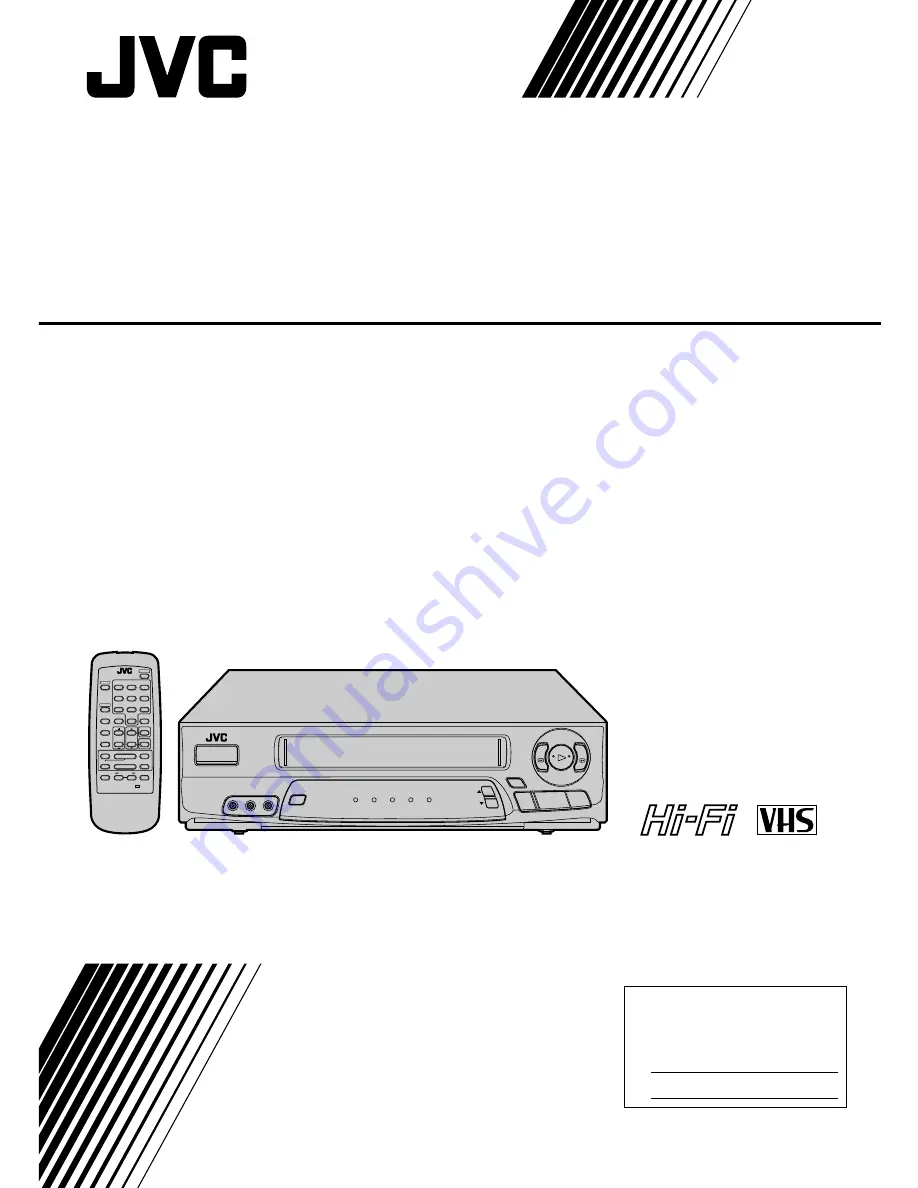
The VCR illustrations appearing in this instruction manual are of the HR-A53U.

HR-A53U

 (Hi-Fi)

HR-A33U

 (Monaural)

VIDEO CASSETTE RECORDER

INSTRUCTIONS

LPT0002-008B

For Customer Use:

Enter below the Serial No. which is
located on the rear of cabinet. Retain
this information for future reference.
     
Model No.   HR-A53U/HR-A33U
     
Serial No.

VIDEO 

(MONO)

L–AUDIO–R

POWER

MENU

OK

REC

q

PLAY

REW

2

FF

3

PAUSE

6

STOP/EJECT

5

/

8

POWER

TIMER

REC

MTS

TV/VCR

CH

TV

TV  operation – Press  and  hold   TV   button,  
then  press  POWER,  CH 

5

/

,  TV/ VCR

OSD

TV

VOL

3

PLAY

REC

7

STOP

8

PAUSE

1

••REW

FF••

¡

POWER

TV/VCR

TIMER

ADD

MENU

OK

CH

SP/EP

DISPLAY

SKIP SEARCH

SEARCH

CANCEL

ENTER

C.RESET/CH SKIP

1

2

3

4

5

6

7

8

 DAILY

0

 AUX

9

 WEEKLY

Summary of Contents for HR-A33U

Page 1: ...net Retain this information for future reference Model No HR A53U HR A33U Serial No VIDEO MONO L AUDIO R POWER MENU OK REC q PLAY REW 2 FF 3 PAUSE 6 STOP EJECT 5 8 POWER TIMER REC MTS TV VCR CH TV TV operation Press and hold TV button then press POWER CH 5 TV VCR OSD TV VOL 3PLAY REC 7STOP 8PAUSE 1 REW FF POWER TV VCR TIMER ADD MENU OK CH SP EP DISPLAY SKIP SEARCH SEARCH CANCEL ENTER C RESET CH SK...

Page 2: ...prone to extreme temperatures or humidity in direct sunlight in a dusty environment in an environment where strong magnetic fields are generated on a surface that is unstable or subject to vibration 2 DO NOT block the VCR s ventilation openings 3 DO NOT place heavy objects on the VCR or remote control 4 DO NOT place anything which might spill on top of the VCR or remote control 5 AVOID violent sho...

Page 3: ...aying particular attention to cords at plugs convenience receptacles and the point where they exit from the product 5 Ventilation Slots and openings in the cabinet are provided for ventilation To ensure reliable operation of the product and to protect it from overheating these openings must not be blocked or covered Do not block the openings by placing the product on a bed sofa rug or other simila...

Page 4: ...ained in the manual This section also illustrates the controls and connections on the front and rear panel the front display panel and the remote control The Z mark signals a reference to another page for instructions or related information Operation buttons necessary for the various procedures are clearly indicated through the use of illustrations at the beginning of each major section BEFORE YOU...

Page 5: ...INGS 7 Language 7 Clock 8 Tuner 9 Set Receivable Channels 9 Add Or Delete A Channel 11 SIMPLE PLAYBACK AND RECORDING 12 Simple Playback 12 Simple Recording 13 PLAYBACK AND RECORDING FEATURES 14 Playback Features 14 Still Picture Frame By Frame Playback 14 Slow Motion Reverse Slow Motion 14 Variable Speed Search Reverse Motion Playback 14 High Speed Search 14 Manual Tracking 15 Index Search 15 Vide...

Page 6: ...ower plug to an AC outlet FINAL PREPARATION FOR USE 5 Power on the VCR and select the VCR channel 3 or 4 by setting the switch on the rear of the VCR as shown in the illustration You can now perform simple playback Z pg 12 or simple recording Z pg 13 NOTES The VCR channel is the channel on the TV which will display the audio and video signals from the VCR The VCR s CH3 CH4 switch on the back of th...

Page 7: ...et to appear in English If you want to see them in Spanish or French place the arrow next to LANGUAGE SELECT by pressing CH5 then press OK SELECT LANGUAGE 5 At the Language Select screen place the arrow next to the desired language by pressing CH5 then press MENU as many times as necessary to return to the normal screen Turn on the TV and select the VCR channel 3 or 4 or AV mode MAIN MENU PROGRAM ...

Page 8: ...clock NOTES CH can be used to perform all operations In this case press OK after each setting At the Clock Set screen the setting that can be set blinks MAKE CORRECTIONS 6 To change any of the settings press OK or SEARCH T Y until the item you want to change blinks then set as in step 5 Turn on the TV and select the VCR channel 3 or 4 or AV mode q 2 3 6 5 8 3 7 8 1 1 2 3 4 5 6 7 8 0 9 MENU OK CH M...

Page 9: ...xternal antenna select TV If you receive your TV channels from a cable TV system select CATV Place the arrow next to your choice by pressing CH5 then press MENU to return to the Tuner Set screen Turn on the TV and select the VCR channel 3 or 4 or AV mode q 2 3 6 5 8 3 7 8 1 1 2 3 4 5 6 7 8 0 9 POWER MENU OK CH MAIN MENU PROGRAM SET FUNCTION SET TUNER SET INITIAL SET AUTO PICTURE VIDEO STABILIZER P...

Page 10: ...setting and connections and start again RETURN TO NORMAL SCREEN 7 Press MENU as many times as necessary TUNER SET BAND AFC AUTO CHANNEL SET MANUAL CHANNEL SET PRESS 5 THEN OK PRESS MENU TO END The VCR detects the band TV or CATV and selects the correct band automatically during Auto Channel Set If necessary you can check the setting at the Band screen after Auto Channel Set has set the channels At...

Page 11: ...r tuning on certain CATV systems ACCESS MANUAL CHANNEL SET SCREEN 4 Place the arrow next to MANUAL CHANNEL SET by pressing CH5 then press OK STORE OR SKIP DESIRED CHANNEL 5 Input the channel number using the NUMBER keys or by pressing CH5 then press ADD to add or CH SKIP to delete Repeat for each channel you want to store or skip RETURN TO NORMAL SCREEN 6 Press MENU as many times as necessary 3 7 ...

Page 12: ...pears on screen Z pg 21 STOP PLAYBACK 4 Press STOP or STOP EJECT Then press STOP EJECT to remove the cassette Full Size VHS T 30 ST 30 T 60 ST 60 T 90 T 120 ST 120 T 160 ST 160 ST 210 Compact VHS TC 20 ST C20 TC 30 ST C30 TC 40 ST C40 Compact VHS camcorder recordings can be played on this video recorder Simply place the recorded cassette into a VHS Cassette Adapter and it can be used just like any...

Page 13: ...Y on the remote control or press REC on the VCR s front panel The REC indicator lights on the front display panel PAUSE RESUME RECORDING 5 Press PAUSE Press PLAY to resume recording During record pause you can change the recording channel by using the CH5 buttons or NUMBER keys STOP RECORDING 6 Press STOP or STOP EJECT Then press STOP EJECT to remove the cassette Turn on the TV and select the VCR ...

Page 14: ...d reverse search modes To resume normal playback press PLAY NOTE If noise bars appear during slow motion press CH 5 or a few times to remove the noise bars from screen Variable Speed Search Reverse Motion Playback ACTIVATE VARIABLE SPEED SEARCH 1 During playback press SEARCH T or Y To increase the speed in the forward direction press Y repeatedly to select the various forward search modes To decre...

Page 15: ... be necessary to adjust tracking in slow playback and then engage Pause Manual tracking is possible during hands free slow motion During hands free slow motion playback simply press CH5 or on the VCR s front panel or remote to adjust tracking 3 7 8 1 1 2 3 4 5 6 7 8 0 9 q 2 3 6 5 8 CH Index Search Index codes are placed on the tape at the start of each recording You can find and automatically play...

Page 16: ...o VIDEO STABILIZER by pressing CH5 then press OK AUTO PICTURE will appear with HR A53U only ACTIVATE VIDEO STABILIZER 3 Place the arrow next to ON by pressing CH5 RETURN TO NORMAL SCREEN 4 Press MENU NOTES Regardless of the setting this function has no effect with SP recordings during recording and during special effects playback When you finish viewing the tape be sure to set it back to OFF MAIN ...

Page 17: ...yed on the screen for 5 seconds Clock time Tape position indicator Operation mode When the operation mode is changed the new mode is displayed RECORD 5 sec PLAY 5 sec FF REW 5 sec when engaged from Stop mode RECORD PAUSE for as long as Pause is engaged and ITR 5 sec B E Cassette Loaded mark When a cassette is loaded the mark is displayed for 5 seconds It blinks when the VCR s EJECT button is pushe...

Page 18: ... with HR A53U only SELECT MODE 4 You have three choices a Hi Fi b Normal c Mix Place the arrow next to your choice by pressing CH5 RETURN TO NORMAL SCREEN 5 Press MENU as many times as necessary FUNCTION AUTO TIMER SUPERIMPOSE 2ND AUDIO AUDIO MONITOR PRESS 5 THEN OK PRESS MENU TO END AUDIO MONITOR HI FI NORM MIX PRESS 5 TO SELECT PRESS MENU TO END NOTES If the tape being played back has no Hi Fi s...

Page 19: ...playback resumes automatically NOTE To return to normal playback during a Skip Search press PLAY Next Function Memory The Next Function Memory tells the VCR what to do after rewinding Before continuing ensure that the VCR is in stop mode a For Automatic Start Of Playback After Tape Rewind press REW then press PLAY within 2 seconds b For Automatic Power Off After Tape Rewind press REW then press PO...

Page 20: ...OWER ACCESS MAIN MENU SCREEN 2 Press MENU ACCESS AUTO PICTURE SCREEN 3 Press CH5 to place the arrow next to AUTO PICTURE then press OK SELECT MODE 4 Place the arrow next to ON by pressing CH5 NOTE When using rental tapes or tapes recorded on other VCRs select ON or OFF as desired to give the best picture RETURN TO NORMAL SCREEN 5 Press MENU MAIN MENU PROGRAM SET FUNCTION SET TUNER SET INITIAL SET ...

Page 21: ...ly appears at the beginning of automatic tracking Even though the screen doesn t appear after that the Auto Picture function is operative SUPERIMPOSE must be set to ON or the Auto Picture screen will not appear Z pg 17 START PLAYBACK 1 Press PLAY The VCR adjusts the playback picture quality based on the quality of the tape in use AUTO PICTURE q 2 3 6 5 8 3 7 8 1 1 2 3 4 5 6 7 8 0 9 PLAY PLAY ...

Page 22: ...channel you want to watch Recording Features Display Elapsed Recording Time RESET COUNTER TO ZERO 1 Before recording starts press C RESET The counter resets to zero and displays the exact elapsed time as the tape runs DISPLAY ELAPSED TIME ON SCREEN 2 During recording press OSD at any time to see the elapsed time All indications corresponding to the current status of the VCR are displayed for 5 sec...

Page 23: ...ed on both the Normal and Hi Fi tracks The main audio program is not recorded If a non SAP program is received the main audio is recorded on both the Hi Fi and Normal audio tracks To Record SAP Programs HR A53U Only ACCESS MAIN MENU SCREEN 1 Press MENU ACCESS FUNCTION SET SCREEN 2 Place the arrow next to FUNCTION SET by pressing CH5 then press OK ACCESS 2ND AUDIO SCREEN 3 Place the arrow next to 2...

Page 24: ...fter AM PM channel number and tape speed settings Any information comprised of 1 digit except the channel number should have a 0 entered before it It is possible to set all information using the CH5 button In this case press OK after each setting Do not use the CH button to set the date At the Program Set screen the setting that can be set blinks NOTE If you are using a cable box enter the cable b...

Page 25: ... start time that has already passed ERROR appears on the screen and blinks Programs that start after midnight must have the next day s date After timer recording is completed the VCR s power goes off automatically You can program the timer while a regular recording is in progress the on screen menu will not be recorded If the end of tape is reached during timer recording the cassette is automatica...

Page 26: ...OGRAM INFORMATION 4 Press CH5 to check the programs in succession Check And Cancel Programs CANCEL A PROGRAM 5 Press CANCEL Repeat steps 4 and 5 as many times as necessary RETURN TO NORMAL SCREEN 6 Press MENU If there are still programs remaining go to step 7 RE ENGAGE TIMER 7 Press TIMER again To Cancel A Program q 2 3 6 5 8 3 7 8 1 1 2 3 4 5 6 7 8 0 9 POWER MENU OK CH TIMER C H POWER MENU OK C A...

Page 27: ... press MENU SELECT MODE 2 Place the arrow next to your choice ON or OFF by pressing CH5 RETURN TO NORMAL SCREEN 3 Press MENU as many times as necessary NOTE For safety when AUTO TIMER is set to OFF all other VCR functions are disabled while the Timer mode is engaged To disengage the timer press TIMER Auto Timer When the Auto Timer is set to ON the timer is automatically engaged when the VCR s powe...

Page 28: ...t display panel SET RECORDING DURATION 3 If you want to record for more than 30 minutes press REC to extend the time Each press extends recording time by 30 minutes NOTES You can only perform ITR using the REC button on the VCR s front panel To check the remaining time press REC once during record ing and the remaining time will be displayed on the screen for about 5 seconds Be careful not to pres...

Page 29: ...nector on the monaural VCR For HR A33U owners When connecting to a Hi Fi VCR connect your VCR s AUDIO OUT connector to the AUDIO IN L connector on the Hi Fi VCR LOAD CASSETTES 2 Insert the playback cassette into your VCR and the cassette to be recorded on into the other VCR SET RECORDER S INPUT MODE 3 Select the other VCR s auxiliary AV input mode START PLAYER 4 Press PLAY on your VCR NOTE If you ...

Page 30: ...CR connect its AUDIO OUT L connector to the AUDIO IN connector on your VCR LOAD A CASSETTE 2 Insert the cassette to be recorded on into your VCR and the playback cassette into the camcorder or the playback VCR SET RECORDER S INPUT MODE 3 Press NUMBER key 0 to set your VCR to AUX START PLAYER 4 Set the camcorder or the playback VCR to its play mode NOTE If the camcorder or another VCR is equipped w...

Page 31: ... re using the RF OUT connec tion Z pg 6 the channel selector on the TV is set incorrectly If you re using the AV connection Z pg 6 the TV receiver is set to the wrong mode This is normal Automatic tracking is engaged The video heads may be dirty The AUDIO MONITOR option at the Function Set screen was set incorrectly CORRECTIVE ACTION Set the channel selector to channel 3 or 4 Set the TV receiver t...

Page 32: ... it finishes Load a cassette with the record safety tab intact or with the hole covered with adhesive tape Press TIMER so that the Timer indicator on the front panel goes out then eject the cassette and cover its hole with adhesive tape or replace it with a cassette on which the safety tab is intact Check the programmed data and re program as necessary then press TIMER again The program may not ha...

Page 33: ...removing the safety tab have A It disables marking of index codes Q Sometimes during Index Search the VCR can t find the program I want to see Why not A There may be index codes too close together Q During playback on screen operational indicators sometimes jitter Why does this happen A If the condition of the tape being played back is not good jittering of the video including on screen indicators...

Page 34: ... Function Setting 17 I Index Search 15 Insert Cassette 12 ITR Instant Timer Recording 28 L Language Selection 7 M Main Menu 7 Manual Channel Setting 11 Manual Tracking 15 N Next Function Memory 19 O On Screen Display 17 On Screen Timer Programming 24 On Screen Timer Recording 24 P Playback 12 R Record Safety Tab 13 Recording 13 Repeat Playback 19 Reverse Motion Playback 14 Reverse Slow Motion Play...

Page 35: ...Button Z pg 14 POWER MENU POWER TIMER REC MTS OK REC q PLAY REW 2 FF 3 PAUSE 6 STOP EJECT 5 8 TV VCR VIDEO MONO L AUDIO R CH 1 0 9 8 7 2 3 4 5 6 REAR VIEW ANT IN RF OUT CH3 CH4 OUT R L AUDIO VIDEO 1 2 4 5 3 1 Power Cord Z pg 6 2 VIDEO AUDIO Output Connectors Z pg 29 The HR A33U has only one AUDIO output connector 3 ANT IN Connector Z pg 6 4 Channel 3 4 Switch Z pg 6 5 RF OUT Connector Z pg 6 1 Pow...

Page 36: ... FF POWER TV VCR TIMER ADD MENU OK CH SP EP DISPLAY SKIP SEARCH SEARCH CANCEL ENTER C RESET CH SKIP 1 2 3 4 5 6 7 8 DAILY 0 AUX 9 WEEKLY w e 1 2 4 5 3 8 6 7 0 9 r t q Installing Batteries 1 Open the battery compartment cover 2 Insert 2 AA size batteries provided in the direction indicated under the battery cover 3 Replace the cover How To Use The remote control can operate most of your VCR s funct...

Page 37: ...m Signal to noise ratio 45 dB Horizontal resolution 240 lines Frequency range Normal audio 70 Hz to 10 000 Hz Hi Fi audio HR A53U Only 20 Hz to 20 000 Hz Input Output RCA connectors IN x 1 OUT x 1 TUNER Tuning system Frequency synthesized tuner Channel coverage VHF Channels 2 13 UHF Channels 14 69 CATV 113 Channels RF output Channel 3 or 4 switchable preset to Channel 3 when shipped 75 ohms unbala...

Page 38: ... HEADQUARTERS JVC SERVICE ENGINEERING COMPANY OF AMERICA DIVISION OF US JVC CORP 107 Little Falls Road Fairfield NJ 07004 2105 Pack your JVC unit in the original carton or one of equivalent size and strength Enclose with the unit a letter stating the problem or symptom that exists and also a copy of the receipt or bill of sale you received when you purchased your JVC unit Print your home return ad...

Page 39: ...with the products or if the model or serial number has been altered tampered with defaced or removed 2 Initial installation and installation and removal for repair 3 Operational adjustments covered in the Owner s Manual normal maintenance video and audio head cleaning 4 Damage that occurs in shipment due to act of God and cosmetic damage 5 Signal reception problems and failures due to line power s...

Page 40: ... 1997 VICTOR COMPANY OF JAPAN LTD U U C Printed in Malaysia 0197HOV UN PJ JVC COMPANY OF AMERICA DIVISION OF US JVC CORP 41 Slater Drive Elmwood Park N J 07407 JVC CANADA INC 21 Finchdene Square Scarborough Ontario M1X 1A7 ...

Reviews: