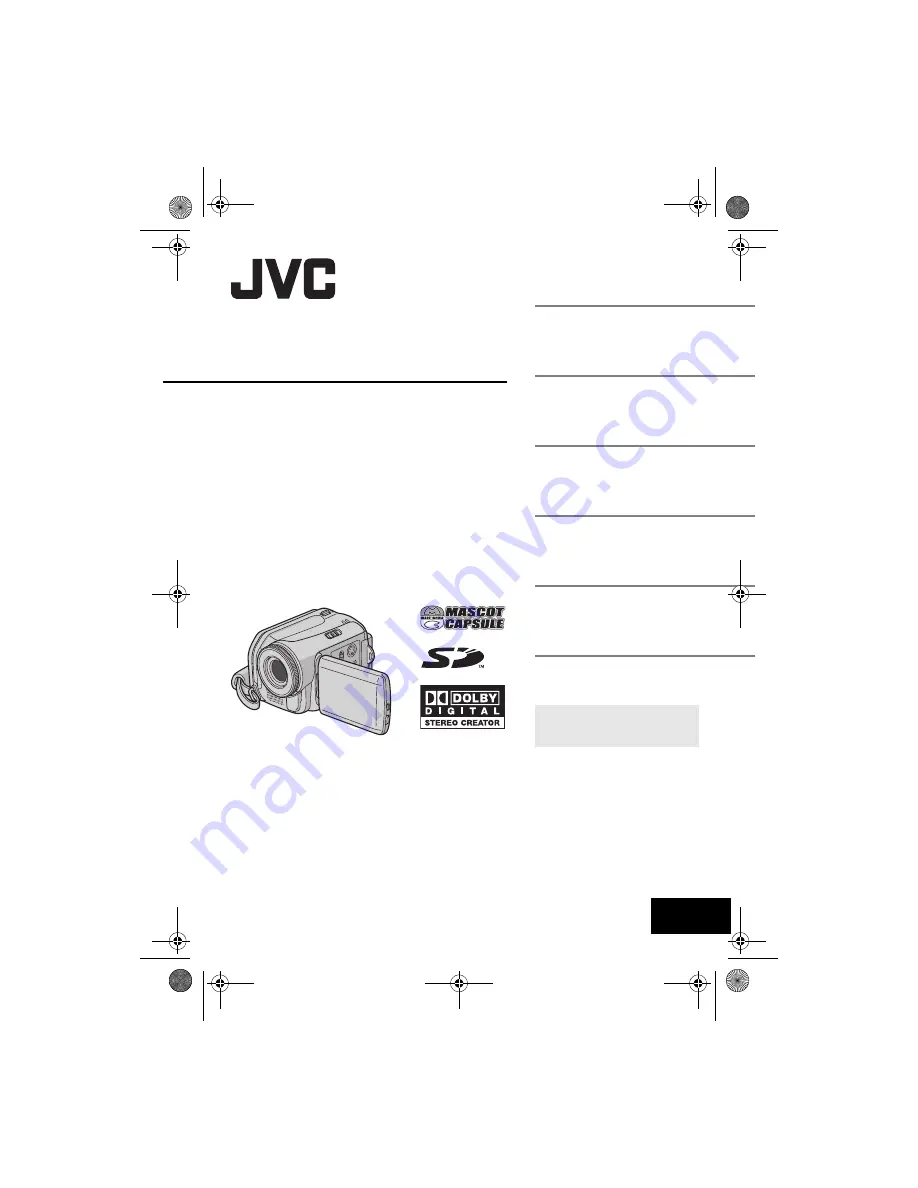
background image

MasterPage: Cover

GZ-MG50E/EK
GZ-MG40E/EK
GZ-MG30E/EK
GZ-MG20E/EK

LYT1472-001A

EN

ENGLISH

HARD DISK CAMCORDER

GETTING STARTED

7

VIDEO RECORDING & 
PLAYBACK

22

MENU SETTINGS

48

52

To deactivate the demonstration, 
set “DEMO MODE” to “OFF”. 
(

pg. 48) 

REFERENCES

INSTRUCTIONS

STILL IMAGE RECORDING 
& PLAYBACK

28

ADVANCED OPERATIONS

31

M5E3PAL.book  Page 1  Tuesday, June 14, 2005  1:40 PM

Summary of Contents for GZ-MG20E

Page 1: ...NGLISH HARD DISK CAMCORDER GETTING STARTED 7 VIDEO RECORDING PLAYBACK 22 MENU SETTINGS 48 52 To deactivate the demonstration set DEMO MODE to OFF 墌 pg 48 REFERENCES INSTRUCTIONS STILL IMAGE RECORDING PLAYBACK 28 ADVANCED OPERATIONS 31 M5E3PAL book Page 1 Tuesday June 14 2005 1 40 PM ...

Page 2: ...ing or fast forward operations Playlist playback effects and other functions are also available for enjoying many different types of playback Editing Files on your PC USB 2 0 enables the smooth transfer of video and still images to a computer With the bundled image editing software you can easily edit video and create your own DVDs Refer to the software installation and USB connection guide Direct...

Page 3: ... Bar 30 Date Index Screen 30 Image Rotation 30 Playback Zoom 30 ADVANCED OPERATIONS 31 RECORDING FEATURES 31 Backlight Compensation 31 Spot Exposure Control 31 LED Light 31 Manual Settings in MSET Menu 32 How to Select a Menu Item 32 Manual Exposure 32 Manual Focus 33 White Balance 34 Shutter Speed 35 Program AE 36 Effect 36 PLAYBACK FEATURES 37 Wipe or Fader Effects 37 Playback Effects 37 MANAGIN...

Page 4: ...to terminal coded L Live or coloured Red If in doubt consult a competent electrician WARNING TO PREVENT FIRE OR SHOCK HAZARD DO NOT EXPOSE THIS UNIT TO RAIN OR MOISTURE Blue to N Neutral or Black Brown to L Live or Red CAUTIONS To prevent shock do not open the cabinet No user serviceable parts inside Refer servicing to qualified personnel When you are not using the AC adapter for a long period of ...

Page 5: ...Union When the equipment is installed in a cabinet or on a shelf make sure that it has sufficient space on all sides to allow for ventilation 10 cm or more on both sides on top and at the rear Do not block the ventilation holes If the ventilation holes are blocked by a newspaper or cloth etc the heat may not be able to get out No naked flame sources such as lighted candles should be placed on the ...

Page 6: ...ure complete safety always fit the manufacturer s approved stand or legs with the fixings provided according to the instructions DON T allow electrical equipment to be exposed to rain or moisture ABOVE ALL NEVER let anyone especially children push anything into holes slots or any other opening in the case this could result in a fatal electrical shock NEVER guess or take chances with electrical equ...

Page 7: ...er for Cables See page 9 for attachment Large x 1 Audio Video Cable Medium x 1 USB Cable Small x 2 AC Adapter s Cord A lithium battery is pre installed in the remote control unit at time of shipment with insulation sheet To use the remote control unit remove the insulation sheet NOTES In order to maintain optimum performance of the camera provided cables may be equipped with one or more core filte...

Page 8: ...of the strap loosen and then tighten the strap in the buckle 4 Slide the strap guide fully towards the eyelet 5 Close the velcro strip Attaching the Lens Cap To protect the lens attach the provided lens cap to the camera as shown in the illustration NOTE To confirm the lens cap is on correctly make sure the cap is flush to the camera 1 4 5 2 3 Strap Guide Buckle Eyelet Place here during recording ...

Page 9: ...e cable plug and the core filter Wind the cable once around the outside of the core filter as shown in the illustration Wind the cable so that it is not slack 3 Close the core filter until it clicks shut NOTES Take care not to damage the cable When connecting a cable attach the end with the core filter to the camera LCD Monitor Pull on the end of the LCD monitor and open the LCD monitor fully It c...

Page 10: ... EN MasterPage Heading0_Left GETTING STARTED Index ATTENTION Be careful not to cover b c d and e during shooting Be careful not to cover Y during playback M5E3PAL book Page 10 Tuesday June 14 2005 1 40 PM ...

Page 11: ...墌 pg 22 28 p Battery Release Button BATT 墌 pg 14 Connectors The connectors are located beneath the covers Q S Video Output Connector S 墌 pg 26 R Audio Video Output Connector AV S USB Universal Serial Bus Connector Refer to the software installation and USB connection guide T DC Input Connector DC 墌 pg 14 Indicators U Power Charge Lamp POWER CHARGE 墌 pg 14 17 V Access Lamp ACCESS Lights up or blink...

Page 12: ...light Compensation Indicator 墌 pg 31 Spot Exposure Control Indicator 墌 pg 31 During Video Recording only a Mode Indicator 墌 pg 17 b Wide Mode Indicator 墌 pg 50 c Wind Cut Indicator 墌 pg 50 d Picture Quality U ultra fine F fine N normal E economy 墌 pg 50 e Remaining Time 墌 pg 22 62 f Counter 墌 pg 49 g 7REC Appears during recording 墌 pg 22 79 Appears during record standby mode 墌 pg 22 h Digital Imag...

Page 13: ...Forward Slow Motion Y9 Reverse Slow Motion The number on the left shows speed e Counter 墌 pg 49 f Volume Level Indicator g Battery Indicator 墌 pg 55 h Date 墌 pg 49 i Selected Medium Indicator 墌 pg 21 49 j Effect Mode Indicator 墌 pg 36 k Wipe Fader Effect Indicator 墌 pg 37 50 During Still Image Playback a Mode Indicator 墌 pg 17 b Folder File Number c Slide Show Playback Indicator 墌 pg 29 d Battery ...

Page 14: ...wer cord to the AC adapter AP V14E only 6 Plug the power cord into an AC outlet The power charge lamp on the camera blinks to indicate charging has started 7 When the power charge lamp goes out charging is finished Unplug the power cord from the AC outlet Disconnect the AC adapter from the camera To detach the battery pack While sliding BATT remove the battery pack Provided Power Power Charge Lamp...

Page 15: ...ocesses electricity internally it becomes warm during use Be sure to use it only in well ventilated areas Using the optional AA VF7 battery charger you can charge the BN VF707U VF714U VF733U battery pack without the camera After 5 minutes has elapsed in record standby mode the camera will automatically turn off its power supplied from the AC adapter In this case the battery charge starts if the ba...

Page 16: ...a guide It is displayed in 10 minute units Using AC Power Perform step 4 in Charging the Battery Pack NOTE The provided AC adapter features automatic voltage selection in the AC range from 110 V to 240 V About Batteries DANGER Do not attempt to take the batteries apart or expose them to flame or excessive heat as it may cause a fire or explosion WARNING Do not allow the battery or its terminals to...

Page 17: ... mode using the MODE switch Video mode 墌 pg 22 24 Still image mode 墌 pg 28 29 3 Auto Manual Mode Press and hold to switch to the manual recording mode When manual mode is selected the indicator appears on the LCD monitor To return to the auto recording mode Press again 4 Power Linked Operation When the power switch is set to you can also turn on off the camera by opening closing the LCD monitor Op...

Page 18: ...n press 49 Repeat to input the month year hour and minute 6 Press MENU to return to the normal screen Built in Clock s Rechargeable Lithium Battery If the camera is not used for approx 3 months the clock s lithium battery will become discharged and the date time stored in memory will be lost When this occurs first connect the camera to an AC outlet using the AC adapter for over 24 hours to charge ...

Page 19: ...ess 49 to clear the brightness control indicator from the display 1 Adjust the velcro strip 2 Pass your right hand through the loop and grasp the grip 3 Adjust your thumb and fingers through the grip to easily operate the recording start stop button power switch and zoom lever Be sure to fasten the velcro strip to your preference To attach the camera to a tripod align the direction stud and screw ...

Page 20: ...HDD or SD cards You have to format the newly purchased SD cards with this camera before using them This enables stable speeds and operation when accessing the recording medium Be aware that all files and data including protected files will be erased 墌 pg 38 1 Set the power switch to or 2 Press MENU The menu screen appears 3 Press to select REC MEDIA SETTING then press 49 4 Press to select FORMAT t...

Page 21: ...heck in REC MEDIA SETTING 墌 pg 48 49 Example When checking the HDD space 1 Set the power switch to or 2 Press INFO The MAX RECORDING TIME screen appears Displayed picture quality mode ULTRA FINE FINE NORMAL ECONOMY For details on the picture quality see page 50 To return to the normal screen Press INFO repeatedly This function turns off the power automatically to prevent HDD damage when the camera...

Page 22: ...nters the sleep mode the access lamp lights and the LCD monitor turns off To cancel the sleep mode perform any operation such as zooming When the camera heats up the 7REC indicator flashes If the camera continues to heat up shooting may be stopped to protect the recording medium In this case turn off the camera power and then wait until the camera cools down 墌 pg 56 If data cannot be recorded or s...

Page 23: ... details on its availability Make sure to connect the end with a core filter to the camera The core filter reduces interference Focusing may become unstable during zooming In this case set the zoom before recording and lock the focus by using the manual focus 墌 pg 33 then zoom in or out during recording During digital zoom the quality of image may suffer Macro shooting is possible as close as appr...

Page 24: ... after MPG is displayed The fast forward rewind slow frame by frame playback and playlist creation functions are not available for files in the EXTMOV folder When you delete the files in the EXTMOV folder perform on the PC NOTES The playback picture can be viewed in the LCD monitor or on a connected TV 墌 pg 26 At the junctions between scenes the image may stop momentarily or the sound may be inter...

Page 25: ...le Pressing repeatedly skips files in reverse direction If you press or during normal playback or search playback resumes after locating the start point of a file Frame by frame playback While playback is paused press or Pressing or repeatedly advances or reverses the still picture frame by frame To resume normal playback press 49 Slow motion playback While playback is paused press and hold or for...

Page 26: ...und volume to its minimum level to avoid a sudden burst of sound when the camera is turned on Playback on a TV 1 Make sure all units are turned off 2 Connect the camera to a TV or VCR as shown in the illustration If using a VCR go to step 3 If not go to step 4 3 Connect the VCR output to the TV input referring to your VCR s instruction manual 4 Turn on the camera the VCR and the TV 5 Set the VCR t...

Page 27: ...tance for indoor use is 5 m Use the remote control in front of the camera facing toward the lens NOTE The transmitted beam may not be effective or may cause incorrect operation when the remote sensor is directly exposed to sunlight or powerful lighting Buttons and Functions A Infrared Beam Transmitting Window Transmits the beam signal B ZOOM T W Buttons Zoom In Out 墌 pg 23 C Up Button Rotate Butto...

Page 28: ...d off see page 48 For approximate number of storable images see page 63 Zooming Use the zoom function for close up or wide angle shooting For details see page 25 Continuous Shooting If the continuous shooting mode is set to on keeping the recording start stop button pressed in step 3 in Still Image Recording 墌 pg 28 provides an effect similar to serial photography Interval between still images app...

Page 29: ...tch to 2 Set the MODE switch to A still image is displayed To switch the medium to be played back see pages 21 48 and 49 3 Press 49 to start the slide show If you press during the slide show files are displayed in descending order If you press during the slide show files are displayed in ascending order To end the slide show press 49 again Index Screen of Still Image Files You can view multiple fi...

Page 30: ...mage clockwise or counterclockwise 1 Set the power switch to 2 Set the MODE switch to A still image is displayed To switch the medium to be played back see pages 21 48 and 49 3 Press to rotate 90 clockwise Each time you press the image rotates clockwise 90 180 270 0 4 Press to rotate 90 counterclockwise Each time you press the image rotates counterclockwise 270 180 90 0 Playback Zoom You can magni...

Page 31: ...s completed To lock the exposure After step 4 press and hold 49 for over 2 seconds The indicator appears To cancel spot exposure control Press once so that the indicator disappears NOTES Spot exposure control may not be possible when some other functions are activated Depending on the shooting location and condition optimum result may not be attained When shooting with insufficient light at night ...

Page 32: ...using reverse lighting or when the background is too bright When shooting on a reflective natural background such as at the beach or when skiing When the background is overly dark or the subject is bright 1 Select AE in the MSET menu 墌 pg 32 2 If AUTO is selected press video mode only 3 To brighten the image press To darken the image press Adjustment range For video recording 6 to 6 or AUTO automa...

Page 33: ...automatic focus Select AUTO in step 2 Manual focus is recommended in situations listed below When two subjects overlap in the same scene When illumination is low When the subject has no contrast difference in brightness and darkness such as a flat one colour wall or a clear blue sky When a dark object is barely visible in the display When the scene contains minute patterns or identical patterns th...

Page 34: ...ite balance Select AUTO in step 2 Manual White Balance Adjustment 1 Select MWB in WB menu 墌 pg 34 2 Hold a sheet of plain white paper in front of the subject Adjust zoom or position yourself so that the white paper fills the screen 3 Press and hold 49 until indicator begins blinking then stops blinking NOTES In step 2 it may be difficult to focus on the white paper In such a case adjust with manua...

Page 35: ...ep 4 NOTES It is recommended to use a tripod when recording with a slow shutter speed The shutter speed can be set separately in video and still image NIGHTSCOPE The shutter speed is fixed at 1 2 second This enables shooting with little light in dim locations The indicator appears 1 4 1 8 1 15 1 25 Slow shutter speed can blur the subject to give the impression of flowing motion 1 50 The shutter sp...

Page 36: ...n shooting in extremely bright surroundings such as in the snow 3 Press 49 The setting is completed To turn off the program AE function Select OFF in step 2 Effect You can add special effects to your recording images 1 Select EF in the MSET menu 墌 pg 32 2 Press to select the desired mode SEPIA The image has a brownish tint like old photos MONOTONE The image becomes black and white like old movies ...

Page 37: ...and right to cover the scene WIPE SCROLL The scene wipes in from the bottom to the top of a black screen or wipes out from top to bottom leaving a black screen WIPE SHUTTER Wipe in from the centre of a black screen toward the top and bottom or wipe out from the top and bottom toward the centre leaving a black screen 6 Press 49 The setting is completed 7 Press MENU to close the menu screen The sele...

Page 38: ...peatedly You can protect files from the accidental erasure 1 Set the power switch to 2 Select the file type video or still image using the MODE switch 3 Press MENU The menu screen appears 4 Press to select PROTECT then press 49 To protect the currently displayed file 5 Press to select CURRENT then press 49 6 Press to select EXECUTE then press 49 You can select the previous or next file by pressing...

Page 39: ...2 Select the file type video or still image using the MODE switch 3 Press to display the desired file then press You can also select the file on the index screen 墌 pg 25 29 4 Press to select EXECUTE then press 49 NOTE If you press during recording mode the file recorded most recently will be deleted However if the recording mode video or still image is switched or the power is turned off and on ag...

Page 40: ...adapter as the recording medium may be corrupted if the battery becomes exhausted during deletion If the recording medium becomes corrupted format it 墌 pg 20 Writing speed of recording media tends to become slow after long period of repeated use To regain the speed execute cleanup periodically The cleanup function is equivalent to Defragmentation of PC s function NOTE Make sure to use the provided...

Page 41: ...py move then press HDD SD or SD HDD To copy or move by selecting files 7 Press to select FILE then press 49 The index screen appears 8 Press to select a desired file then press 49 The check mark appears on the selected file To select other files repeat this step The scroll bar can also be used with the zoom lever and 墌 pg 30 9 Press MENU to return to the previous screen 10 Press to select EXECUTE ...

Page 42: ...4 Press to select PLAY LIST then press 49 5 Press to select EDIT then press 49 6 Press to select NEW LIST then press 49 7 Press to scroll upward or downward the thumbnail images of recorded files and select a file to be added to a play list The scroll bar can also be used with the zoom lever and pressing 墌 pg 25 8 Press 49 The frame for selecting an inserting point appears 9 Press to scroll upward...

Page 43: ...rom the play list By playing back the play list you can view your original video clips To create play list 墌 pg 42 1 Set the power switch to 2 Set the MODE switch to 3 Press MENU The menu screen appears 4 Press to select PLAY LIST then press 49 5 Press to select PLAYLIST CONTENTS then press 49 The table of play lists appears 6 Press to select a list you want to play back The display format of date...

Page 44: ...like 1 Set the power switch to 2 Set the MODE switch to 3 Press MENU The menu screen appears 4 Press to select PLAY LIST then press 49 5 Press to select RENAME then press 49 The table of play lists appears 6 Press to select a play list whose name you want to change The scroll bar can also be used with the zoom lever and pressing 墌 pg 25 The thumbnail appears on the upper right side 7 Press 49 The ...

Page 45: ...26 2 Set the VCR to VIDEO AUXILIARY input and engage the recording standby mode For details how to set VIDEO AUXILARY input refer to VCR instructions 3 Set the power switch to 4 Set the MODE switch to 5 Press MENU The menu screen appears 6 Press to select PLAY LIST then press 49 7 Press to select PLAYLIST CONTENTS then press 49 The table of play lists appears 8 Press to select a list you want to d...

Page 46: ... and 7 8 Press MENU to finish the setting To cancel the selection select the same image in step 6 NOTE The DPOF setting is available up to 999 images To print all still images One print for each 1 Display the DPOF menu screen 墌 To print by selecting a still image 2 Press to select ALL1 then press 49 3 Press to select EXECUTE then press 49 4 Press MENU to finish the setting To confirm the DPOF sett...

Page 47: ...49 The image is printed To cancel print setting Press to select CANCEL then press 49 To stop printing after printing starts 1 Press 49 The confirmation screen appears 2 Press to select EXECUTE then press 49 To print using the DPOF setting If the printer is compatible with DPOF you can use the DPOF setting 墌 pg 46 1 Set the power switch to 2 Set the MODE switch to 3 Press MENU The menu screen appea...

Page 48: ...Resets all settings to the factory preset CANCEL Returns to the menu screen without executing reset OFF Disables the function ON Activates demonstration mode and shows various features on the display Demonstration starts in the following cases When the menu screen is closed after DEMO MODE is set to ON With DEMO MODE set to ON if there is no operation for about 3 minutes after the power switch is ...

Page 49: ...r appears Adjust the brightness of the display using then press 49 墌 pg 19 OFF The date time does not appear AUTO Displays the date time for approx 5 seconds in the following cases When the power switch is set from OFF to When playback starts When the date is changed during playback ON The date time is always displayed NOTES Only the date is displayed for the video playback You can set to differen...

Page 50: ...ng on the shooting condition In this case the indicator blinks or goes out Switch off this mode when recording with the camera on the tripod CAMERA SETTING GZ MG50E EK GZ MG40E EK 15X Only optical zoom is available up to 15x 60X Digital zoom is available up to 60x 700X Digital zoom is available up to 700x GZ MG30E EK GZ MG20E EK 25X Only optical zoom is available up to 25x 100X Digital zoom is ava...

Page 51: ...pg 28 OFF The image in the dark will be recorded with no picture brightness adjustment ON The image in the dark will be brightened But the overall appearance may become grainy CAMERA SETTING The menu item of TELE MACRO is the same as in the description on page 50 Factory preset 墌 DPOF Print Setting 墌 pg 46 墌 Direct Printing with a PictBridge Printer 墌 pg 47 墌 Playback Effects 墌 pg 37 The menu item...

Page 52: ...ndications blink Certain modes of program AE effect DIS and other functions that cannot be used together are selected at the same time Digital zoom does not work ZOOM is set to 15X optical zoom HSet ZOOM to 60X or 700X 墌 pg 50 Digital zoom is not available in the still image recording mode For GZ MG30E EK GZ MG20E EK optical zoom can go up to 25x and ZOOM can be set to 100X or 800X Troubleshooting...

Page 53: ...e white Or there are various different light sources behind the subject HTry manual white balance adjustment 墌 pg 34 The recorded image is too dark Shooting was performed under backlit conditions HTry backlight compensation 墌 pg 31 or manual exposure 墌 pg 32 The recorded image is too bright The subject is too bright HTry manual exposure 墌 pg 32 White balance setting cannot be activated The sepia S...

Page 54: ...m the printer a black bar appears at the bottom of the screen This is not a malfunction HBy recording with DIS activated this can be avoided 墌 pg 50 Images on the LCD monitor appear dark or whitish In places subject to low temperature images become dark due to the characteristics of the LCD monitor This is not a malfunction HAdjust the brightness and angle of the LCD monitor 墌 pg 9 19 49 When the ...

Page 55: ...les when you attempt video playback NO IMAGE FILES STORED Appears if there are no still image files when you attempt still image playback CLOSE COVER Appears when the SD card cover is opened during file copy move operation 墌 pg 41 NO MEMORY CARD Appears when the SD card is not inserted to the SD slot for file copy move operation 墌 pg 41 NO SUPPORTED FILES Appears when there is no JPEG still image ...

Page 56: ...power then wait for a while CAMERA TEMPERATURE IS TOO LOW KEEP CAMERA POWER ON PLEASE WAIT The temperature of the camera is too low Keep the power on and wait for a while RECORDING FAILURE Performance of recording medium is poor Use the Cleanup function CLEAN UP in the menu 墌 pg 40 49 The writing speed of recording medium is slow or the recording medium is corrupted Use the recording medium to whi...

Page 57: ...connected Mould may form if the lens is left dirty When using a cleaner or chemically treated cloth refer to the cautions of each product Battery Packs The supplied battery pack is a lithium ion battery Before using the supplied battery pack or an optional battery pack be sure to read the following cautions To avoid hazards do not burn do not short circuit the terminals When transporting make sure...

Page 58: ...the recording medium or subject it to strong pressure jolts or vibrations Do not splash the recording medium with water Do not use replace or store the recording medium in locations that are exposed to strong static electricity or electrical noise Do not turn off the camera power or remove the battery or AC adapter during shooting playback or when otherwise accessing the recording medium Do not br...

Page 59: ...cted at extremely bright objects for long periods expose the lens to direct sunlight swing it excessively when using the hand strap swing the soft camera case excessively when the camera is inside it How to Handle a CD ROM Take care not to soil or scratch the mirror surface opposite to the printed surface Do not write anything or put a sticker on either the front or back surface If the CD ROM gets...

Page 60: ...C to 40 C Operating humidity 35 to 80 Storage temperature 20 C to 50 C Pickup 1 4 5 1 330 000 pixels CCD Lens GZ MG50E EK GZ MG40E EK F 1 2 to 2 8 f 3 0 mm to 45 mm 15 1 power zoom lens GZ MG30E EK GZ MG20E EK F 1 8 to 3 2 f 2 2 mm to 50 mm 25 1 power zoom lens Filter diameter GZ MG50E EK GZ MG40E EK ø30 5 mm GZ MG30E EK GZ MG20E EK ø27 mm LCD monitor 2 5 diagonally measured LCD panel TFT active m...

Page 61: ...48 kHz 128 kbps Format JPEG Image size GZ MG50E EK GZ MG40E EK 3 modes 1152 x 864 1024 x 768 640 x 480 GZ MG30E EK GZ MG20E EK Only 1 mode 640 x 480 Picture quality 2 modes FINE STANDARD AV S Video output Y 1 0 V p p 75 Ω analogue C 0 29 V p p 75 Ω analogue Video output 1 0 V p p 75 Ω analogue Audio output 300 mV rms 1 kΩ analogue stereo USB Mini USB B type USB 1 1 2 0 compliant AC Adapter Power r...

Page 62: ...ts with caution SD memory cards By Panasonic TOSHIBA pqi still image only and SanDisk If other media are used they may fail to record data correctly or they may lose data that has already been recorded MultiMediaCards are not supported For video recording use a high speed SD memory card at least 10 MB s Approximate recording time for video The numbers indicate minutes Built in hard disk SD card Qu...

Page 63: ...0E EK 640 x 480 FINE 9999 9999 640 x 480 STANDARD 9999 9999 1024 x 768 FINE 3285 1024 x 768 STANDARD 5675 1152 x 864 FINE 2230 1152 x 864 STANDARD 3670 Image size quality 128 MB 256 MB 512 MB 1 GB 640 x 480 FINE 780 1555 3140 6040 640 x 480 STANDARD 1115 2225 4490 8635 1024 x 768 FINE 210 420 845 1630 1024 x 768 STANDARD 350 705 1425 2745 1152 x 864 FINE 140 280 570 1095 1152 x 864 STANDARD 225 45...

Page 64: ... Dubbing 26 45 E Effect 36 37 F File Information 38 Formatting a Recording Medium 20 49 G Gain Up 50 I Image Rotation 30 Image Size 51 Index Screen 24 29 L Language Setting 18 49 LCD Monitor 9 12 58 LED Light 31 M Manual Exposure 32 33 Manual Focus 33 MSET Menu 32 O Operation Sound 48 P Picture Quality 50 51 Play List 42 45 50 Power Linked Operation 17 Program AE 36 Protecting Files 38 50 R Remote...

Reviews: