background image

.

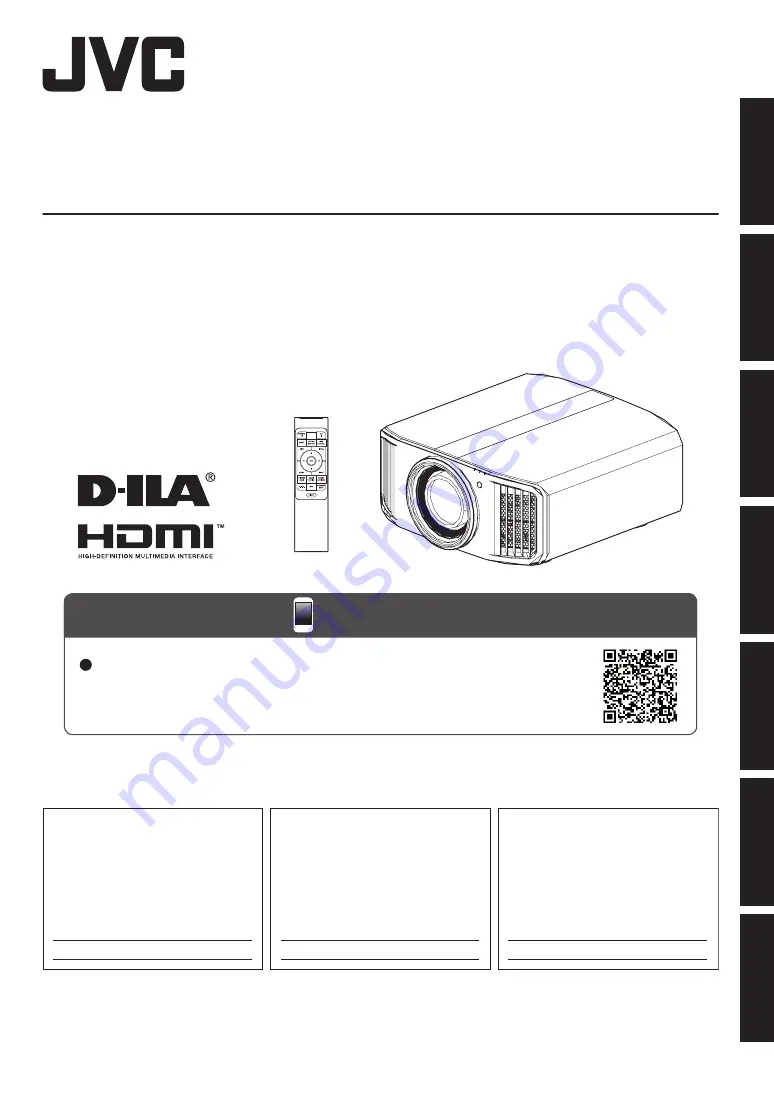
D-ILA

PROJECTOR

DLA-NX9

DLA-NX7

DLA-NX5

.

.

http://manual3.jvckenwood.com/projector/mobile/global/

The Mobile User Guide can be viewed on mobile internet devices including 
smartphones and tablets.

Mobile User Guide

This instruction manual is intended for software version 3.50 or later. If you are using an older

software version, please make use of the instruction manual (for software versions up to 3.10)

(B5A-2809-31).

.

Pour utilisation par le client :

Entrerci-dessous le N°de série qui 
est situé sous le boîtier. Garder 
cetteinformation comme référence
pour le futur.

Instrucción para el cliente :

Introduzca a continuación el nº de 
serie que aparece en la parte 
inferior lateral de la caja. Conserve
esta información como referencia 
para uso ulterior.

For Customer use :

Enter below the serial No. which is
located on the side of the cabinet.
Retain this information for future
reference.

DLA-NX9 K, 
DLA-NX7 K, 
DLA-NX5 K, 

DLA-NX9 K, 
DLA-NX7 K, 
DLA-NX5 K, 

DLA-NX9 K, 
DLA-NX7 K, 
DLA-NX5 K, 

Model No.

Serial No.

N° de modèle

N° de série

Modelo Nº

Nº de serie

Not suitable for household room illumination.

INSTRUCTIONS

B5A-2809-41

Getting Started

Set up

Operate

Adjust/Set

Maintenance

Troubleshooting

Others

Summary of Contents for DLA-N5

Page 1: ...é sous le boîtier Garder cetteinformation comme référence pour le futur Instrucción para el cliente Introduzca a continuación el nº de serie que aparece en la parte inferior lateral de la caja Conserve esta información como referencia para uso ulterior For Customer use Enter below the serial No which is located on the side of the cabinet Retain this information for future reference DLA NX9 K DLA N...

Page 2: ... protection against harmful interference in a residential installation This equipment generates uses and can radiate radio frequency energy and if not installed and used in accordance with the instructions may cause harmful interference to radio communications However there is no guarantee that interference will not occur in a particular installation If this equipment does cause harmful interferen...

Page 3: ...duct does not operate normally by following the operating instructions Adjust only those controls that are covered by the Operation Manual as an improper adjustment of controls may result in damage and will often require extensive work by a qualified technician to restore the product to normal operation If the product has been dropped or damaged in any way When the product exhibits a distinct chan...

Page 4: ...d Video images can burn into the electronic component parts Please do not display screens with still images of high brightness or high contrast such as found in video games and computer programs Over a long period of time it might stick to the picture element There is no problem with the playback of moving images e g normal video footage Not using the unit for a long time can lead to malfunction P...

Page 5: ...y European representative of JVC KENWOOD Corporation is JVCKENWOOD Deutschland GmbH Konrad Adenauer Allee 1 11 61118 Bad Vilbel GERMANY THIS APPARATUS MUST BE EARTHED IMPORTANT Europe only The wires in the mains lead on this product are colored in accordance with the following code HOW TO REPLACE THE FUSE POWER CONNECTION United Kingdom only When replacing the fuse be sure to use only a correctly ...

Page 6: ... cette pile contient du plomb Informatie voor gebruikers over het verwijderen van oude apparatuur en batterijen Alleen Europese Unie Deze symbolen geven aan dat apparatuur met dit symbool niet mag worden weggegooid als algemeen huishoudelijk afval Als u het product of de batterij wilt weggooien kunt u inzamelsystemen of faciliteiten voor een geschikte recycling gebruiken Opmerking Het teken Pb ond...

Page 7: ...IEC62471 5 Location information of the mark As with any bright light source do not stare into the beam RG2 IEC 62471 5 2015 7 Getting Started ...

Page 8: ...4 Original HDR Technology of JVC 34 Collaboration with Panasonic UHD BD Player DP UB9000 36 MPC Multiple Pixel Control 37 Fine tuning the Image Quality 38 Adjusting the Output Value of the Projected Image Gamma Tone Mapping 38 Fine tuning of Gamma Tone Mapping to Preferred Settings 41 Setting Frame Adapt HDR 43 Setting Auto Tone Mapping 44 Reduces the jitter of Fast moving Images Motion Control 46...

Page 9: ...rational check 2 pieces Power cord for USA about 2 m about 78 7 in 1 piece 0 Quick User Guide safety precautions warranty card and other printed material are also included 0 Be sure to read the Safety Precautions before using this projector Optional Accessories 0 Replacement lamp Product no PK L2618UW 0 3D Glasses model PK AG3 0 3D Synchro Emitter model PK EM2 9 Getting Started ...

Page 10: ...lso a remote sensor at the rear C Indicator Refer to Indicator Display on the Main Unit P 92 D Exhaust vent Warm air is discharged to cool down the internal temperature Do not block the vents Main Unit Bottom E Feet The height and angle of the projector can be adjusted by turning the foot 0 to 5 mm 0 to 0 2 in P 18 When the foot is removed it can be used as the mounting hole for the ceiling mount ...

Page 11: ...ls H Operation panel For more details please refer to the Operation panel in the diagram below I Remote Sensor rear Please aim the remote control at this area when using it There is also a remote sensor at the front J Power input terminal Connect the supplied power cord to this terminal K Air Inlets The inlets take in air to cool down the internal temperature Do not block the inlet Do not blow hot...

Page 12: ...th of the screw hole is 3 mm 0 1 in D RS 232C terminal D sub 9 pin male The projector can be controlled by connecting a PC to this terminal E SERVICE terminal For updating the software using a commercially available USB flash drive F LAN terminal RJ 45 The projector can be controlled by connecting it to a PC through the computer network for control commands to be sent to the projector G TRIGGER te...

Page 13: ... OK Confirms a selected item J MENU Displays the menu or hides the menu if it is displayed K BACK Returns to the previous menu L PICTURE MODE Displays the picture mode selection menu P 28 M COLOR PROFILE Displays the color profile selection menu P 30 N GAMMA SETTINGS Displays the gamma setting menu O C M D Displays the frame interpolation selection menu P 47 P MPC Displays the MPC setting menu P 3...

Page 14: ...l Storing the remote control for a prolonged period without removing the batteries can cause battery leakage 0 Risk of explosion if battery is replaced by an incorrect type Dispose of used batteries according to the instructions 0 If you want to dispose of the battery please consider the collection systems or facilities for appropriate recycling Effective Range of Remote Control Unit Whenaimingthe...

Page 15: ...ct the icon at the top of the menu to display its corresponding setting item as shown below A Picture Adjust B Input Signal C Installation D Display Setup E Function F Information A B C D E F 15 Getting Started ...

Page 16: ...e clearance from the surroundings as shown below Front 200 mm 8 in and above 300 mm 12 in and above 300 mm 12 in and above 150 mm 6 in and above 150 mm 6 in and above Leave the front area of the unit unblocked If there is any obstructing object in front of the exhaust vent hot air will flow back to the unit and cause it to heat up Hot air flowing out of the unit may cast shadows on the screen heat...

Page 17: ... JVC is not liable for any product damage caused by mounting the unit with non JVC ceiling fittings or to an environment that is not suited for ceiling mount 0 When using the unit with it suspended from a ceiling pay attention to the surrounding temperature When a heater is in use the temperature around the ceiling may be higher than expected 0 To attach the unit to the ceiling mount bracket set t...

Page 18: ...orizontal Position Vertical Position 0 Center Up to about 43 k and 34 l m of the projected image Vertical Position Horizontal Position 0 Center Up to about 100 k and 80 l m of the projected image 16 9 image Lens Shift Range 16 9 k 120 100 80 60 40 20 0 10 30 20 40 50 Amount of horizontal shift Amount of vertical shift l m 90 80 60 70 50 40 30 10 20 0 10 30 20 40 50 Amount of horizontal shift Amoun...

Page 19: ... 59 0 Some cables cannot be connected to this unit due to the size of their connector cover Connecting to the HDMI Input Terminal Digital Input Connecting via HDMI cable HDMI Output Terminal BD DVD Recorder etc Laptop etc HDMI Cable Sold Separately This Unit To HDMI 1 or HDMI 2 input terminal 0 If noise occurs move the laptop away from this unit Connecting through an AV amplifier HDMI Cable Sold S...

Page 20: ...To LAN Terminal 0 The network is used to control this unit It is not used for sending or receiving video signals 0 Please contact your network administrator for information concerning the network connection 0 Set ECO Mode to Off if LAN communication is performed in the Standby mode P 69 0 For more information on control please refer to External Control P 81 Connecting to the RS 232C Terminal RS 23...

Page 21: ... 69 Connecting the Power Cord Supplied Accessory A Connect the power cord supplied to the power input terminal on the main unit B Insert the supplied power plug into the wall outlet Precautions to prevent fire and electric shock 0 The power consumption of this unit is large Please connect it directly to the wall outlet 0 When you are not using the projector please unplug the power cord from the ou...

Page 22: ... red light off in ECO Mode to green light goes off after the unit starts up LIGHT WARNING STANDBY ON LIGHT WARNING STANDBY ON LIGHT WARNING STANDBY ON DB AN BY O DB AN BY O When in ECO Mode STANDBY ON light off During lamp startup STANDBY ON lights up green In standby state STANDBY ON lights up red 2 Choose the image to project Remote control projector unit press the INPUT button to switch the inp...

Page 23: ...ut 60 seconds the STANDBY ON indicator switches from a blinking red to a solid red light LIGHT WARNING STANDBY ON DB TAN Y O LIGHT WARNING STANDBY ON DB In standby state STANDBY ON lights up red In the Cool down mode STANDBY ON blinking red 0 Attach the lens cover CAUTION 0 The power cannot be turned off within approximately 80 seconds after it has been turned on 0 The power cannot be turned on ag...

Page 24: ...re is disabled when the lens lock is set to On P 61 0 For more detailed information please refer to Lens Control P 61 Shift Screen Position Adjustment Zoom Screen Size Adjustment ABCD ABCD ABCD Focus Adjustment 2 Press the MENU button once or the BACK twice to end adjustment Adjustment Pattern Displayed on the Adjustment Screen 2 35 1 1 33 1 4 3 Focus 1 78 1 16 9 1 89 1 17 9 Adjust the display acc...

Page 25: ... image horizontally to the maximum while maintaining its aspect ratio for display Part of the image that runs off the edge vertically will not be displayed Displayed in a width of 3840 pixels when in the 3D mode Auto Magnifies the input image horizontally or vertically to the maximum while maintaining its aspect ratio for display Native Any image below 1920x1080 and 2048x1080 will be scaled 4 time...

Page 26: ...hro Emitter PK EM2 both sold separately you can enjoy 3D video images Installing the 3D Synchro Emitter 1 Connect 3D Synchro Emitter to the 3D SYNCHRO terminal on the main unit Installation Example 3D Glasses 3D Synchro Emitter PK EM2 This Unit PK AG3 26 Operate ...

Page 27: ... not switch the signal to a 3D image For more information on possible input signals please refer to Types of Possible Input Signals P 91 In the default setting 3D Format is set to Auto for automatic projection of 3D images 2 Turn on the power of the 3D Glasses and put them on Adjusting 3D Movies 3D video images may appear differently to different viewers It may also be affected by your physical co...

Page 28: ...e input video system After switching automatically the picture mode switches to the setting preconfigured in Auto Pic Mode Select Æ Auto Pic Mode Select P 59 SDR Picture mode suitable for viewing SDR content HDR10 Picture mode suitable for viewing HDR10 content HLG Picture mode suitable for viewing HLG content Configuring the video type to Auto automatically switches Content Type according to the ...

Page 29: ...ure mode that analyzes and automatically adjusts the HDR Tone Mapping of each frame in the HDR10 content It employs an original analysis algorithm that allows users to enjoy any HDR content with or without any meta data Frame Adapt HDR works with HDR10 format on any device HDR10 Making full use of the wide color gamut and contrast this mode is suited for viewing HDR10 content such as Ultra HD Blu ...

Page 30: ...or CG animation works Ideal for animated works with bright colors Cinema Original JVC cinema specific color gamut that achieves a balance between increased brightness and color vividness Film 1 Color space that is close to the characteristics of Eastman Kodak Company movie films Film 2 Color space that is close to the characteristics of FUJIFILM Corporation movie films THX k Color space of the THX...

Page 31: ...k l Cinema Film k l Film 1 Film 2 THX k THX Frame Adapt HDR BT 2020 Wide k l BT 2020 Normal k l BT 2020 m HDR10 HLG Auto BT 709 BT 2020 Wide k l BT 2020 Normal k l BT 2020 m DCI Pana_PQ Pana_PQ_HL Pana_PQ_BL User 1 to User 3 Auto BT 709 BT 2020 Wide k l BT 2020 Normal k l BT 2020 m DCI Video Anime k l Cinema Off Wide k l Off Normal k l Off m Custom1 to Custom4 31 Adjust Set ...

Page 32: ...Picture Mode Color Profile User 4 to User 6 Auto BT 709 BT 2020 Wide k l BT 2020 Normal k l BT 2020 m DCI Pana_PQ_HL Pana_PQ_BL Off Wide k l Off Normal k l Off m Custom1 to Custom4 32 Adjust Set ...

Page 33: ...axis of the selected color Hue 30 to 30 Adjusts the hue color tone Saturation 30 to 30 Adjusts the color saturation vividness 30 dull to 30 vivid Brightness 30 to 30 Adjusts the brightness 30 dark to 30 bright 0 Selecting Reset resets all the adjustment data 0 Pressing the HIDE button on the remote control enables you to check the image before adjustment Press the HIDE button again to return to th...

Page 34: ...res for enjoying HDR images in better quality with ease Content Type HDR10 Hybrid Log Gamma and other HDR standard content cannot be displayed correctly unless it is viewed in the appropriate picture mode Configuring Content Type to Auto on this unit enables selection of only the Picture Mode suited for the content Doing so allows users to enjoy optimal HDR videos without the need to deal with the...

Page 35: ...e tuning according to the playback content and viewing environment is possible by using Picture Tone to determine the overall brightness Dark Level to adjust the gradation of shadows and Bright Level to adjust the gradation of highlights Æ Performing Tone Mapping Manually P 45 0 0 0 Bright Level Dark Level Picture Tone Frame Adapt HDR In addition to the grading of individual works the peak brightn...

Page 36: ... Picture Mode as follows 1 Set Picture Mode to Pana_PQ P 28 2 Set Color Profile P 30 manually based on the following chart Projector Color Profile DP UB9000 HDR Display Type Effects on the Video Image Pana_PQ_HL High Luminance Projector Prioritizes highest image brightness with good color Pana_PQ_BL Basic Luminance Projector Prioritizes best color reproduction with slightly reduced brightness 3 Th...

Page 37: ... factory setting varies with the Picture Mode Item Setting Description 8K e shift k Off On Toggles the e shift display to on or off Graphic Mode Standard High res Switches the MPC setting It is recommended that this item be configured to Standard such as when viewing normal Blu ray content and to High res such as when viewing 4K resolution content Enhance 0 to 10 Enhances the sharpness of the imag...

Page 38: ...The photos are for illustrative purposes only Input Value Output Value A B A B Increases the contrast with respect to the original image creating a greater sense of depth 0 255 0 255 A B A B The photos are for illustrative purposes only Input Value Output Value 1 Press the GAMMA SETTINGS button to display the Gamma Tone Mapping menu 2 Select the Gamma Tone Mapping to configure 0 You can also perfo...

Page 39: ...n movie films 2 2 The gamma is set to 2 2 2 4 and 2 6 respectively 2 4 2 6 Cinema 1 Places emphasis on the gradation Cinema 2 Places emphasis on the contrast HDR Auto Automatically corrects Picture Tone Dark Level Bright Level from Max CLL Max FALL with HDR PQ as the base HDR PQ Suited for viewing HDR content such as UHD BD HDR10 HDR HLG Suited for viewing HDR content such as HDR broadcast Pana_PQ...

Page 40: ...2 2 2 4 2 6 Cinema 1 Cinema 2 Custom 1 to Custom 3 Frame Adapt HDR HDR Auto HDR10 HDR Auto HDR PQ Custom 1 to Custom 3 Pana_PQ Pana_PQ HLG HDR HLG Custom 1 to Custom 3 THX k THX User 4 to User 6 HDR Auto HDR PQ HDR HLG Custom 1 to Custom 3 When Picture Mode is configured to Frame Adapt HDR this is fixed at HDR Auto and Gamma Tone Mapping cannot be configured 40 Adjust Set ...

Page 41: ...ription Setting Color Selection For selecting the color for adjusting Picture Tone Dark Level and Bright Level White Red Green Blue Picture Tone Adjusts the overall brightness automatically for a well balanced result without compromising the gradation of the image 16 darkens image for an underexposed effect to 16 brightens image for an overexposed effect Dark Level Adjusts the dark areas of the in...

Page 42: ... User 1 to User 3 1 8 1 9 2 0 2 1 2 2 2 3 2 4 2 5 2 6 Cinema 1 Cinema 2 Import Picture Mode Correction Value HDR10 HDR PQ Import HLG HDR HLG Import User 4 to User 6 HDR PQ HDR HLG Import Correction value cannot be configured when Picture Mode is configured to Frame Adapt HDR When Correction Value is set to Import 0 By selecting Import for Correction Value the gamma data created externally can be s...

Page 43: ...10 in the Picture Adjust menu 2 Configure Picture Mode to Frame Adapt HDR in the Picture Adjust menu 0 You can also press the PICTURE MODE button and use the keys Frame Adapt HDR to select and configure a setting P 28 0 Enter the HDR10 content when Picture Mode is configured to Auto 3 Configure to HDR Processing in the Picture Adjust menu HDR Processing P 55 4 Configure to HDR Level in the Picture...

Page 44: ...onfiguring Tone Mapping to HDR Auto Alternatively configure Tone Mapping to Custom 1 to Custom 3 followed by configuring Correction Value to HDR Auto 4 Configure to Mapping Level in the Picture Adjust menu This may not appear depending on the settings Please refer to Mapping Level P 57 for details MEMO When Correction Value is configured to HDR Auto while Tone Mapping is configured to HDR Auto or ...

Page 45: ...s Picture tone adjustment method 0 Picture Tone When Picture Tone is set to The entire screen becomes dark 0 Screen size is smaller than estimated 0 MaxFALL MaxCLL value is higher than estimated P 71 0 Screen becomes brighter in the course of viewing When Picture Tone is set to The entire screen becomes brighter 0 Screen size is bigger than estimated 0 MaxFALL MaxCLL value is lower than estimated ...

Page 46: ...ts Picture Tone 9 Dark Level 0 Bright Level 7 When clipping point is 4000 nits Picture Tone 13 Dark Level 0 Bright Level 7 This product is designed for home use and we do not provide guarantee for commercial uses such as in mastering work Reduces the jitter of Fast moving Images Motion Control Low Latency For changing the low latency setting You are recommended to set to On for content requiring s...

Page 47: ...n is not performed Low Improves motion lag for movie type images High Improves motion lag fast moving sports type images Inverse Telecine 60i 60p video images such as those of TVs and DVDs Suitable for original images that are 24 frame film sources 0 Does not function for 24p video images C M D is the abbreviation for Clear Motion Drive This item cannot be set when Low Latency is set to On Motion ...

Page 48: ... P 51 9 Tint P 51 9 User Name Edit P 51 IColor Profile P 30 9 Color Management P 33 IColor Temp P 52 IHDR Processing P 55 IGamma Tone Mapping P 38 9 Correction Value P 55 9 Picture Tone P 41 9 Dark Level Bright Level P 41 ITheater Optimizer P 56 9 Theater Optimizer P 56 9 Optimize Level P 56 IHDR Level IMapping Level P 57 IMPC e shift k MPC Level l m P 57 IMotion Control P 46 Input Signal IInput L...

Page 49: ... Pixel P 62 9 Adjust Fine P 62 9 Reset P 62 IMask P 66 IAnamorphic P 66 IScreen Setting P 67 9 Screen Adjust P 67 IInstallation Style P 68 IKeystone P 68 IAspect P 25 Display Setup IBack Color P 68 IMenu Position P 68 ISignal Display P 68 ILogo P 69 ILanguage P 69 Function ITrigger P 69 IOff Timer P 69 IECO Mode P 69 INetwork P 70 IRemote Code P 70 IHigh Altitude Mode P 71 ILamp Reset P 74 IFactor...

Page 50: ...e the lamp to darken faster Aperture JVC has developed an image analysis algorithm which analyzes the state of the video image in real time and controls the aperture dynamically according to the image information This technology enables viewers to enjoy video images with enhanced contrast Setting Description Auto 1 Places emphasis on the gradation Auto 2 Image contrast is enhanced Manual Does not ...

Page 51: ...eo image 0 Setting range 50 reddish to 50 greenish User Name Edit You can edit the User 1 to User 6 names in the Picture mode 0 Characters that are usable include alphabets upper or lower case numeric characters symbols and blank space character However blank space cannot be used for the first and last characters 0 Enter not more than 10 characters User 1 y l Y L _ x k X K 0 w j W J 9 v i V I 8 y ...

Page 52: ...0K 2 When Color Profile is configured to Off Wide Off Normal k l or Off m the setting is fixed at High Bright Color Temp Color Temp Description Xenon 1 k l Color temperature that reproduces the characteristics of a xenon lamp used in cinemas 0 Xenon 1 A light source color that is emitted by a film projector 0 Xenon 2 A light source color emitted by a projector used for digital cinema Xenon 2 k l 5...

Page 53: ...7500K 9300K Xenon 1 k l Xenon 2 k l High Bright Custom 1 to Custom 2 Natural User 1 to User 3 5500K 6500K 7500K 9300K High Bright Custom 1 to Custom 2 THX 6500K Frame Adapt HDR HDR10 Pana_PQ 5500K 6500K 7500K 9300K High Bright HDR10 Custom 1 to Custom 2 HLG 5500K 6500K 7500K 9300K High Bright HLG Custom 1 to Custom 2 Continue on next page 53 Adjust Set ...

Page 54: ...s each color in the bright parts of the video image 0 Setting range 255 reduces the red green blue tone to 0 no adjustment Offset Red Offset Green Offset Blue Adjusts each color in the dark areas of the video image 0 Setting range 50 reduces the red green blue tone to 0 no adjustment to 50 enhances the red green blue tone List of selectable Correction Value according to Picture Mode Picture Mode C...

Page 55: ...input It is also used to adjust the preconfigured Gamma Tone Mapping setting Æ Adjusting the Output Value of the Projected Image Gamma Tone Mapping P 38 0 The available Gamma Tone Mapping settings vary according to the Picture Mode When Picture Mode is configured to Frame Adapt HDR Gamma Tone Mapping is fixed at HDR Auto and the detailed settings cannot be configured Correction Value For setting t...

Page 56: ...ON Pressing Set in the Theater Optimizer menu automatically applies the Screen Size Screen Gain settings and state of the projector in the auto settings of Theater Optimizer If Set is not pressed in the Theater Optimizer menu the settings are applied after the next restart of the unit or change of the Installation Mode HDR Level This is a feature for adjusting the overall brightness during tone ma...

Page 57: ...ing Level is fixed at 0 0 Setting range 5 to 5 MPC e shift k MPC Level l m You can enjoy natural expressive images with a stronger sense of depth Æ MPC Multiple Pixel Control P 37 8K e shift k Switches the display resolution 0 Setting values On 8K Off 4K Graphic Mode Switches the MPC setting It is recommended that this item be configured to Standard such as when viewing normal Blu ray content and ...

Page 58: ...etting if you are inputting PC signals dynamic range 0 255 16 255 S White Select this setting when inputting Super White compatible device signals dynamic range 16 255 Color Space For setting the color space of the input signal If the image is not displayed properly even after selecting Auto select an appropriate setting Setting Description Auto Detects YCbCr444 YCbCr422 and RGB automatically YCbC...

Page 59: ...s last configured when viewing HDR10 content Frame Adapt HDR Switches the Picture Mode automatically to Frame Adapt HDR HDR10 Switches the Picture Mode automatically to HDR10 Pana_PQ Switches the Picture Mode automatically to Pana_PQ User 4 to User 6 Switches the Picture Mode automatically to User 4 to User 6 HLG For configuring the Picture Mode to switch to automatically during input of HLG signa...

Page 60: ...pper or lower case numeric characters symbols and blank space character However blank space cannot be used for the first and last characters 0 Enter not more than 10 characters y l Y L _ x k X K 0 w j W J 9 v i V I 8 y h U H 7 t g T G 6 s f S F 5 r e R E 4 q d Q D 3 p c P C 2 o b O B z M Z m 1 n a N A Name Mode 1 After entry is complete select OK and press the OK button Selection Cursor Input Curs...

Page 61: ...not display the lens adjustment pattern On Displays the lens adjustment pattern Lock For setting whether to lock or unlock the lens Setting to On to lock the lens allows you to preserve the adjustment status of the lens Setting Description Off Does not lock the lens On Locks the lens to prevent any erroneous operation on the adjustments 0 Even when On the lens will be in the mode selected by Insta...

Page 62: ... of the color selected in Adjust Color Æ Whole Adjust Pixel Operation Procedure P 63 0 Adjustment cannot be made when Adjust Area is set to Zone Setting Description H Horizontal Setting range 2 moves red blue to the left to 2 moves red blue to the right V Vertical Setting range 2 moves red blue downward to 2 moves red blue upward Adjust Fine When Adjust Area is set to Whole adjustment can be made ...

Page 63: ...orizontal pixels of the entire zone 0 The adjustment setting appears at the center of the Adjustment Pixel window Adj Area Pat Col Pixel Fine Adj Col H 0 V 0 Red Pixel Adjust Back Whole Adjust Pixel BACK ADVANCED MENU GAMMA SETTINGS C M D PICTURE MODE Remote Control Operation Guide Color for Adjustment Pixel Adjustment Setting E After adjustment is complete press the BACK button twice to exit the ...

Page 64: ...of the entire zone 0 The adjustment setting appears at the center of the Fine window Adj Area Pat Col Pixel Fine Adj Col H 0 0 0 V 0 0 0 BACK ADVANCED MENU GAMMA SETTINGS C M D PICTURE MODE H 20 20 20 V 5 5 5 Red Whole Adjust Fine Pixel Adjust Back Indicates the maximum and minimum misalignment value of the entire screen Max Min Adjustment Setting Remote Control Operation Guide Color for Adjustmen...

Page 65: ... BACK ADVANCED MENU GAMMA SETTINGS C M D PICTURE MODE Red Back 0 0 Position Zone Adjust Pixel Adjust V Vertical H Horizontal Zone Adjustment Window Zone Cursor Adjustment Pattern D Press the JKH I keys to move the cursor to the point to be adjusted E Press the OK button to enter the Adjustment mode F Use the JKH I keys to move and adjust the vertical and horizontal pixels of the entire zone 0 The ...

Page 66: ...ects the 2 35 1 image without any changes A Projects the 2 35 1 image with it stretched in the vertical direction only using a 3840 pixel width B Projects the 16 9 image with it compressed in the horizontal direction only C This is a mode used exclusively for the DCR lens of Panamorph Projects the image by stretching 2 35 1 video images in the vertical direction and enlarging them in the horizonta...

Page 67: ... calibration software to make finer adjustments For details on the dedicated projector calibration software please visit our website https www3 jvckenwood com projector support Screen Size For configuring the size of the screen for viewing when using Theater Optimizer Screen Gain For configuring the gain of the screen for viewing when using Theater Optimizer MEMO 0 Configuring Theater Optimizer to...

Page 68: ...al setting range 16 to 16 Increasing the value changes the aspect slightly Image will reduce in size when keystone is adjusted 16 0 16 Aspect The screen size of the projected image can be adjusted optimally according to the original screen size aspect that has been input Æ Adjusting the Screen Size Aspect P 25 Display Setup Back Color For setting the color of the background to Blue or Black when t...

Page 69: ...mber as this setting when the power is turned on When a setting other than Off is selected the control signal output is stopped when the cooling function starts once the power is turned off Off Timer For setting the duration before the power turns off automatically when the projector is not operated 0 Setting values Off 1 Hour 2 Hours 3 Hours and 4 Hours The setting will be retained even after the...

Page 70: ... network Subnet Mask Numeric characters that define the bit count used for the network address that is a segment of the IP address Default Gateway Server for communicating beyond the network that is divided by the subnet mask MAC Address Abbreviation for Media Access Control address This is a number that is unique to each network adapter Each of the network adapters is assigned with a unique MAC a...

Page 71: ...onlyduringvideosignalinput Displays the input source Resolution Displayed only during PC signal input Displays the image resolution H Frequency Displays the horizontal frequency V Frequency Displays the vertical frequency Color Depth Displays the color space and color bit depth of the input video signal 0 The color bit depth is not displayed when YCbCr422 is input 0 The color bit depth is displaye...

Page 72: ...hock Doing so may cause lamp blowout 0 Do not use a flammable air duster to clean the internal parts of the unit Doing so may cause fire 0 Use only genuine replacement parts for the lamp unit Also never attempt to reuse an old lamp unit Doing so may shorten the lamp life and cause a malfunction 0 Do not touch the surface of a new lamp Doing so may shorten the lamp life and cause lamp blowout 0 Whe...

Page 73: ...ooks unnatural or when the image flickers replace the lamp unit with a new one promptly Purchasing a lamp unit For details please consult your authorized dealer 0 Lamp unit Product no PK L2618UW Not suitable for household room illumination Lamps with a different product number or those for other projector models cannot be used Information about the lamp An ultra high pressure mercury lamp with a h...

Page 74: ...t 2 Make sure that you operate the remote control in the Standby mode the power plug is inserted into the outlet but the power is not turned on 0 Press the keys according to the sequence of the numbers in the illustration 0 Make sure that you press a button within two seconds after the last button is pressed Press the last button for at least two seconds A C D B Press for 2 seconds or longer 0 The...

Page 75: ...educe the brightness of the image Dirt that enters the unit may also appear as shadows on the image 2 3 4 1 5 Sponge filter 1 Press down the two tabs on the cover and pull the cover out to remove the cover 2 Remove the sponge filter 3 Use a vacuum cleaner to remove dirt from the sponge filter carefully 4 Restore the sponge filter 5 Insert the catches at the bottom of the cover into the holes on th...

Page 76: ...o High during 3D mode the fan will make louder noise than usual since it is designed to run at high speed in 3D mode Power is not supplied Check Action Refer to Is the power cord disconnected Insert the power cord plug firmly P 21 Is the lamp cover properly shut If the unit is in the Standby mode remove the power plug and closethelampcoverproperly Afterthat inserttheplug again P 72 Is the unit in ...

Page 77: ...two images displayed side by side Set 3D Format to Side by Side Video images in the Side by Side format may not be recognized automatically in the case of 3D video images P 27 Is an intermediate device AV amplifier divider etc in use Connect the source device to the projector directly and check whether there is any improvement in the condition If the condition improves it is likely that this is no...

Page 78: ...age flickers Check Action Refer to Do you see horizontally extended overlapping video images In this case set 3D Format to Auto P 27 Are you viewing the video images under a fluorescent light This is caused by interference between the 3D glasses with the flickers of the fluorescent light View with the fluorescent light turned off Is Aperture set to Auto 1 or Auto 2 Set Aperture to Manual P 50 Proj...

Page 79: ...ction Refer to Is the exhaust vent blocked Is the unit used near a heater or air conditioner Check the installation condition of the projector When the surrounding temperature of the projector is high the fan revolution speed increases to protect the projector unit hence a louder operating sound P 16 Are you viewing 3D video images Lamp Power is set automatically to High to ease viewing of 3D vide...

Page 80: ... The video signal input is not supported on this unit Input video signals that can be used P 91 BACK Back Lamp replacement Indicates that the lamp needs to be replaced soon To clear the message press the BACK button on the operation panel of the projector unit or the remote control Get ready a new lamp unit and replace as soon as possible Reset the lamp time after replacing the lamp P 72 74 80 Tro...

Page 81: ...Non synchronous Character length 8 bit Parity None Start bit 1 Stop bit 1 Data rate 19200 bps Data format Binary 1 5 6 9 This Unit D6 D7 D4 D5 D2 D3 D0 D1 Stop bit Start bit TCP IP Connection Before controlling via LAN it is necessary to establish connection of the TCP layer by a 3 way handshake followed bysending out PJREQ andreceiving PJACK withinfivesecondsaftertheprojectorsendsout PJ_OK forcon...

Page 82: ... command and data binary code Command Type Description 0000 Connection check Check whether communication is enabledbetweenthisunitandthe PC during standby 5057 Power supply During standby 31 Turns on the power When power is on 30 Turns off the power Standby mode 4950 Input When power is on 36 HDMI 1 37 HDMI 2 5243 Remote control Sends the same code as the supplied remote control 0 Remote Control C...

Page 83: ...NDBY 37 33 30 36 ON 37 33 30 35 INPUT 37 33 30 38 SETTING MEMORY 37 33 44 34 LENS CONTROL 37 33 33 30 HIDE 37 33 31 44 INFO 37 33 37 34 J 37 33 30 31 K 37 33 30 32 I 37 33 33 34 H 37 33 33 36 Remote Control Button Name Binary Code OK 37 33 32 46 MENU 37 33 32 45 BACK 37 33 30 33 PICTURE MODE 37 33 46 34 COLOR PROFILE 37 33 38 38 GAMMA SETTINGS 37 33 46 35 C M D 37 33 38 41 MPC 37 33 46 30 ADVANCED...

Page 84: ...0 57 0A When power is turned off Standby mode from power on mode Remote control MENU PC This unit 21 89 01 52 43 37 33 32 45 0A This unit PC 06 89 01 52 43 0A When the same operation as pressing the MENU button on the remote control is performed Reference command Type Command Description Power On PC This unit 3F 89 01 50 57 0A This unit PC 06 89 01 50 57 0A This unit PC 40 89 01 50 57 31 0A When i...

Page 85: ...ature 5 C to 35 C humidity 20 to 80 storage temperature 10 C to 60 C Installation Height Below 5 000 ft 1 524 m Dimensions Width x Height x Depth 500 mm x 234 mm x 518 mm 19 3 4 in x 9 1 4 in x 20 3 8 in including feet k 500 mm x 234 mm x 495 mm 19 3 4 in x 9 1 4 in x 19 1 2 in including feet l m Mass 21 8 kg 48 lb k 19 8 kg 43 6 lb l 19 6 kg 43 2 lb m Accessories Refer to P 9 1 D ILA is the abbre...

Page 86: ...oducts that have cleared more than 400 image quality tests This unit is isf certified so calibration can be performed by an isf certified trainer After calibration is performed an isf mode is added to the Picture mode For more details please refer to the isf website http www imagingscience com About Trademarks and Copyrights The terms HDMI and HDMI High Definition Multimedia Interface and the HDMI...

Page 87: ... 7 53 3 90 7 92 4 12 8 36 4 79 9 71 140 3 99 8 11 4 20 8 53 4 44 9 01 5 16 10 46 150 4 28 8 70 4 51 9 15 4 76 9 66 5 53 11 21 160 4 58 9 28 4 81 9 76 5 09 10 31 5 91 11 96 170 4 87 9 87 5 12 10 38 5 41 10 96 6 28 12 72 180 5 16 10 45 5 43 10 99 5 73 11 61 6 66 13 47 190 5 45 11 04 5 73 11 61 6 05 12 26 7 03 14 22 200 5 74 11 62 6 04 12 22 6 38 12 91 7 41 14 98 210 6 03 12 21 6 34 12 84 6 70 13 56 ...

Page 88: ... 188 4 382 1 140 157 2 319 4 165 4 335 9 174 8 354 8 203 2 411 8 150 168 7 342 5 177 5 360 1 187 5 380 3 217 9 441 4 160 180 1 365 5 189 5 384 3 200 2 405 9 232 6 471 0 170 191 6 388 5 201 5 408 5 212 9 431 5 247 4 500 7 180 203 1 411 6 213 6 432 8 225 7 457 0 262 1 530 3 190 214 5 434 6 225 6 457 0 238 4 482 6 276 8 559 9 200 226 0 457 6 237 7 481 2 251 1 508 2 291 6 589 6 210 237 4 480 7 249 7 5...

Page 89: ... 3 10 6 32 90 2 70 5 52 2 84 5 80 3 00 6 13 3 49 7 11 100 3 01 6 14 3 16 6 45 3 34 6 81 3 88 7 91 110 3 31 6 75 3 49 7 10 3 68 7 50 4 28 8 70 120 3 62 7 37 3 81 7 75 4 02 8 18 4 67 9 49 130 3 92 7 99 4 13 8 40 4 36 8 87 5 06 10 29 140 4 23 8 61 4 45 9 05 4 70 9 56 5 45 11 08 150 4 54 9 23 4 77 9 70 5 04 10 24 5 85 11 88 160 4 84 9 84 5 09 10 35 5 38 10 93 170 5 15 10 46 5 41 11 00 5 72 11 61 180 5...

Page 90: ...111 8 228 3 118 1 241 3 137 4 279 9 100 118 5 241 7 124 4 253 9 131 5 268 1 152 8 311 4 110 130 3 265 7 137 4 279 5 144 9 295 3 168 5 342 5 120 142 5 290 2 150 0 305 1 158 3 322 0 183 9 373 6 130 154 3 314 6 162 6 330 7 171 7 349 2 199 2 405 1 140 166 5 339 0 175 2 356 3 185 0 376 4 214 6 436 2 150 178 7 363 4 187 8 381 9 198 4 403 1 230 3 467 7 160 190 6 387 4 200 4 407 5 211 8 430 3 170 202 8 41...

Page 91: ...GA 800 600 37 879 60 317 40 000 1056 628 800 600 XGA 1024 768 48 363 60 004 65 000 1344 806 1024 768 WXGA 1280 768 47 776 59 870 79 500 1664 798 1280 768 WXGA 1280 800 49 702 59 810 83 500 1680 831 1280 800 FWXGA 1366 768 47 712 59 790 85 500 1792 798 1366 768 WXGA 1440 900 55 935 59 887 106 500 1904 934 1440 900 SXGA 1280 1024 63 981 60 020 108 000 1688 1066 1280 1024 WXGA 1600 900 60 000 60 000 ...

Page 92: ...N BY O D D Y O A ANDBY O When in ECO Mode When the video image is temporarily hidden HIDE is on During projection All lights off In the Cool down mode STANDBY ON blinking red During lamp startup STANDBY ON lights up green In standby state STANDBY ON lights up red STANDBY ON blinking green Estimated timing for lamp replacement Displaysusingthesolid blinkinglightofthe LIGHT indicator The STANDBY ON ...

Page 93: ...After that turn on the power again x3 Internal temperature is abnormally high x4 External temperature is too high WARNING WARNING Red LIGHT LIGHT Orange STANDBY ON Mode Display x1 DD board occurs error x2 Motor board occurs error x3 CPU board occurs error x4 Power board occurs error WARNING RN WARNING Red LIGHT LIGHT Orange STANDBY ON Mode Display x1 Lamp does not light up and unit is unable to pr...

Page 94: ...0 19 3 4 Front 104 4 1 16 329 12 15 16 20 13 16 71 2 13 16 71 2 13 16 234 9 1 4 Bottom Surface 37 1 7 16 41 1 5 8 145 5 11 16 290 11 7 16 337 13 1 4 69 2 3 4 Rear Surface 211 8 5 16 33 1 5 16 107 4 7 32 79 3 1 8 60 2 3 8 243 9 19 32 98 3 7 8 98 3 7 8 94 Others ...

Page 95: ...04 4 1 16 329 12 15 16 20 13 16 71 2 13 16 71 2 13 16 234 9 1 4 Bottom Surface 122 4 13 16 46 1 13 16 37 1 7 16 41 1 5 8 290 11 7 16 337 13 1 4 Rear Surface 211 8 5 16 33 1 5 16 107 4 7 32 79 3 1 8 60 2 3 8 243 9 19 32 98 3 7 8 98 3 7 8 95 Others ...

Page 96: ...12 Installation Menu 60 Installation Method 16 Installation Mode 60 Installation Style 68 K Keystone 68 L Lamp Reset 74 Lamp Unit Part Number 73 Language Selection 69 Lens 10 Lens Control 24 61 Lens Cover 9 List of Menu Items 48 Logo Display 69 Low Latency 46 M Maintenance 71 Mask 66 Menu 15 Menu Position 68 Motion Control 46 Motion Enhance 47 MPC 37 57 N Network 70 O Off Timer 69 Optional Accesso...

Page 97: ...ewing HDR Content 34 Viewing Videos 22 W When the Following Messages Appear 80 Whole Adjust Fine 62 64 Whole Adjust Pixel 62 63 Z Zoom 24 Alphanumeric 3D Format 27 3D Glasses 9 26 3D Setting 27 3D Synchro Emitter 9 26 97 Others ...

Page 98: ...98 Others ...

Page 99: ... DLA NX9 DLA NX7 DLA NX5 D ILA PROJECTOR 2018 1020KSH SW XX ...

Reviews: