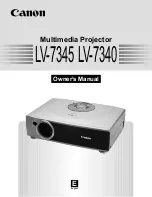
background image

E

English

Multimedia Projector

Owner’s Manual

LV-7345 LV-7340

Summary of Contents for 7345 - LV - LCD Projector

Page 1: ...E English Multimedia Projector Owner s Manual LV 7345 LV 7340 ...

Page 2: ...E RISK OF FIRE OR ELECTRIC SHOCK DO NOT EXPOSE THIS APPLIANCE TO RAIN OR MOISTURE This projector produces intense light from the projection lens Do not stare directly into the lens as possible Eye damage could result Be especially careful that children do not stare directly into the beam This projector should be set in the way indicated If not it may result in a fire hazard Take appropriate space ...

Page 3: ...cabinet slots as they may touch dangerous voltage points or short out parts that could result in a fire or electric shock Never spill liquid of any kind on the projector This projector should be operated only from the type of power source indicated on the marking label If you are not sure of the type of power supplied consult your authorized dealer or local power company Do not overload wall outle...

Page 4: ...rovide reasonable protection against harmful interference in a residential installation This equipment generates uses and can radiate radio frequency energy and if not installed and used in accordance with the instructions may cause harmful interference to radio communications However there is no guarantee that interference will not occur in a particular installation If this equipment does cause h...

Page 5: ...TMENT 28 PICTURE SCREEN ADJUSTMENT 29 SELECTING INPUT SOURCE 30 SELECTING VIDEO SYSTEM 31 PICTURE IMAGE ADJUSTMENT 32 IMAGE LEVEL SELECT 32 IMAGE LEVEL ADJUSTMENT 33 PICTURE SCREEN ADJUSTMENT 34 SETTING MENU 35 OPERATING WIRELESS MOUSE 37 MAINTENANCE 38 WARNING TEMP INDICATOR 38 AIR FILTER CARE AND CLEANING 38 CLEANING PROJECTION LENS 38 LAMP REPLACEMENT 39 LAMP REPLACE COUNTER 39 TROUBLESHOOTING ...

Page 6: ... Spanish Portuguese Dutch Swedish Chinese Korean or Japanese One Touch Auto PC Adjustment Incoming computer video signals are recognized and the best adjustment is automatically set by Auto PC Adjustment No complicated setup is necessary and projection is always precise Digital Zoom for Computer Digital Zoom function adjusts the image size to approx 1 4 49 times of original image size allowing you...

Page 7: ... internal temperature and automatically controls operating power of Cooling Fans FRONT This projector is equipped with Cooling Fans for protection from overheating Pay attention to the following to ensure proper ventilation and avoid a possible risk of fire and malfunction Do not cover vent slots Keep back and bottom clear of any object Obstructions may block cooling air PROJECTION LENS LENS COVER...

Page 8: ...plug AC Power Cord when an appliance is not used When this projector is connected to the outlet with AC Power Cord an appliance is in Stand by Mode and consumes a little electric power CONNECTING AC POWER CORD Connect AC Power Cord supplied to a projector The AC outlet must be near this equipment and must be easily accessible To the POWER CORD CONNECTOR on the projector Projector side AC Outlet si...

Page 9: ...tor and pull Feet Lock Latches on the both sides of a projector 1 ADJUSTABLE FEET FEET LOCK LATCHES 40 100 150 200 300 230 153 115 77 31 H1 H2 40 0 12 2m 26 6 8 1m 20 0 6 1m 13 1 4 0m 5 3 1 6m Release Feet Lock Latches to lock Adjustable Feet and rotate Adjustable Feet to fine tune position and tilt 2 To retract Adjustable Feet lift the front of a projector and pull and undo Feet Lock Latches Keys...

Page 10: ...ort services with this bag The projector can be damaged When handling a projector do not drop bump subject it to strong forces or put other things on the cabinet Use Carry Handle when moving a projector When moving a projector replace Lens Cover and retract Adjustable Feet to prevent damage to the lens and cabinet When a projector is not in use for an extended period put it into the case carrying ...

Page 11: ...o Y jack or connect the component video outputs to Y Pb Cb and Pr Cr jacks Refer to P12 Connect the computer digital analog output to one of these terminals Refer to P13 RGB INPUT TERMINALS DIGITAL ANALOG This projector has input and output terminals on its back for connecting computers and video equipment Refer to figures on pages 11 to 13 and connect properly Connect an external audio amplifier ...

Page 12: ...mputer ADB port Cables used for connection Cable or adapter is not supplied with this projector Control Cable for PS 2 Port Control Cable for ADB Port Audio Cable stereo NOTE When connecting the cable the power cords of both the projector and the external equipment should be disconnected from AC outlet Turn the projector and peripheral equipment on before the computer is switched on USB port MAC A...

Page 13: ...ity over Y jack When both Y Pb Cb Pr Cr jacks and S VIDEO jack are connected Y Pb Cb Pr Cr jacks has priority over S VIDEO jack S VIDEO Output Audio Input Cables used for connection Cable is not supplied with this projector Video Cable RCA x 1 or RCA x 3 S VIDEO Cable Audio Cable RCA x 2 NOTE When connecting the cable the power cords of both the projector and the external equipment should be disco...

Page 14: ...specified herein may result hazardous radiation exposure Laser Light Window These caution labels are put on the remote control LASER POINTER FUNCTION Used to select input source P22 30 Used to execute the item selected or to expand or compress the image in DIGITAL ZOOM mode P29 It is also used as a PC mouse in Wireless Mouse Operation P37 POWER ON OFF BUTTON Used to turn projector on or off P19 ME...

Page 15: ...atteries Installation 1 2 3 Operating Range Point Remote Control Unit toward projector Receiver Window whenever pressing any button Maximum operating range for Remote Control Unit is about 16 4 5m and 60 in front and rear of the projector 16 4 5 m 60 16 4 5 m Used to adjust zoom P20 VOLUME POWER FOCUS ZOOM D ZOOM MENU MUTE LASER KEYSTONE NO SHOW FREEZE AUTO PC ADJ IMAGE P TIMER INPUT BRIGHT MUTE B...

Page 16: ... is turned on And bright when the projector is in stand by mode Turns to yellow when the life of Projection Lamp draws to an end P39 Flashes red while internal projector temperature is too high P38 Used to select input source P22 30 Used to select an item or adjust value in ON SCREEN MENU They are also used to pan the image in DIGITAL ZOOM mode P29 POINT LEFT RIGHT buttons are also used as VOLUME ...

Page 17: ...to operate each adjustment on ON SCREEN MENU 2 MOVING POINTER 3 SELECT ITEM Move the pointer see below or adjust the value of item by pressing POINT button s on Top Control or on Remote Control Unit Select the item or set selected function by pressing SET button OPERATING ON SCREEN MENU Pointer is the icon on ON SCREEN MENU to select the item See the figures on the section FLOW OF ON SCREEN MENU O...

Page 18: ...UST MENU Used to adjust picture image Contrast Brightness Color Tint White balance R G B Sharpness Gamma Refer to P33 34 FOR VIDEO SOURCE Press MENU BUTTON while connecting to VIDEO input source Same function as Menu for PC source INPUT MENU Used to select input source either Video or Computer Refer to P30 PC ADJUST MENU Used to adjust parameters to match with input signal format Refer to P24 26 I...

Page 19: ...east 5 minutes before turning on projector again When WARNING TEMP Indicator continues to flash follow procedures below 1 Press POWER ON OFF button to turn a projector off and disconnect AC Power Cord from an AC outlet 2 Check Air Filters for dust accumulation 3 Clean Air Filters See AIR FILTER CARE AND CLEANING section on page 38 4 Turn a projector on again If WARNING TEMP Indicator should still ...

Page 20: ...after 4 seconds Message disappears after 4 seconds Zoom Focus ZOOM ADJUSTMENT FOCUS ADJUSTMENT 1 Press ZOOM button on Top Control or ZOOM button on Remote Control Unit The message Zoom is displayed 2 Press ZOOM button or POINT UP button to make image larger and press ZOOM button or POINT DOWN button to make image smaller 1 Press FOCUS button on Top Control or FOCUS button on Remote Control Unit Th...

Page 21: ... Menu icon Volume Press VOLUME button s on Top Control or on Remote Control Unit to adjust volume Volume dialog box appears button to increase volume and button for decreasing Mute Press MUTE button on Remote Control Unit to cut off sound To restore sound to its previous level press MUTE button again or press Volume button s Press POINT RIGHT button to increase volume and press POINT LEFT button f...

Page 22: ...cannot recognize connected signal as PC system provided in this projector Auto PC Adjustment function operates to adjust projector and the message Auto is displayed on SYSTEM Menu icon Refer to P24 When image is not provided properly manual adjustment is required Refer to P25 and 26 There is no signal input from computer Make sure the connection of computer and a projector is set correctly Refer t...

Page 23: ... 1152 x 864 SXGA 2 1280 x 1024 63 48 79 35 SXGA 3 1280 x 1024 36 00 87 17 Interlace SXGA 4 1280 x 1024 64 20 70 40 SXGA 5 1280 x 1024 62 50 58 60 SXGA 6 1280 x 1024 63 90 60 00 SXGA 7 1280 x 1024 63 34 59 98 SXGA 8 1280 x 1024 63 74 60 01 SXGA 11 1152 x 900 71 69 67 19 SXGA 12 1152 x 900 81 13 76 107 SXGA 13 1280 x 1024 63 98 60 02 SXGA 14 1280 x 1024 61 20 65 20 71 40 75 60 50 00 86 00 Interlace ...

Page 24: ... Remote Control Unit Move a red frame pointer to AUTO PC Adj icon and press SET button PC ADJUST MENU Auto PC Adj PC ADJUST Menu icon Store adjustment parameters Adjustment parameters from Auto PC Adjustment can be memorized in this projector Once parameters are memorized setting can be done just by selecting Mode in PC SYSTEM Menu P22 Refer to step 3 of MANUAL PC ADJUSTMENT section P26 NOTE Fine ...

Page 25: ...d frame pointer to PC ADJUST Menu icon 1 2 Press POINT DOWN button to move a red frame pointer to the item that you want to adjust and then press SET button Adjustment dialog box will appear Press POINT LEFT RIGHT button to adjust value Move a red frame icon to the item and press SET button PC ADJUST MENU PC ADJUST Menu icon Adjusts an image as necessary to eliminate flicker from the display Press...

Page 26: ...een Reset Store Closes PC ADJUST MENU Quit Other icons operates as follows 3 To store adjustment parameters move a red frame pointer to Store icon and then press SET button Move a red arrow pointer to any of Mode 1 to 5 that you want to store to and then press SET button Reset all adjust parameters on adjustment dialog box to previous figure Mode free Vacant Mode Shows values of Total dots Horizon...

Page 27: ...ard Picture adjustment improved in reproduction of halftones This adjustment is suitable for providing better image in brighter place High contrast User preset picture adjustment in IMAGE ADJUST Menu P28 Custom IMAGE SELECT Menu icon IMAGE LEVEL SELECT DIRECT Select image level among Standard High contrast and Custom by pressing IMAGE button on Remote Control Unit IMAGE button Standard High contra...

Page 28: ...r and POINT RIGHT button to adjust brighter From 0 to 63 Contrast Brightness Press either POINT LEFT button or POINT RIGHT button to obtain better balance of contrast From 0 to 15 Gamma 3 To store manually preset image level move a red frame pointer to Store icon and press SET button The message OK will appear Select Yes to store manual adjustment To set this manual adjustment select Custom by pre...

Page 29: ...ected on PC SYSTEM Menu P22 Wide cannot be selected when 720p HDTV is selected on PC SYSTEM Menu P22 True and Digital zoom cannot be selected when RGB is selected on PC SYSTEM Menu P22 This projector cannot display any resolution higher than 1280 X 1024 If your computer s screen resolution is higher than 1280 X 1024 reset the resolution to the lower before connecting projector The image data in ot...

Page 30: ...utton Move a pointer to the source and press SET button Source Select Menu VIDEO INPUT MENU INPUT button Video Computer Move a pointer to the source that you want to select and then press SET button 3 Projector automatically detects incoming Video signal and adjusts itself to optimize its performance When both Y jack and S VIDEO jack are connected S VIDEO jack has priority over Y jack When both Y ...

Page 31: ...ress SET button PAL SECAM NTSC NTSC4 43 PAL M PAL N Projector automatically detects incoming Video signal and adjusts itself to optimize its performance If projector cannot reproduce proper video image it is necessary to select a specific component video signal format among 480i 575i 480p 575p 720p 1035i and 1080i Auto COMPONENT VIDEO SIGNAL FORMAT VIDEO Y JACK OR S VIDEO JACK Y Pb Cb Pr Cr JACKS ...

Page 32: ...level being selected IMAGE SELECT MENU Normal picture level preset on this projector Standard Picture level adjusted for the picture with fine tone Cinema User preset picture adjustment in IMAGE ADJUST Menu P34 Custom IMAGE SELECT Menu icon IMAGE LEVEL SELECT DIRECT Select image level among Standard Cinema and Custom by pressing IMAGE button on Remote Control Unit Normal picture level preset on th...

Page 33: ...o obtain better balance of contrast From 0 to 15 Gamma Press SET button at this icon to dis play other items IMAGE ADJUST Menu icon Press POINT LEFT RIGHT buttons to adjust value Press POINT LEFT button to lighten color and POINT RIGHT button to deeper color From 0 to 63 Press POINT LEFT button or POINT RIGHT button to obtain proper color From 0 to 63 Color Tint Press POINT LEFT button to soften t...

Page 34: ...AV SYSTEM Menu P30 Move the red frame to the function and press SET button SCREEN MENU SCREEN Menu icon Provides image at a wide screen ratio of 16 9 Wide Provides image at a normal video aspect ratio of 4 3 Normal 3 To store manually preset image level move a red frame pointer to Store icon and press SET button The message OK will appear Select Yes to store manual adjustment To set this manual ad...

Page 35: ...e used in ON SCREEN MENU is selectable from among English German French Italian Spanish Portuguese Dutch Swedish Chinese Korean and Japanese Display This function decides whether to display On Screen Displays On shows all the On Screen Displays Off sets On Screen Displays disappeared except ON SCREEN MENU Power off message Set a red frame pointer to the item and press SET button Press POINT DOWN b...

Page 36: ...e control codes the factory set normal code Code 1 and the secondary code Code 2 This switching function prevents remote control operation mixture jam when operating several projectors or video equipment together When operating projector in Code 2 both projector and Remote Control Unit must be switched to Code 2 To change the code of Projector Set Remote control in the SETTING MENU to Code 2 To ch...

Page 37: ...l Unit as Wireless Mouse for a Personal Computer installation of the mouse driver not supplied is required Make sure that the mouse driver is properly installed in your computer And make sure that the mouse port or USB port of a Personal Computer is activated OPERATING WIRELESS MOUSE When controlling a PC mouse pointer operate Wireless Mouse with POINT button SET button and RIGHT CLICK button on W...

Page 38: ...r a service station 3 AIR FILTER Pull up and remove Turn off the projector and disconnect AC power cord from the AC outlet Turn the projector upside down and remove Air Filter by pulling the latches upward 1 2 Removable Air Filter prevents dust from accumulating on the surface of Projection Lens and Projection Mirror Should Air Filter become clogged with dust particles it will reduce Cooling Fans ...

Page 39: ...dered through your dealer When ordering Projection Lamp give the following information to the dealer Model No of your projector LV 7340 LV 7345 Replacement Lamp Type No LV LP11 610 293 2751 LAMP REPLACE COUNTER Be sure to reset Lamp Replace Counter when Lamp Assembly is replaced When Lamp Replace Counter is reset LAMP REPLACE Indicator stops lighting Turn projector on press MENU button and ON SCRE...

Page 40: ...r lights green again and a projector may be turned on by pressing Power ON OFF button Check WARNING TEMP indicator If this indicator flashes red a projector cannot be turned on See TURNING ON OFF PROJECTOR section on page 19 Check Projection Lamp Refer to page 39 Image is out of focus Adjust focus of a projector Make sure a projection screen is at least 5 3 1 6m from the projector Check Projection...

Page 41: ... advise you how to obtain service Remote Control Unit does not work Check the batteries Check ALL OFF switch on Remote Control Unit is set to ON Make sure nothing is between Infrared Remote Receiver and Remote Control Unit Make sure you are not too far from a projector when using Remote Control Unit Maximum operating range is 16 4 5m Make sure the code of Remote Control is set to conform to projec...

Page 42: ...Video Y Pb Cb Pr Cr and Mini DIN 4 pin x 1 S Video Projection Lens Throw Distance Projection Lamp Video Input Jacks RCA Type x 2 Audio Input Jacks VGA HDB 15 Terminal x 1 and DVI 24 pin x 1 Mini Jack stereo x 1 Mini DIN 8 pin x 1 RCA Type x 2 1 0 W RMS RGB Input Terminals Computer Audio Input Jack Control Port Connector Audio Output Jacks Internal Audio Amp 0 to 15 6 Feet Adjustment Power Source A...

Page 43: ...Pin Configuration CONTROL PORT CONNECTOR CLK DATA GND GND R X D GND RTS CTS T X D GND GND ADB GND GND PS 2 Serial ADB 1 2 3 4 5 6 7 8 RGB INPUT TERMINAL DIGITAL Terminal DVI 24 pin Connect the display output terminal of the computer to this terminal with DVI cable for Single Link T M D S not supplied 1 9 17 2 10 18 3 11 19 4 12 20 5 13 21 6 14 22 7 15 23 8 16 24 T M D S Data2 No Connect T M D S Da...

Page 44: ...taly CANON Schweiz A G Industriestrasse 12 8305 Dietlikon Switzerland CANON BENELUX N V Neptunusstraat 1 2132 JA Hoofddorp The Netherlands CANON BENELUX N V S A Bessenveldstraat 7 1831 Diegem Machelen Belgium CANON GmbH Zetschegasse 11 A 1232 Wien Austria CANON ESPANA S A C Joaquin Costa 41 28002 Madrid Spain CANON SVENSKA AB Stensätravägen 13 S 127 88 Skarholmen 2 Sweden CANON NORGE A S Hallagerb...

Reviews: