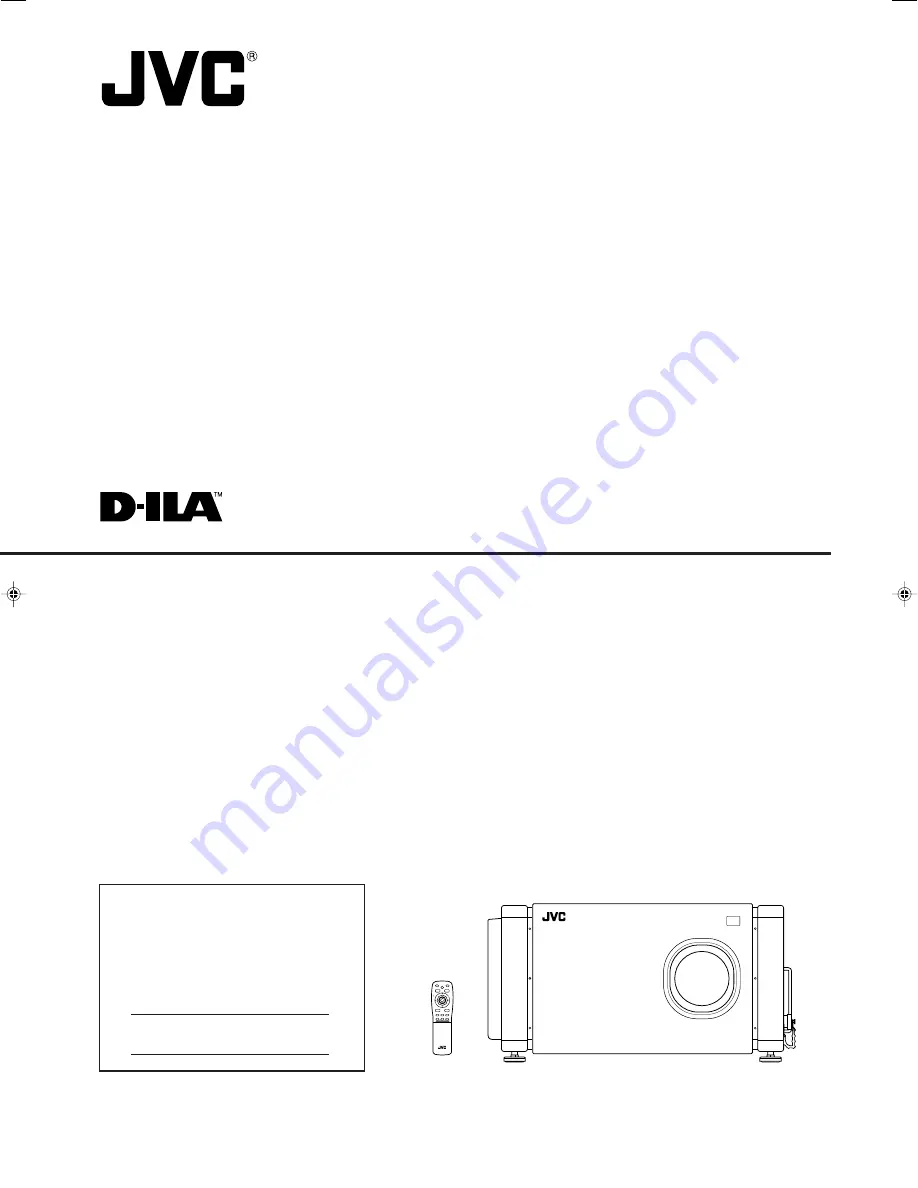
background image

DLA-M4000LU

INSTRUCTIONS


SUPER PROJECTOR

For customer Use:
Enter below the Serial No. which is located
on the side panel of the cabinet. Retain this
information for future reference.

Model No.      

DLA-M4000LU

Serial No.

MEN

U/E

N

T

E

R

QUICK

ALIGN.

AV HIDE

OPERATE

PRESET

AV

SHIFT

ZOOM

FOCUS

RM-M4100G  REMOTE  CONTROL  UNIT

LENS

U

T

+

D

W

RGB/COMPUTER

LENS

LOCK

UNLOCK

PAGE BACK

M4000LU  Cover

00.10.3, 10:58 AM

3

Summary of Contents for DLA-M4000LU - D-ila Projector

Page 1: ... No which is located on the side panel of the cabinet Retain this information for future reference Model No DLA M4000LU Serial No MENU E N T E R QUICK ALIGN AV HIDE OPERATE PRESET AV SHIFT ZOOM FOCUS RM M4100G REMOTE CONTROL UNIT LENS U T D W RGB COMPUTER LENS LOCK UNLOCK PAGE BACK ...

Page 2: ... the wall outlet before cleaning Do not use liquid cleaners or aerosol cleaners Use a damp cloth for cleaning Do not use attachments not recommended by the product manufacturer as they may be hazardous Do not use this product near water Do not use immediately after moving from a low temperature to high temperature as this causes condensation which may result in fire electric shock or other hazards...

Page 3: ...ates a need for service When replacement parts are required be sure the service technician has used replacement parts specified by the manufacturer or with same characteristics as the original part Unauthorized substitutions may result in fire electric shock or other hazards Upon completion of any service or repairs to this product ask the service technician to perform safety checks to determine t...

Page 4: ...e Power 25 2 Select the video input to be projected 26 3 Adjust the screen size 26 4 Adjust focus 27 For Operating Other Functions 27 Operating the Setting Menu 30 Making Basic Settings 30 Operating the Main Menu 31 Configuration of the Main Menu 31 Operating the Main Menu Basic Operation of the Main Menu 33 Changing the Color System 34 Changing the Language Display 35 Adjusting the Pixel Clock 36...

Page 5: ...ries The following accessories are included with this projector Check for them if any item is missing please contact your dealer Information on separately sold items Projection lens GL M4023SZ 3 1 7 1 zoom lens GL M4015S 1 5 1 fixed focus lens Video board PK G1101D A board to be used for adding composite video signal input and Y C S Video function to the projector ...

Page 6: ...Filter on page 59 Deposition of dirt on the filter works to reduce the cooling effect causing heat to build up inside which could cause a fire or malfunction 4 AC IN power input terminal This is the power input terminal where the supplied power cord is connected For details refer to page 23 5 MAIN POWER switch This is the main power switch When it is turned on the projector goes into stand by stat...

Page 7: ...ensor An additional remote sensor is provided on the front of the projector The effective operating distance of the remote control is 10 m from each of the sensors The effective operating range of angles is 50 left and right and 15 up and down q Exhaust vent for the light source lamp power supply Warm air comes out of this vent from the cooling fan for the light source lamp power supply This fan c...

Page 8: ... indicator ON After the light source lamp has been used for more than approx 900 hours Blinking Replace the lamp Ask the dealer where you purchased your projector to replace the lamp 5 TEMP indicator ON The temperature inside the projector has abnormally risen Note While the TEMP indicator is on during abnormal temperature the power is automatically cut off and an emergency mode is shown with the ...

Page 9: ...ent function works When a menu is shown button The value for the selected item increases button The value for the selected item decreases When no menu is shown Press the button and button at the same time QUICK ALIGNMENT is displayed on the screen and the quick alignment function works TRACKING PHASE H POS and V POS are automatically adjusted When the adjustment is finished the display goes off au...

Page 10: ...y 6 RGB OUT RGB output terminal D sub 3 row 15 pin The computer input signal projected on the screen is output A display unit can be used by connecting it to this terminal 7 RGB IN RGB input 2 terminal BNC These are input terminals for analog RGB signals vertical sync V signals and horizontal sync H signals composite signals Cs Devices which have analog RGB signal output terminals can be connected...

Page 11: ...nt While the main menu is displayed pressing MENU ENTER displays a details setting submenu if the selected item has a details setting For how to operate the buttons see page 13 5 RGB COMPUTER button Use this button to select the devices connected to the projector s RGB IN RGB input 1 and 2 input terminals Each time you press the button the selection changes as follows RGB 1 RGB 2 6 FOCUS button Us...

Page 12: ...e UNLOCK position w PRESET button While making adjustment on the main or setting menu use this button to reset the setting of the selected item to the factory set value This button works only for numerical settings and does not work for switching ON to OFF e QUICK ALIGN Quick Alignment button Use this button to automatically adjust TRACKING PHASE H POS and V POS of the projected video During the a...

Page 13: ... it off with a cloth otherwise the skin could become rough Do not put batteries into fire or try to recharge them Batteries run for six months to one year in normal use But the batteries supplied are for confirming operation and may not run that long When the remote control starts failing to work properly replace the batteries with new ones 1 2 2 2 2 3Close the back cover First fit the claw on the...

Page 14: ...e becomes equal to the outside temperature Allowable minimum space required CAUTIONS Since the projector weighs approx 70 kg 154 lbs be sure to use four or more people when lifting or moving it otherwise the projector could possibly drop causing personal injury and or damage to the projector Do not install the projector in the following places There is much water humidity or dust The projector may...

Page 15: ... easily lift and lower the projector from the shelf for mainte nance access 305 mm 12 or more Light energy decreases as it passes a glass So no more than one glass should be used in the projecting room Avoid using panes of glass as much as possible Pay attention to the angle of the glass and the installed angle of the projector so that the light emitted from the projector does not come back into t...

Page 16: ...n With the lens used you can adjust the projected image vertically using the setting menu or the remote control s SHIFT button U or D When using the projectors in a stack configuration stacked one over another make adjustment so that the picture of one projector overlays exactly that of another using the lens shift function For detailed adjustment procedures refer to Operating the Setting Menu pag...

Page 17: ...Py Px Py Px 0 000 31 968 10 000 26 609 20 000 19 421 30 000 9 747 1 000 31 503 11 000 25 980 21 000 18 581 31 000 8 599 2 000 31 234 12 000 25 333 22 000 17 716 32 000 7 410 3 000 31 528 13 000 24 666 23 000 16 824 33 000 6 178 4 000 30 018 14 000 23 980 24 000 15 905 34 000 4 900 5 000 29 491 15 000 23 274 25 000 14 958 35 000 3 573 6 000 28 949 16 000 22 548 26 000 13 981 36 000 2 193 7 000 28 3...

Page 18: ...ch Projection Distance m WIDE 3 1 TELE 7 1 Fixed Focus Lens 1 5 1 Zoom Lens In the shaded areas in the above graph the projected image may be partially distorted or missed out depending on the distance between the projector and the screen To project an image with no image distortion or missing we recommend you to use the projector in the areas defined with solid lines in the graph Lens Screen Size...

Page 19: ... R Y G B R H CS V Screen resolution standard name Horizontal frequency Vertical frequency Scanning method 640 400 PC 9801 24 8kHz 56 4Hz Non interlace 640 350 VGA1 31 5kHz 70 1Hz Non interlace 640 480 VGA3 31 5kHz 59 9Hz Non interlace 640 480 Macintosh 13 35 0kHz 66 7Hz Non interlace 640 480 VGA VESA 37 5kHz 75 0Hz Non interlace 800 600 SVGA1 37 9kHz 60 3Hz Non interlace 800 600 SVGA2 48 1kHz 72 2...

Page 20: ...ote control supplied you can select the channel for an input source and project an image optimal to the source HDTV 2 Computer 1 RGB switcher Computer 2 Projector HDTV 1 Note Video image displayed on devices whose image signal is unstable such as a video deck may be disturbed This can occur when the projectors is not yet adjusted at the time of installation or when a new device is added In such a ...

Page 21: ...onitor connector There are some note types which do not allow the computer s LCD to work if an external display is connected With such a note type the LCD display and external display output need to be switched To monitor connector RGB output devices Laser video disc player etc Computer cable separately available To RGB IN 2 Separate cable separately available To RGB IN 1 To RGB OUT To V To H Cs C...

Page 22: ...l you can control the projector For details consult an authorized your dealer or service center If you connect the cable terminal of the remote control and the REMOTE terminal of the projector with a remote control cable you can use the remote control in a place or at an angle from which the infrared beam cannot reach the projector Remote control cable To remote control cable terminal Remote contr...

Page 23: ...high be sure to insert the power plug directly into a wall outlet This projector requires a single phase 3 wire 220V 240V wall outlet To use the projector Remove the lens cap 220V single phase 1 Remove the power input terminal cover The cover is a screwed type Turn the cover in the direction of the arrow to remove 2 Insert the plug of the supplied power cord into a wall outlet and turn the plug to...

Page 24: ...ed from flashing for about 20 seconds to steady lighting If you press the OPERATE button immediately after the light source lamp lights it takes about 30 seconds for the lamp to go off To turn the lamp on again wait 20 seconds or more before pressing the OPERATE button When the TEMP indicator lights the power turns off automatically While the light source lamp is on if an abnormal temperature rise...

Page 25: ...U T D W RGB COMPUTER LENS LOCK UNLOCK PAGE BACK The following describes the basic procedure for normal use of the projector 1 Turn on the MAIN POWER switch of the projector ON The main power turns on and the STAND BY indicator comes on 2 Press the OPERATE button for one second or more Or press the remote control s OPERATE button for one second or more The OPERATE indicator comes on About 30 second...

Page 26: ...of the screen size zoom adjustment can also be made on the setting menu For operating the setting menu refer to Making Basic Settings on page 30 When a fixed focus lens is used you cannot operate the setting menu Press the AV button or the RGB button to switch the input Each time you press either button the selected input changes as follows When you press VIDEO Y C VIDEO YPBPR When you press COMPU...

Page 27: ...the quick alignment function The quick alignment function is used to automatically adjust set the screen settings of TRACKING PHASE H POS and V POS of computer system input video Use either the remote control s or projector s button When using the remote control unit Press the QUICK ALIGN button When using the projector Clear the menu display and press the projector s QUICK ALIGN and buttons at th...

Page 28: ...asic adjustments and settings TRACKING PHASE H POS V POS FOCUS and ZOOM of the video picture being projected after installation connection or after inputs are switched For operating the setting menu refer to Making Basic Settings on page 30 Press the projector s SETTING button The setting menu is displayed on the screen Note To change the menu language displayed English is set when the projector i...

Page 29: ...ry set value PAGE BACK AV HIDE PRESET AV HIDE button PRESET button Remote control unit To temporarily erase video image Press the AV HIDE button and video image will temporarily disappear from the screen Pressing the button again will resume the video image Press AV HIDE on the remote control Video image temporarily disappears from the screen To display CHANNEL on the screen While no menu is displ...

Page 30: ...er related inputs use of the quick alignment function allows automatic adjustment of TRACKING PHASE H POS and V POS See pages 30 36 and 37 1 Press the SETTING button of the projector The setting menu is displayed on the screen 2 Press the SETTING button to select the desired item The selected item is shown in magenta color Each time you press the button the selected item changes as follows TRACKIN...

Page 31: ...al Background color can be selected from BLUE CYAN BLACK GREEN MAGENTA RED and YELLOW COLOR TEMP Adjusts the color temperature of the image being projected Make adjustment when the image becomes reddish or bluish Color temperature can be set to LOW MIDDLE or HIGH ASPECT CHANGE Selects the vertical to horizontal ratio of the image projected The factory set ratio is 4 3 When projecting high vision v...

Page 32: ...ution of D ILA device the video image is then enlarged to a virtually full screen size of D ILA device and projected Resizing indication BACK COLOR Specifies the background color when there is no image signal Background color can be selected from BLUE CYAN BLACK GREEN MAGENTA RED and YELLOW COLOR TEMP Adjusts the color temperature of the video image being projected Make adjustment when the video i...

Page 33: ... display The selected input mode designation is displayed For input mode designation Y C VIDEO YPBPR RGB 1 and RGB 2 are available Source display The type of signal being input is displayed With this projector unique designations are previously given to specific horizontal and vertical frequencies This allows the source selected under SOURCE submenu item to be indicated The source setting can be s...

Page 34: ...M Dedicated to SECAM Memo About automatic signal identification AUTO is selected when shipped from the factory In AUTO the color system DECODER of the signal being input is automatically identified and indicated in Refer to the main menu display If operation in AUTO is unstable such as with color not being shown set to a dedicated color system in accordance with the color system of the signal bein...

Page 35: ...English is selected when the projector is shipped from the factory The languages in the menu display are the following six Japanese ENGLISH DEUTSCH German ESPAÑOL Spanish ITALIANO Italian and FRANÇAIS French However some text such as QUICK ALIGNMENT is displayed only in English Unique designations such as line display and source display are similarly indicated To finish the main menu press the PAG...

Page 36: ...factory set adjustment values press the remote control s PRESET button Tracking and phase are reset to the factory set adjustment values To return to the main menu press the PAGE BACK button To finish the main menu press PAGE BACK again To finish the menu display from the submenu display PIXEL CLOCK menu press PAGE BACK twice The screen shrinks laterally right to left 255 0 255 The screen extends ...

Page 37: ...ment values To return to the main menu press the PAGE BACK button To finish the main menu press PAGE BACK again To finish the menu display from the submenu display POSITION menu press PAGE BACK twice The screen moves to the left 255 0 255 The screen moves to the right 255 0 255 The screen moves upwards 120 0 120 The screen moves downwards 120 0 120 Adjustment item Button Adjustment content H POS V...

Page 38: ... 5 or mark to select the item to adjust The selected item displayed in text is shown in magenta color Remote control unit Main menu Notes The selected item is shown in magenta color Items shown in gray color cannot be operated or set in the current mode Adjustment items on the PICTURE menu are different when AV signals are input and when computer related signals are input To be continued on the ne...

Page 39: ...ress MENU ENTER To reset only the selected items ALL RESET excluded to the factory set adjustment value press the remote control s PRESET button The selected item is reset to the factory set adjustment value Gets darker 30 0 30 Gets brighter 30 0 30 Gets lower 30 0 30 Gets higher 30 0 30 Gets softer 0 7 Gets sharper 0 7 Gets softer 30 0 30 Gets deeper 30 0 30 Gets reddish 30 0 30 Gets greenish 30 ...

Page 40: ...d B GAIN has reached 30 minimum or 30 maximum CONTRAST cannot be adjusted to any higher value For example when R GAIN is 0 G GAIN is 5 B GAIN is 0 and CONTRAST is 0 increasing CONTRAST allows the other adjustment values to increase until R GAIN 25 G GAIN 30 and B GAIN 25 then CONTRAST becomes 25 and cannot be adjusted to any higher value To return to the main menu press the PAGE BACK button To fin...

Page 41: ...tems of the OPTIONS menu are displayed OPTIONS menu Remote control unit Main menu Notes The selected item is shown in magenta color Items shown in gray color cannot be operated or set in the current mode Items to be set adjusted are different when AV signals are input and when computer system signals are input 4Press MENU ENTER toward the 5 or mark to select an item to set adjust The selected item...

Page 42: ...e clamp pulse s position at the back porch BP or on the sink tip ST Normally the clamp is used at BP If with some PCs or workstations the screen becomes unstable such as being too dark or too bright try to switch to ST factory setting BP BP The clamp pulse is positioned at the back porch ST The clamp pulse is positioned on the sink tip BP ST When the number of pixels resolution sought by the input...

Page 43: ... Sets the length of sleep time which automatically brings the projector into stand by state You can select one of the following sleep times 10 minutes 20 minute 30 minutes 60 minutes and 0 Factory setting 0 minutes 10 20 30 60 0 If set to 0 minutes this function does not work Adjustment item Button Adjustment content BACK COLOR COLOR TEMP ASPECT CHANGE SLEEP TIME 2 3 2 3 2 3 2 3 To return to the m...

Page 44: ...er dedicated source is available When shipped from the factory the source settings are as follows Notes Depending on the signal from a device connected adjustment may be needed after a dedicated source is set If that is the case adjust the appropriate items When the input mode SOURCE is VIDEO or Y C and if AUTO is set the automatic detecting function may work possibly causing the screen to be inte...

Page 45: ...C 1 3 V G A V E S A S V G A 1 S V G A 2 M A C 1 6 X G A 1 X G A 2 M A C 1 9 M A C 2 1 S X G A 1 S X G A 2 S X G A 3 U S E R YPBPR AUTO HDTV 1080i Select AUTO When a source setting DEDICATED SOURCE is selected Under SOURCE shown at the top of the screen a dedicated source name is displayed in and the setting procedure is finished To finish the menu display press PAGE BACK twice The display goes bac...

Page 46: ...ext display is shown in magenta color 2 Press MENU ENTER down to set a source By having a source set the source for the projector switches to the setting registered to the user source SOURCE setup menu Notes The selected item is shown in magenta color Items shown in gray color cannot be operated or set in the current mode Items that can be set are different when video signals are input and when co...

Page 47: ...s not found among the registered sources the most approximate source of the sources registered will be selected 1 Press the MENU ENTER button The main menu appears on the screen 2 Press MENU ENTER toward the 5 or mark to select a submenu item CHANNEL The selected item text display is shown in magenta color 3 Press the MENU ENTER button to set A submenu item CHANNEL setup selection menu appears on ...

Page 48: ...menu If the NONE of LINE items is selected and MENU ENTER is pressed all the settings LINE SOURCE and SWNo of the CH already selected will be cleared erased If the selected channel is the same with the one in under the CHANNEL display at the top of the CHANNEL setup selection menu the registration or settings cannot be cleared Pressing PAGE BACK twice will bring you back to the main menu To finish...

Page 49: ...electedfrom SOURCEregistrationmenu The USER SOURCE registration menu appears Registered user sources are indicated with check marks PAGE BACK button MENU ENTER button 1 2 3 4 5 6 7 8 9 AUTO CHANNEL NTSC 480i PAL SECAM 777777777 777777777 777777777 777777777 777777777 777777777 777777777 777777777 10 77777 77777 77777 77777 77777 77777 77777 77777 Y C VIDEO 1 2 77 77 77 77 77 77 77 77 CH LINE SOURC...

Page 50: ...EL NTSC 480i PAL SECAM 777777777 777777777 777777777 777777777 777777777 777777777 777777777 777777777 10 77777 77777 77777 77777 77777 77777 77777 77777 Y C VIDEO 1 2 77 77 77 77 77 77 77 77 CH LINE SOURCE SWNo 2 Press the MENU ENTER button When the item is set a check mark is placed next to its user name which is registered as a SOURCE If you place the cursor on a SOURCE item with a check mark a...

Page 51: ...e number becomes smaller and pressing the button toward the 3 mark makes the number larger If you select 77 SWNo will be deselected If the selected channel is the same with the one in under the CHANNEL display at the top of the CHANNEL setup selection menu the registration or settings cannot be cleared 2 Press the PAGE BACK button to set When you press PAGE BACK the switcher number is set and the ...

Page 52: ...witched by using either a direct channel or the CHANNEL setup selection menu To switch channels using a DIRECT CHANNEL 1 Press PAGE BACK while no menu is displayed A channel No is displayed on the right upper area of the screen A channel number where lines and sources are registered is displayed If such a channel is not available AUTO will be selected 2 Press MENU ENTER toward the 5 or mark to sel...

Page 53: ...Press MENU ENTER toward the 5 or mark to select a submenu item CHANNEL The selected item text display is shown in magenta color 3Press the MENU ENTER button to set A submenu item CHANNEL setup selection menu appears on the screen PAGE BACK button MENU ENTER button CHANNEL setup selection menu Channel Line Source 1 2 3 4 5 6 7 8 9 AUTO CHA NNE L NTS C 480i PA L SECAM 777777777 777777777 777777777 7...

Page 54: ...display is shown in magenta color 3 Press the MENU ENTER button to set A submenu item USER SOURCE SETUP menu appears on the screen 7 is displayed for Nos which have no user source registered PAGE BACK button MENU ENTER button USER SOURCE setup menu A U T O E N G L I S H P I X E L C L O C K P O S I T I O N P I C T U R E O P T I O N S S O U R C E C H A N N E L U S E R S O U R C E S E T U P D I S P L...

Page 55: ...ENU ENTER button to set A submenu item USER SOURCE SETUP menu appears on the screen PAGE BACK button MENU ENTER button USER SOURCE setup menu 4Press MENU ENTER toward the 5 or mark to select the number No of the user name to be changed The selected item text display is shown in magenta color 5Press MENU ENTER toward the 3 mark to select the USER NAME The selected item text display is shown in mage...

Page 56: ...to select characters to enter You can select any characters from A to Z 0 to 9 _ and space 3 Repeat steps 1 and 2 to enter the user name Up to 9 characters can be entered 4 Press MENU ENTER toward the 5 or mark to select positions where to enter characters The display returns to the USER SOURCE SETUP screen To delete a user name overwrite the user name with spaces However if this user name area is...

Page 57: ... menu appears on the screen 2 Press MENU ENTER toward the 5 or mark to select a submenu item DISPLAY SIZE The selected item text display is shown in magenta color 3 Press the MENU ENTER button to set A submenu item DISPLAY SIZE adjustment menu appears on the screen PAGE BACK button MENU ENTER button DISPLAY SIZE adjustment menu 4Press MENU ENTER toward the 5 or mark to select an item to be adjuste...

Page 58: ...tment value 640Ô1360 V PIXEL Adjusts the number of vertical effective dots Adjustment value 350Ô1024 H CENTER Adjusts the horizontal display position Adjustment value 0Ô639 V CENTER Adjusts the horizontal display position Adjustment value 1Ô511 A U T O E N G L I S H P I X E L C L O C K P O S I T I O N P I C T U R E O P T I O N S S O U R C E C H A N N E L U S E R S O U R C E S E T U P D I S P L A Y...

Page 59: ...er screws Using a Phillips screwdriver remove the six screws fixing each filter Two filters are used one on the right side and the other on the back of the projector 3 Remove the filters To remove the filter pinch the center portion of the filter with your fingers and pull it toward you The filter is held by four tabs There are two filters used Cleaning and Replacing the Filter The filters should ...

Page 60: ...sing a vacuum cleaner Since the filter is soft it may be sucked into the vacuum cleaner or damaged The light source lamp has its service life It is approximately 1000 hours When the light source lamp approaches the end of its service life its degradation progresses rapidly When the lamp s used hours exceed 900 hours the projector s LAMP indicator comes on Also at the start of projection lamp energ...

Page 61: ...ur if the power is shut down due to a power failure etc Insert the power cord plug firmly Remove the lens cap Has the projector been moved from its installed place Wait until the lamp has cooled down Turn on the main power sand let the fans cool the lamp About 10 minutes later press OPERATE on the remote control Turn on the MAIN POWER switch Check the lamp use time on the menu and if the lamp life...

Page 62: ...cifications of both signal being input and video input card Are specifications of the signal being input matching those of the video input card Check cable connections Is the input cable connected correctly The upper part of the video image bows or distorts While computer system signal is input isn t a sync signal for composite sync Cs or G on sync being input Is the source setting correctly selec...

Page 63: ... consult the dealer where you purchased the projector or a local service center Is the shift center lock pin for shipment left attached Match the polarities of batteries correctly to and to Replace with new batteries Use the remote control unit at a nearer point Remove any shielding objects Remote control unit does not work Are batteries exhausted Are batteries installed correctly Is there a shiel...

Page 64: ...installed Y C 1 line mini DIN 4 pin 1 With the video board separately available installed Y luminance signal 1V p p 75Ω negative sync C chroma signal 0 286V p p burst signal 75Ω NTSC 0 3V p p burst signal 75Ω PAL VIDEO 1 line BNC 1 With the video board separately available installed Composite video signal 1V p p 75Ω negative sync Y PB B Y PR R Y 1 line BNC 3 Component Y B Y R Y signals Y 1V p p 75...

Page 65: ...ature 5 C to 40 C 41 F to 104 F Allowable relative humidity 90 or less no condensation Allowable storage temperature 5 C to 60 C 23 F to 140 F Maximum outside dimensions Approx W 747 mm H 420 mm D 793 mm 29 7 16 16 9 16 31 1 14 excluding protruding parts Weight Approx 71kg 156 2 lbs Accessories Refer to page 5 Design and specifications are subject to change without notice D ILA devices are manufac...

Page 66: ...9 2 3 8 30 1 3 16 30 1 3 16 368 14 1 2 420 16 9 19 DTV format signals The following are DTV format signals that can be input DTV Formats 480i 480p 720p 1080i Signal Standard ITU R BT 601 4 SMPTE 293M SMPTE 296M SMPTE 274M Scanning Line Frame 525 525 750 1125 Effective Samples x Scanning Lines 720 x 485 720 x 483 1280 x 720 1920 x 1080 Samples Total Line 858 858 1650 2200 Field Frequency Hz 59 94 5...

Page 67: ... Pin number Signal name 1 Red 2 Green 3 Blue 4 N C 5 N C 6 GND Red 7 GND Green 8 GND Blue Pin number Signal name 9 N C 10 GND SYNC 11 GND 12 N C 13 H SYNC 14 V SYNC 15 N C Specifications Cont Pin assignment Specifications for terminals Y C terminal Pin number Signal name 1 GND Y 2 GND C 3 Y 4 C 1 2 3 4 5 6 7 8 9 10 11 12 13 14 15 3 5 6 9 4 8 2 1 7 1 2 3 4 ...

Page 68: ...DLA M4000LU SUPER PROJECTOR 2000 VICTOR COMPANY OF JAPAN LIMITED Printed in Japan LCT0634 001D 1000 I V Ni VICTOR COMPANY OF JAPAN LIMITED ...

Reviews: