background image

Serial Number

IMPORTANT NOTE TO THE CUSTOMER:

In the space below, enter the serial number for your

television (located on the rear of the television cabinet).

Staple your sales receipt or invoice to the inside cover of this guide.

Keep this user's guide in a convenient place for future reference.

Keep the carton and original packaging for future use.

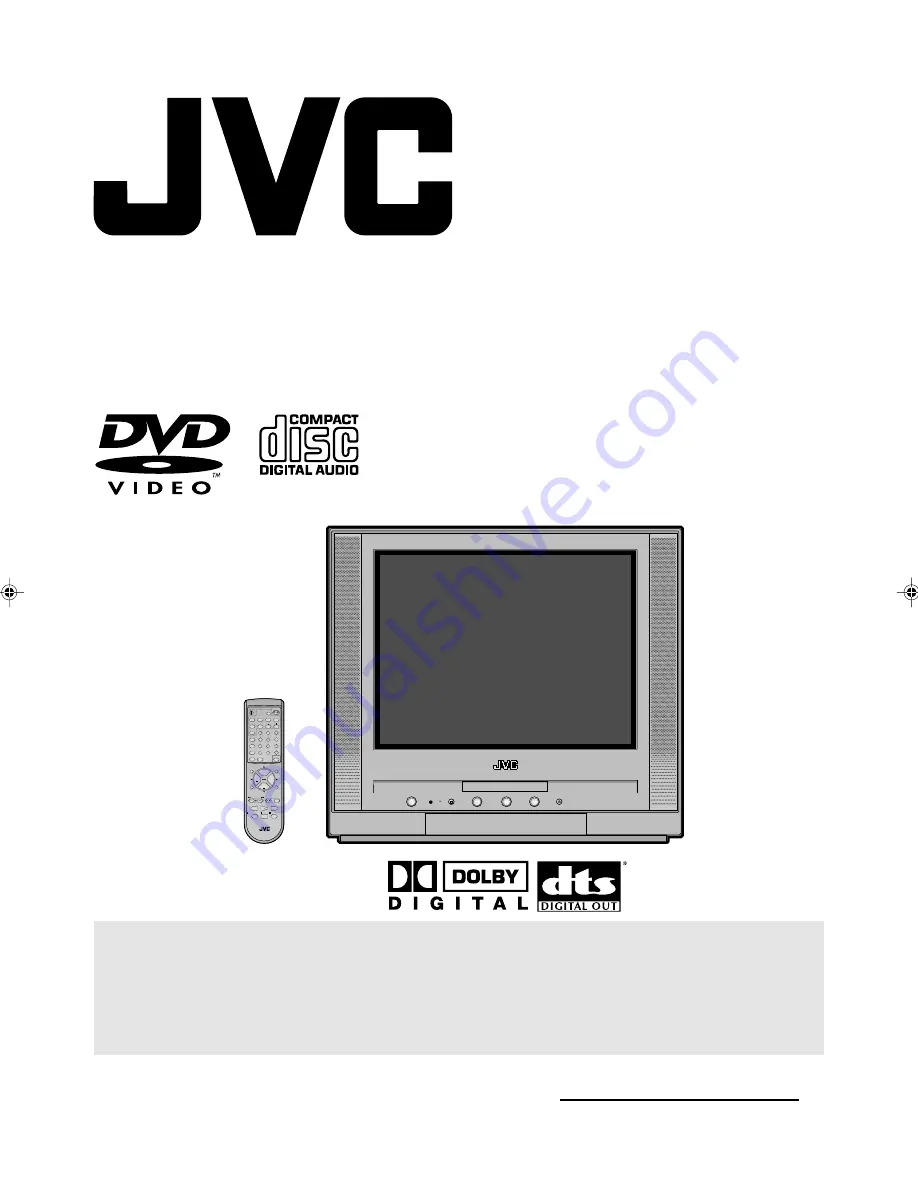
For model:

AV-20FD22

TV/DVD COMBO
USER'S GUIDE

®

POWER

RM-C394G

1

2

3

DISPLAY

7

8

9

4

5

6

SLEEP TIMER

0

TV RETURN

LIGHT

TV CATV

PAUSE/STILL

OPEN/CLOSE

TV / DVD

RETURN

AUDIO

REPEATA-B

CANCEL

SLOW

ZOOM

TITLE

AUDIO

ANGLE

SUBTITLE

INPUT

C.C.

DVD SETUP

SELECT
/ENTER

TV MENU

MUTING

DVD

CONTROL

PLAY MODE

PREV   NEXT

TV/DVD DVD MENU

F.SEARCH

PLAY

B.SEARCH

STOP

+

CH

VOL

VOL

+

CH

 5870201AE Cover

5/4/01, 5:31 PM

1

Summary of Contents for AV-20FD22

Page 1: ...a convenient place for future reference Keep the carton and original packaging for future use For model AV 20FD22 TV DVD COMBO USER S GUIDE POWER RM C394G 1 2 3 DISPLAY 7 8 9 4 5 6 SLEEP TIMER 0TV RETURN LIGHT TV CATV PAUSE STILL OPEN CLOSE TV DVD RETURN AUDIO REPEATA B CANCEL SLOW ZOOM TITLE AUDIO ANGLE SUBTITLE INPUT C C DVD SETUP SELECT ENTER TV MENU MUTING DVD CONTROL PLAY MODE PREV NEXT TV DV...

Page 2: ...l triangle is intended to alert the user to the presence of important operating and maintenance servicing instructions in the literature accompa nying the appliance CAUTION TO REDUCE THE RISK OF ELECTRIC SHOCK DO NOT REMOVE COVER OR BACK NO USER SERVICEABLE PARTS INSIDE REFER SERVICING TO QUALIFIED SERVICE PERSONNEL WARNING This equipment has been tested and found to comply with the limits for a C...

Page 3: ...not be blocked or covered The openings should never be blocked by placing the unit on a bed sofa rug or other similar surface This unit should never be placed near or over a radiator or heat source This unit should not be placed in a built in installations such as a bookcase or rack unless proper ventilation is provided or the manufacturer s instructions have been adhered to 10 POWER SOURCES This ...

Page 4: ...ng or removing covers may expose you to dangerous voltage or other hazards Refer all servicing to qualified service personnel 19 DAMAGE REQUIRING SERVICE Unplug this unit from the wall outlet and refer servicing to qualified service personnel under the following conditions a When the power supply cord or plug is damaged b If liquid has been spilled or objects have fallen into the unit c If the uni...

Page 5: ...sonal injury and product malfunction 30 NOTE TO CATV SYSTEM INSTALLER This reminder is provided to call the CATV system installer s attention to Article 820 40 of the NEC that provides guidelines for proper grounding and in particular specifies that the cable ground shall be con nected to the grounding system of the building as close to the point of cable entry as practical TO USE AC POWER SOURCE ...

Page 6: ... 48 kHz 16 bit through 96 kHz 20 bit exceeds audio CD sound Convenience Features Frame Advance The PAUSE STILL moves one frame at a time Slow Motion The SLOW moves you back and forth through the program by 4 steps of 1 7 1 2 times Repeat Playback You can repeat chapter track or title between two selected points Program Playback Audio CD You can play back tracks in programmed sequences Zoom DVD onl...

Page 7: ...ion Parental control setting 35 To change the parental level 36 Temporary disabling of rating level by DVD disc 37 Setting the aspect ratio of TV screen 38 Setting on screen display Status display of Disc 39 Setting menu language 40 Setting subtitle language 41 Setting audio soundtrack language 42 Language code list 43 Connection to other equipments 44 Problems and troubleshooting 46 Reception dis...

Page 8: ...nctions Front STOP button Rear AC power cord PLAY button OPEN CLOSE button Disc tray POWER button AUDIO L R VIDEO OUT jacks SERVICE jack COAXIAL DIGITAL AUDIO OUT jack AUDIO L R VIDEO IN jacks LINE 1 RF IN jack Headphone Jack CHANNEL buttons VOLUME buttons AUDIO L R VIDEO IN jacks LINE 2 Power indicator Remote sensor HOW TO OPEN THE FRONT DOOR PREVIOUS button NEXT button ...

Page 9: ... of TV setup 13 17 22 24 DVD SETUP Display menu of DVD setup 26 35 36 38 42 SELECT ENTER Enter information in the menu 13 19 21 26 Select option in the menu 27 29 31 34 42 PREV NEXT Skip chapter to forward or reverse direction 28 TV DVD Switch between the TV mode DVD mode 10 26 DVD MENU Display menu of DVD software 34 B SEARCH F SEARCH Fast Forward Review playback 28 PLAY Playback 27 28 31 34 OPEN...

Page 10: ... manufacturer s directions 6 When you change the batteries try to complete the task within three minutes If you take longer than three minutes the remote control codes for your Cable Box may have to be reset see page 50 Before you can operate the remote control you must first install the batteries included See Inserting Batteries on this page above for instructions Press the POWER button to turn t...

Page 11: ...VHF 75 ohm Separate VHF UHF Antennas 75 ohm VHF Cable and 300 ohm UHF Twin lead Wires Antenna Jack Antenna Jack Antenna Jack Combiner not supplied Antenna Jack Combiner Connect the 75 ohm Cable from the Combination VHF UHF Antenna to the Antenna Jack If your Combination VHF UHF Antenna has a 300 ohm Twin lead Wire the use of the 300 75 ohm Matching Transformer may be necessary Connect the UHF 300 ...

Page 12: ...RS TO UNSCRAMBLED BASIC CABLE TV SERVICE WITH SCRAMBLED PREMIUM CHANNELS Splitter B A Incoming 75 ohm CATV Cable A B Switch 75 ohm Cable to TV VCR Incoming 75 ohm CATV Cable 75 ohm Cable to TV VCR Converter Descrambler UHF VHF UHF VHF Antenna Jack Antenna Jack Antenna Jack Converter Descrambler This TV DVD has an extended tuning range and can tune most cable channels without using a Cable TV Conve...

Page 13: ... the screen when you press the MENU button initially Select the language you prefer first then proceed with the other menu options Press TV MENU The TV menu screen will appear Press TV MENU until the MENU screen is cleared Press or to select the LANGUAGE option then press or button 1 2 3 Press or until the SET UP menu appears To turn on the TV DVD press POWER The Power indicator will light If the ...

Page 14: ...the TV CATV menu option is in the CATV position channels can be selected as follows TO SELECT CATV CHANNELS 1 9 Press 0 twice then 1 9 as needed Example to select channel 2 press 002 10 12 Press 0 then the remaining 2 digits Example to select channel 12 press 012 13 99 Press the 2 digits in order Example to select channel 36 press 36 100 125 Press the 3 digits in order Example to select channel 12...

Page 15: ...18 To memorize channels TV RETURN This button allows you to go back to the last channel selected by pressing TV RETURN Press TV RETURN again to return to the last channel you were watching SLEEP TIMER To set the TV DVD to turn off after a preset amount of time press SLEEP TIMER on the remote control The clock will count down 10 minutes for each press of SLEEP TIMER 120 110 10 0 After the sleep tim...

Page 16: ...ined describe titles words in foreign languages or words requiring emphasis Words that are sung usually appear enclosed by musical notes For television programs broadcasting with Closed Captions look in your TV guide for the Closed Captions symbol CC When selecting Closed Captions the captioning will be delayed approximately 10 seconds If no caption signal is received no captions will appear but t...

Page 17: ... menu appears This TV DVD is equipped with a channel memory feature which allows channels to skip up or down to the next channel set into memory skipping over unwanted channels Before selecting channels they must be pro grammed into the TV DVD s memory In addition to normal VHF and UHF channels this TV DVD can receive up to 113 Cable TV channels To use this TV DVD with an antenna set the TV CATV m...

Page 18: ... AUTO CH MEMORY MENU TV CATV ADD DELETE CATV ADD AUTO CH MEMORY MENU TV CATV ADD DELETE CATV ADD AUTO CH MEMORY Press TV MENU in the TV mode The TV menu screen will appear Press or until CHANNEL SETUP menu appears AUTOMATIC MEMORY TUNING Press or to select the AUTO CH MEMORY then press or The TV will begin memorizing all the channels available in your area Press TV MENU until the MENU screen is cl...

Page 19: ...menu screen will appear Enter the password 4 digits using Direct Channel Selection 0 9 then press ENTER Enter the same password again for the safety then press ENTER Now the password was registered and V Chip setting menu will appear on the display NOTES TO REGISTER PASSWORD An age limitation can be set to forbid children to see and hear violent scenes or pictures for adults etc The TV DVD corresp...

Page 20: ...ce suggested NC 17 17 years old and above X Adult only Press or to select the CAN ENG RATING then press or to select desired rating To use after the TV is protected When the program applied to the V Chip setting is received enter the password Protection can be can celled 4 E Exempt Exempt programming includes news sports documentaries and other information program ming talk shows music videos and ...

Page 21: ...LANGUAGE IDIOMA LANGUE TO CHANGE PASSWORD Press TV MENU in the TV mode The TV menu screen will appear Press or until SETUP menu appears Press or to select the V CHIP SET then press or Press or to select CHANGE PASSWORD then press or Enter the new password using Direct Channel Selection 0 9 then press ENTER Enter the same password again for safety then press ENTER Press TV MENU repeatedly to return...

Page 22: ...tory Press or to select the item you want to adjust 1 2 3 4 Press or to adjust the setting 5 After your desired setting press TV MENU until the MENU screen is cleared BRIGHTNESS CONTRAST COLOR TINT SHARPNESS increase brightness increase contrast be brilliant color be greenish color decrease brightness decrease contrast be pale color be reddish color makes picture softer makes picture clearer POWER...

Page 23: ...e control to change to mono sound The noise should be eliminated Press it again to return to the stereo sound LISTENING TO SAP SEPARATE AUDIO PROGRAM TO SELECT DESIRED SOUND MONO SAP BROADCASTING SAP SOUND MONO SOUND MAIN STEREO SOUND MAIN MONO SAP SOUND MONO STEREO SAP BROADCASTING MONO SAP SOUND MAIN MONO SOUND MAIN SAP SOUND Stereo and separate audio program SAP STEREO SAP CH 013 STEREO CH 013 ...

Page 24: ...ment Sound controls are factory preset but you can adjust them individually as follows BASS Press or to adjust the bass sound TREBLE Press or to adjust the treble sound BALANCE Press or to obtain an equal sound level from both speakers Press or until the AUDIO menu appears Press TV MENU in the TV mode The TV menu screen will appear Press or to select the item you want to adjust 1 2 3 4 Press or to...

Page 25: ... the tracks Removing Disc from Case Be sure to hold the edge of disc Do not touch the surface of the disc Pick up the disc gently from the case Do not scratch the disc Do not get dirt on the surface of the disc Do not stick a label or adhesive tape on the disc Do not drop or bend the disc Storing Disc Store the disc in the case to avoid risk of scratches dirt or damage Do not leave disc exposed to...

Page 26: ...t Note When connecting to other equipment unplug the unit from the AC outlet Press POWER on the unit or on the remote control to turn on the unit The POWER indicator will light When using an amplifier switch on the amplifier Press and then press or to select desired language e g English then press ENTER 2 Press DVD SETUP in the stop mode NOTE To make SETUP screen disappear press DVD SETUP or RETUR...

Page 27: ... the stopped point 5 To stop the playback press STOP Then press OPEN CLOSE on the unit The disc tray opens Remove the disc and press OPEN CLOSE on the unit then press POWER The disc tray closes automatically and unit turns off Note If a non compatible disc is loaded Incor rect Disc Region Code Error or Paren tal Error will appear on the TV screen ac cording to the type of loaded disc In this case ...

Page 28: ...AY Press PAUSE during still playback One frame is advanced each time you press PAUSE Frame Advance To resume normal playback press PLAY To resume the still playback press PAUSE Press SLOW Reverse or SLOW Forward during normal playback or still playback Each press of SLOW will change the speed of the slow x1 2 x1 4 x1 6 x1 7 Slow motion Playback To resume normal playback press PLAY Locating a chapt...

Page 29: ...back in the zoom mode However you cannot zoom in during the Slow or Search playback Zooming This unit will allow you to zoom in on the frame image You can then make selections by switching the position of the frame In the zoom mode press ZOOM repeatedly to return to a 1 1 view Off 1 Press ZOOM during play back The centre part of the image will be zoomed in Each press of ZOOM will change the ZOOM 1...

Page 30: ...the A B Repeat Playback the ANGLE feature will not operate You may not be able to set A B Repeat depending on the scenes of the DVD A B repeat does not work with an inter active DVD Repeat playback Press PLAY MODE during playback or stop mode Press PLAY MODE again to make the screen disappear Press PLAY to start Repeat playback To resume normal playback select Repeat Off Title Chapter Track Playba...

Page 31: ... to select Play Mode then press to select program 3 Press or to selecttheprogrammingpo sition UseNumberedbut tons 0 9 toinputtheTrack numbers To program others re peat Step 3 4 Press or to select Program Playback and press ENTER The programmes you se lected will start to playback in the order To return to normal play back selectPlayMode Off To cancel program play select Quit and press ENTER The pr...

Page 32: ...anguage You can select the language when you play a multilingual disc 1 Press AUDIO during play back 2 Note If the desired language is not heard after pressing the button several times the language is not recorded on the disc Changing soundtrack language is can celled when you open the disc tray or turn the power off The initial default lan guage or available language will be heard if the disc is ...

Page 33: ... is cancelled when you open the disc tray or turn the power off Depending on the DVD you may not be able to turn the subtitles on even if they are recorded on it Depending on the DVD you may not be able to turn the subtitles off Depending on the DVD you may not be able to change the subtitles even if multilingual subtitles are recorded on it While playing the DVD the subtitle may change when you o...

Page 34: ...k of the selected title will start 1 Press TITLE during playback Title menu appears on the screen 2 Press or to select the desired title 3 Title Selection Some DVDs allow you to select the disc contents using the menu When you play back these DVDs you can select the sub title language and sound track language etc using the DVD menu Press ENTER The menu continues to another screen Repeat steps 2 an...

Page 35: ...n press or until the level you re quire appears Level 1 DVD software for adults cannot be played back Level 8 All DVD software can be played back Select from the level 1 to level 8 The limitation will be more severe as the level number is lower Press DVD SETUP or RETURN to remove the parental control screen Note Ifeachsetup P 35 42 hasbeen com pleted theunitcanalwaysbeworked under the same conditi...

Page 36: ...re Parental Other To change the parental level Press number buttons 0 9 to enter the password you have stored 1 Press DVD SETUP in the stop mode or No Disc Press or to select Parental Then press or ENTER 2 Press ENTER The rating is now unlocked 3 Note Do not forget the password If you forget the password contact the dealer that you purchased the unit from Password Parental 5 Enter Setup Return Lan...

Page 37: ... setting screen will disappear Press OPEN CLOSE to remove the disc 1 Load a DVD disc and press PLAY or OPEN CLOSE on the unit see P 27 2 IftheDVDdischasbeendesignedtotemporarilycancelthe Rating level the screen which follows the Reading screen willchange dependingonwhichdiscisplayed Ifyouselect YES with the SELECT key Your disc exceeds The parental control level screen will then appear 3 Enter the...

Page 38: ...s or to select Picture 3 To make SETUP screen disappear press DVD SETUP or RETURN while the SETUP screen is being displayed 4 Note If the DVD disc is not formatted in the pan scan style it displays 4 3 style You can select the aspect ratio for your TV 4 3 Select this mode when connecting to a conventional TV When playing back a wide screen DVD disc it displays the wide picture with black bands at ...

Page 39: ... or ENTER to select ON or OFF 1 Press DVD SETUP in the stop mode or No Disc 2 Press or to select Picture 3 To make SETUP screen disappear press DVD SETUP or RETURN while the SETUP screen is being displayed 4 On screen display can be switched on or off when you press the buttons ON On screen displays appear when you press the buttons factory setting OFF On screen displays do not appear when you pre...

Page 40: ...ubtitle Audio English English English English Francais Espanol Other Enter Setup Return 0 9 Cancel Language Picture Parental Other Setting menu language Press or ENTER Press or to select your desired language then press ENTER 1 Press DVD SETUP in the stop mode or No Disc 2 Press or to select Language 3 To make SETUP screen disappear press DVD SETUP or RETURN while the SETUP screen is being display...

Page 41: ... Francais Espanol The subtitle is displayed with the selected language if it is recorded on the disc Setting subtitle language Press or ENTER Press or to select your desired language then press ENTER 1 Press DVD SETUP in the stop mode or No Disc 2 Press or to select Language 3 To make SETUP screen disappear press DVD SETUP or RETURN while the SETUP screen is being displayed 4 Note If the selected ...

Page 42: ...isc 2 Press or to select Language 3 To make SETUP screen disappear press DVD SETUP or RETURN while the SETUP screen is being displayed 4 Note If the selected language is not recorded on the disc the original language will be heard The same audio soundtrack language can always be selected by your unit even if you replace the disc or turn the power off English Francais Espanol The language you have ...

Page 43: ...1436 Hindi 1819 Norwegian 2425 Thai 3018 Bihari 1218 Hungarian 1831 Oriya 2528 Tibetan 1225 Breton 1228 Icelandic 1929 Panjabi 2611 Tigrinya 3019 Bulgarian 1217 Indonesian 1924 Pashto Pushto 2629 Tonga 3025 Burmese 2335 Interlingua 1911 Persian 1611 Turkish 3028 Byelorussian 1215 Irish 1711 Polish 2622 Turkmen 3021 Cambodian 2123 Italian 1930 Portuguese 2630 Twi 3033 Catalan 1311 Japanese 2011 Que...

Page 44: ...he model and features of each component Check the Owner s Manual provided with each component for the location of video and audio inputs and outputs To Audio L Input To Audio R Input AUDIO cord not supplied Amplifier Rear of TV DVD Audio R Output Audio L Output NOTE When you make the connections above do not set DOLBY DIGITAL to DOLBY DIGITAL MPEG to MPEG to ON on the AV Amplifier If you do a loud...

Page 45: ...er To playback from the camcorder connect the camcorder to the TV DVD as shown 3 To connect the TV to a TV Game VIDEO L MONO AUDIO R LINE 2 IN Front of TV DVD Audio Video cord not supplied To Audio Video OUT VIDEO IN AUDIO IN L AUDIO IN R UHF VHF OUT LINE 1 IN VIDEO L R MONO DIGITAL AUDIO COAXIAL AUDIO VCR VIDEO IN AUDIO IN L AUDIO IN R Rear of TV DVD To Audio Video OUT LINE 1 NOTE In the DVD mode...

Page 46: ...na Check for sources of possible interference Picture wobbles or drifts Station or CATV experiencing problems tune to another station Make sure channels are set into memory CATV company is scrambling signal Check antenna orientation No CATV reception Check all CATV connections Set TV CATV menu option to the CATV mode Station or CATV system problems try another station Make sure TV CATV menu option...

Page 47: ...playback search slow motion play repeat play or program play etc cannot be performed Some discs may not do some of the functions No 4 3 16 9 picture The setup does not match your TV No on screen display Select Display On No surround sound The setup does not match your stereo system The remote control does not function Aim at the remote control at the remote sensor Operate within Approx 5 Meters or...

Page 48: ...ools and appliances such as drills or hair dryers SNOW If the TV VCR is located far from the TV station in a fringe reception area where the signal is weak small dots may appear in the picture If the signal is extremely weak the installation of a larger external antenna may be necessary RADIO FREQUENCY INTERFERENCE RFI Caused by two way radios this type of interference produces moving ripples or d...

Page 49: ...hes 515 mm Depth 19 1 8 inches 483 mm Type 20 508 mm diagonal Quartz PLL Frequency Synthesized VHF 2 13 UHF 14 69 CATV 14 36 A W 37 59 AA WW 60 85 AAA ZZZ 86 94 86 94 95 99 A 5 A 1 100 125 100 125 01 5A VHF UHF In 75 ohm coaxial 3 76 mm 8 ohm x 2 2 5W 2 5W NTSC 1 DVD 12cm 8cm 2 CD 12cm 8cm DVD 4Hz 22KHz CD 4Hz 20KHz 90dB 0 01 Below Measurable Level 96dB Inputs Video RCA 1 Vp p 75ohm Audio RCA 8 dB...

Page 50: ...te Search Codes Function 1 Slide the 2 Way Mode Selector switch to CATV 2 Press the TV POWER and TV RETURN buttons Hold for at least three seconds and release 3 Press TV POWER see if the CATV or Satellite box responds 4 If there was a response press TV RETURN The operating codes are now set If there was no response repeat Step 3 If you repeat Step 3 a total of 52 times without a response use the r...

Page 51: ...51 MEMO ...

Page 52: ...Printed in Thailand 5870201A 01 03 K JVC COMPANY OF AMERICA Division of U S JVC CORP 1700 Valley Road Wayne New Jersey 07470 JVC CANADA INC 21 Finchdene Square Scarborough Ontario Canada M1X 1A7 ...

Reviews: