background image

COLOR TELEVISION
USER'S GUIDE

For models:

AV-20320

AV-20321

C-20310
C-13310

C-13311

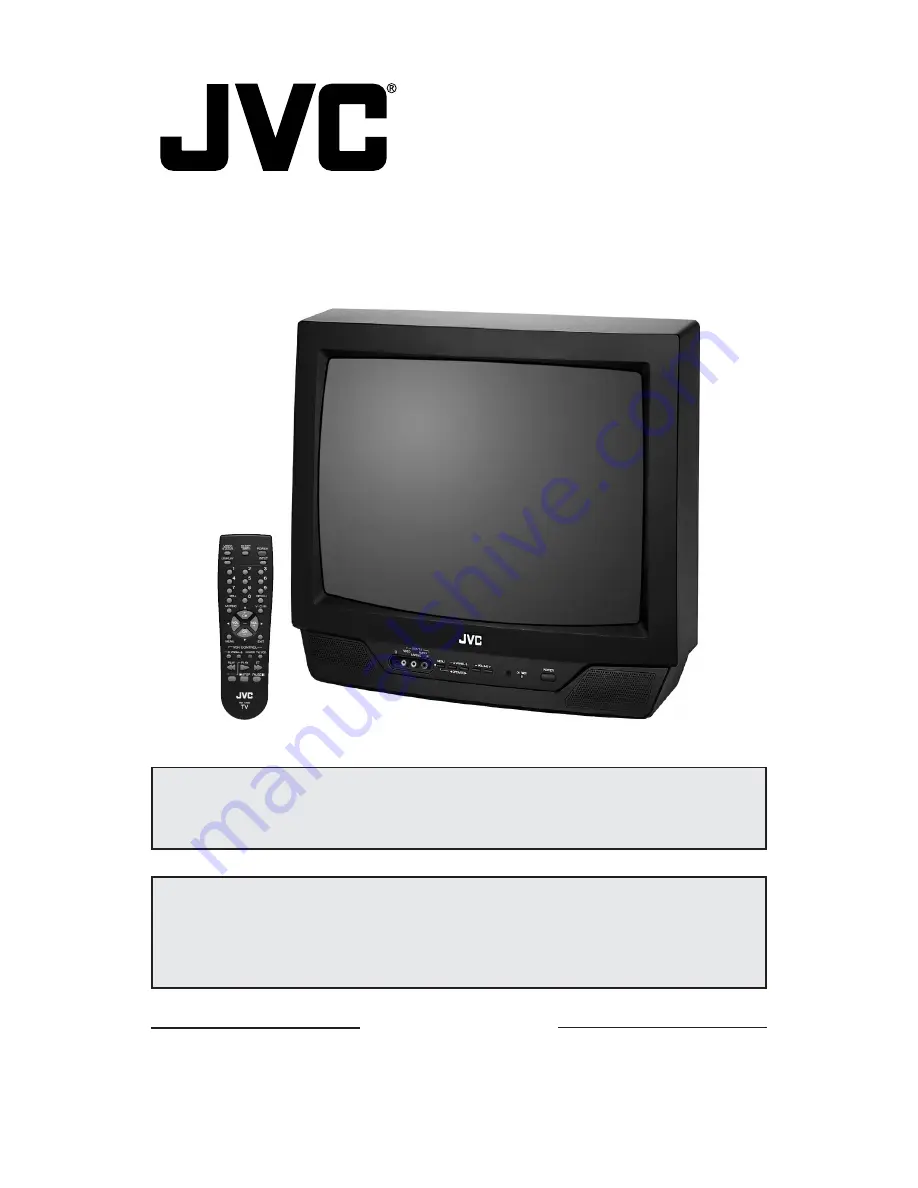
Illustration of AV-20320 and RM-C205

IMPORTANT NOTE TO THE CUSTOMER

In the space below, enter the model number and serial number of your television (located at

the rear of the television cabinet). Staple your sales receipt or invoice to the inside cover of

this guide. Keep this user's guide in a convenient place for future reference. Keep the carton

and original packaging for future use.

Model Number

Serial Number

LCT1146-001B-A

0102-TN-FAA-JIM

PLEASE NOTE

This web based PDF File for this instruction book is not an exact replica

of the instruction book that comes with the TV.

Summary of Contents for AV 20321

Page 1: ...n located at the rear of the television cabinet Staple your sales receipt or invoice to the inside cover of this guide Keep this user s guide in a convenient place for future reference Keep the carton and original packaging for future use Model Number Serial Number LCT1146 001B A 0102 TN FAA JIM PLEASE NOTE This web based PDF File for this instruction book is not an exact replica of the instructio...

Page 2: ... sure to dis connect both the power plug from the AC outlet and antenna for your safety To prevent electric shock do not use this polarized plug with an exten sion cord receptacle or other outlet unless the blades can be fully insert ed to prevent blade exposure CAUTION To reduce the risk of electric shock Do not remove cover or back No user serviceable parts inside Refer servicing to qualified se...

Page 3: ...d extension cords are dangerous and so are frayed power cords and broken plugs They may result in a shock or fire hazard Call your service technician for replacement 4 Do not allow anything to rest on or roll over the power cord and do not place the TV set where power cord is subject to traffic or abuse This may result in a shock or fire hazard 5 Do not use this TV set near water for example near ...

Page 4: ...l Never place the TV set near or over a radiator or heat register 9 To avoid personal injury Do not place a TV set on a sloping shelf unless properly secured Use only a cart or stand recommended by the TV set manufacturer Do not try to roll a cart with small casters across thresholds or deep pile carpets Wall or shelf mounting should follow the manufacturer s instructions and should use a mounting...

Page 5: ...een dropped or damaged in any way F When the TV set exhibits a distinct change in performance this indicates a need for service 16 Do not attempt to service this TV set yourself as opening or removing covers may expose you to dangerous voltage or other hazards Refer all servicing to qualified service person nel 17 When replacement parts are required have the service technician verify in writing th...

Page 6: ...tup 19 Channel Summary 20 V Chip 21 Set Lock Code 28 Picture Settings Tint 29 Color 29 Picture 29 Bright 29 Detail 29 Noise Muting 30 Set Video Status 30 Sound Settings Bass 31 Treble 31 Balance 31 MTS Multi channel Sound 32 TV Speaker 32 General Items Auto Clock Set 33 Manual Clock Set 34 On Off Timer 35 Language 35 Closed Caption 36 Background 36 BUTTON FUNCTIONS 37 Menu 37 Exit 37 Display 37 Vi...

Page 7: ...you want to use with your television To make these connections you will use plugs like the ones illustrated below A V Input Plug RF Connectors Used to connect a coaxial cable from an external antenna or Cable TV system Note Your television and or remote control may differ from the examples illustrated here Used to connect audio video devices like VCRs DVD players stereo amplifiers game consoles et...

Page 8: ...purchased These will help assist you in understanding how to connect your television to another device as well as use the remote to set up your televison Rear Panel Diagram VHF UHF 75 VHF UHF INPUT L MONO l AUDIO I R OUTPUT VIDEO L R Front Panel Diagram VIDEO L MONO INPUT 2 AUDIO R MODELS C 20310 C 13310 C 13311 VIDEO INPUT AUDIO 8 MODELS AV 20320 AV 20321 MODELS AV 20320 AV 20321 ...

Page 9: ... 5 CH VOL VOL CH CHANNEL VCR CONTROL POWER TV VCR REC STOP PAUSE PLAY FF REW SLEEP TIMER VIDEO STATUS RM C205W 9 POWER DISPLAY INPUT 1 7 4 100 3 9 6 RETURN MUTING MENU V CHIP EXIT 2 8 0 5 CH VOL VOL CH CHANNEL VCR CONTROL POWER TV VCR REC STOP PAUSE PLAY FF REW SLEEP TIMER VIDEO STATUS RM C205 Remote Control RM C205 MODEL AV 20320 C 20310 C 13310 ...

Page 10: ...install the batteries included Raise the latch on the remote s back cover to remove Insert two batteries carefully noting the and markings placing the end in the unit first Snap the cover back into place Basic Operation Turn the television on and off by pressing the POWER button at the top right cor ner of the remote The four key feature buttons at the center of the remote can be use for basic ope...

Page 11: ... pages 13 to 16 Note A VCR is not required to operate your television The connection shown below is for stereo televisions only models AV 20320 and AV 20321 only All others use connections shown on pages 13 and 14 1 Connect the yellow video cable out from the VCR s Video Output in to the TV s Video Input jack 2 Connect the white audio cable out from the VCR s Left Audio Output in to the TV s Left ...

Page 12: ...nu screens and their features are discussed in detail in this book The menu settings are optional you can set as many or as few of them as you wish But to begin watching your television right away you will need to run the Auto Tuner Setup This lets your television learn the channels it is able to receive To run the Auto Tuner Setup follow the steps below The Auto Tuner is finished when the message...

Page 13: ...o connections with your VCR for television models AV 20320 and AV 20321 only There are two basic types of antenna or cable connections If you have an antenna or have a cable system that does not require you use a cable box to select channels please refer to Diagram 1 If you have a cable system that requires the use of a cable box to access any or all of the channels please refer to Diagram 2 For y...

Page 14: ...put on the back of the TV Please consult your VCR s owner s manual for more information on its operation See page 15 for instructions on making stereo connections with your VCR for television models AV 20320 and AV 20321 only The connection diagrams are intended to show some basic connections Some cable companies may require special connections to properly use your television If you fol low these ...

Page 15: ...n Stereo models AV 20320 AV 20321 only If you have a Stereo model television AV 20320 AV 20321 you can use the connection shown below for high quality stereo sound from your HiFi VCR You can also use this diagram to connect your television to a DVD player VHF UHF 75Ω VHF UHF INPUT L MONO l AUDIO I R OUTPUT VIDEO L R L Stereo VCR or DVD Player IN 1 Connect the yellow video cable out from the VCR s ...

Page 16: ... Input jack 2 Connect the white audio cable out from the Camcorder s Left Audio Output in to the TV s Left Audio Input Jack 3 Connect the red audio cable out from the Camcorder s Right Audio Output in to the TV s Right Audio Input Jack If your Camcorder is a mono sound model it will have only one audio jack Connect it to the TV s Left Audio Jack Connecting to a Camcorder VIDEO L MONO INPUT 2 AUDIO...

Page 17: ...ntrol you must first install the batteries included See Changing the Batteries at the bottom of this page for instructions For an illustration please see page 10 Press the POWER button to turn the television on or off Press the CH and CH buttons to scan through the chan nels Tap the CH or CH button to move through the chan nels one channel at a time To move rapidly through the channels using JVC s...

Page 18: ... a menu screen Left and right arrows mean press the VOLUME LEFT or VOLUME RIGHT buttons to Select a highlighted menu item Select an item in a submenu Select numbers in certain menu options Turn the volume up or down when not in a menu screen The Press Button icon means you should press the button named on your remote con trol Button names appear in SMALL CAPITAL LETTERS To bring up the onscreen me...

Page 19: ... AIR To move to START To start Auto Tuner Setup Noise Muting will not work during Auto Tuner Setup NOW PROGRAMMING PROGRAMMING OVER 48 Programming will take approximately 1 to 2 minutes If you have already run the Auto Tuner as part of the quick setup earlier in this guide please skip ahead to Channel Summary to continue setting up your television Some cable systems experience interference from ra...

Page 20: ...or delete from scan EXIT when finished You can block access to a channel by activating the Channel Lock To CHANNEL SUMMARY To operate To the Lock Column ZERO to lock or unlock that channel EXIT when finished Channel Guard Message When a viewer attempts to watch a guarded channel the following message appears To watch a channel that you have locked enter the Lock Code using the 10 key pad If the wr...

Page 21: ...anada and movie ratings You may use any or all of the settings US V Chip Canada V Chip Movie ratings Descriptions for setting each of the three V Chip formats appear in the next seven pages along with descriptions of the rating cate gories To access the rating categories THIS PROGRAMMING EXCEEDS YOUR RATING LIMITS PLEASE ENTER LOCK CODE BY 10 KEY PAD TO UNLOCK IT NO V CHIP ON OFF SET US TV RATINGS...

Page 22: ...dance Suggested May contain some but not much strong language limited violence and some suggestive sexual dialog or situations It is recommended that parents watch these programs first or with their children TV 14 Parents Strongly Cautioned Programs contain some material that may be unsuitable for children under the age of 14 including possible intense violence sexual situations strong coarse lang...

Page 23: ...d To the TV 14 Column To turn on the lock To FINISH To save settings and exit If you want to change the setup move the cursor to the top column and change the lock icon to by pressing or again You may then select individual categories to block TV MA TV Y7 TV Y TV G TV PG TV 14 V FV S L D FINISH Press the MENU button To V CHIP To operate Lock icon will appear Press ZERO to access the V Chip menu To...

Page 24: ...u decide you want to block this category of viewing press 0 while the above screen is visible and all programs from that category will be blocked Example 1 If you want to set your V Chip settings to block all programming above TV PG Press ZERO when TV PG is displayed All Programming above TV PG will be blocked For Children s programming you can block TV Y and Y7 programs by Pressing 0 when Y is di...

Page 25: ...th children under 13 are cautioned that the content of movies with this rating may include more explicit sexual language and violence content than movies rated PG R Restricted These films contain material that is explicit in nature and is not recommended for unsupervised children under the age of 17 NC 17 No One Under 17 These movies contain content which most parents would feel is too adult for t...

Page 26: ...n PG Parental Guidance Programming intended for a general audience but which may not be suitable for younger children Parents may consider some content not appropriate for children aged 8 13 14 14 Years and Older Parents are strongly cautioned to exercise discretion in permitting viewing by pre teens and early teens Programming may contain mature themes and scenes of intense violence 18 Adult Mate...

Page 27: ... Bulletins Locally Originated Programming News Political Programs Public Service Announcements Religious Programs Sports Weather Some Commercials TV programs or movies that do not have rating signals will be blocked if the Unrated Category is set to BLOCK Directions to Block Unrated Programs You can block programs that are not rated Press the MENU button To V CHIP To operate Lock icon appears Pres...

Page 28: ...ate Lock icon appears Press ZERO to access the Lock Code The first digit will be highlighted To select the number To move to the next digit Continue to follow these directions for all four numbers To FINISH To save settings and exit Your Lock Code is now set LOCK CODE 0000 FINISH 0 After a power interruption you must reset the Lock Code Write your Lock Code number down and keep it hidden from pote...

Page 29: ...ing Picture allows you to adjust the levels of black and white on the TV screen giving you a darker or brighter picture overall Press the MENU button To PICTURE To increase the level of contrast To decrease the level of contrast To move to the next setting You can adjust the overall brightness of the TV picture with the Bright control Press the MENU button To BRIGHT To lighten the picture To darke...

Page 30: ...ate To set the TINT levels To move to the next option Repeat these steps until all levels are set To SAVE AS CHOICE To save settings and exit You must use SAVE AS CHOICE to exit the Set Video Status menu otherwise your prefer ences will not be saved You can access your Choice settings at any time by pressing the VIDEO STATUS button on the remote control TINT COLOR PICTURE BRIGHT DETAIL SAVE AS CHO...

Page 31: ...rease the treble To decrease the treble To move to the next setting Adjust the level of sound between the TV s two speakers with the Balance setting Press the MENU button To BALANCE To shift the balance towards the right speaker To shift the balance towards the left speaker To move to the next setting Treble Balance Bass Please note The Sound Settings options are available on Stereo televisions mo...

Page 32: ...ose the MONO setting to reduce excessive noise on a certain channel or broadcast Selecting SAP will allow you to hear an alternative soundtrack if one is available MTS Multi Channel Television Sound If your TV is connected to a stereo system you can turn off the TV speakers and listen to the audio through your stereo Press the MENU button To TV SPEAKER To turn the TV s speakers ON or OFF EXIT when...

Page 33: ...ylight Savings Time D S T To turn D S T ON or OFF To FINISH To save settings and exit If you do not have a PBS station in your local area you will have to set the clock manually See Manual Clock Set at the top of the next page for instructions The Daylight Savings Time feature automatically adjusts your TV s clock for Daylight Savings The clock will move forward one hour at 2 00 am on the first Su...

Page 34: ... To operate To MANUAL To move to the hour To set the hour To move to minutes To set the minutes To move to START CLOCK To start clock and exit MODE AUTO MANUAL TIME START CLOCK THANK YOU Manual Clock Set NOTE You will have to reset the clock after a power interruption of 90 seconds or longer You must set the clock before operating any timer functions ...

Page 35: ... operate begins with ON TIME To set the hour AM PM you want the TV to turn on To move to minutes To set the minutes To accept ON TIME and move to OFF TIME the time the TV will turn off Set the OFF TIME the same way as ON TIME To accept OFF TIME and move to CHANNEL To select channel To move to MODE Choose ONCE or EVERYDAY To ON OFF TIMER Choose YES to accept the timer setting choose NO if you don t...

Page 36: ...s subtitles are usually found on closed caption channel CC1 Some programs may include additional text information which is usually found on text channel T1 The other channels are available for future use Closed captioning may not work correctly if the signal being received is weak or if you are playing a video tape Most broadcasts containing Closed Captioning will display a notice at the start of ...

Page 37: ...e current channel Off Turns Display off You may also turn off the Display at any step by pressing EXIT 07 NOW 12 20 PM SLEEP TIMER OFF ON OFF TIMER EVERYDAY ON TIME 7 00 PM OFF TIME 10 00 PM Display Time Channel Off The MENU button allows you to access JVC s onscreen menu system Press MENU to activate the onscreen menu system See individual topics like Set Video Status for specific information on ...

Page 38: ...V off for you after you fall asleep Program it to work in intervals of 15 minutes for a total time of up to 180 minutes Press the SLEEP TIMER button Sleep Timer Message 20 seconds before the automatic shutoff this message will appear You then have 20 seconds to press the Sleep Timer button to delay the shutoff for another 15 minutes GOOD NIGHT PUSH SLEEP TIMER BUTTON TO EXTEND CHOICE GAME STANDARD...

Page 39: ... will cancel Return Use the 100 button to directly access channels above Channel 99 For example to move to channel 124 press 100 2 two 4 four RETURN CHANNEL PROGRAMMED 100 Button Return Input Selects the signal input source for the television TV for Antenna or Cable Video 1 or Video 2 for video devices like VCRs DVD players or camcorders INPUT AV 20320 and AV 20321 users C 13310 C 13311 and C 2031...

Page 40: ...e set did not become unplugged Perhaps the On Off Timer is set See page 35 Check to see if the Sleep Timer was set See page 38 The power was interrupted and the clock was not reset See page 33 There is a problem with the TV Unplug the set and call for service Tint and Color may be improperly adjusted See page 29 The Video Status mode may be turned to the wrong setting See page 30 There could be in...

Page 41: ...representatives If in home serv ice is not available carry in service will be provided If service is not locally available box the product carefully preferably in its original car ton and ship insured with a copy of your bill of sale plus a letter of explanation of the problem to the nearest JVC Factory Service Center the name and location which will be given to you by the toll free number If you ...

Page 42: ... not allow the exclusion of incidental or consequential damages or limi tations on how long the warranty lasts so these exclusions or limitations may not apply to you This warranty gives you specific legal rights and you may also have other rights which vary state to state JVC COMPANY OF AMERICA 1700 Valley Road DIVISION OF JVC AMERICAS CORP Wayne New Jersey 07470 http www jvcservice com REFURBISH...

Page 43: ...m Remember to retain your Bill of Sale for Warranty Service Caution To prevent electrical shock do not open the cabinet There are no user serviceable parts inside Please refer to qualified service personnel for repairs Accessories To purchase accessories for your JVC product you may contact your local JVC Dealer From the 48 Continental United States call toll free 1 800 882 2345 or on the web at w...

Page 44: ...F 14 to 69 Sub Mid Mid Super Hyper and Ultra bands 181 channel frequency synthesizer system 60W 1 1A 87W 1 4A 13 inch 34 cm measured diagonally full square 20 inch 51 cm measured diagonally full square 1W 1W 1W 3 1 16 8 cm round x 1 2 x 3 1 2 5x9 cm oval x 1 2 x 3 1 2 5x9 cm oval x 2 75 ohms VHF UHF F type connector Power Source AC 120V 60Hz Video 1 Vp p 75 ohms Audio 500mVrms 4dBs high impediance...

Reviews: