background image

©2014 Johnson Level & Tool - Rev. 3

1

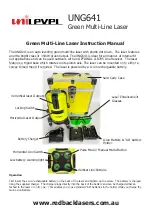
Self-Leveling Ultra-Bright Cross-Line Laser

Model No. 40-6625

Instruction Manual

Congratulations on your choice of this Self-Leveling Cross-Line Laser.
We suggest you read this instruction manual thoroughly before using
the instrument. Save this instruction manual for future use.

This is a Class IIIa laser tool and is manufactured to comply with 
CFR 21, parts 1040 .10 and 1040 .11 as well as international safety 
rule IEC 285.

8185H-English_Manuals  8/8/14  11:36 AM  Page 1

Summary of Contents for 40-6625

Page 1: ...is Self Leveling Cross Line Laser We suggest you read this instruction manual thoroughly before using the instrument Save this instruction manual for future use This is a Class IIIa laser tool and is manufactured to comply with CFR 21 parts 1040 10 and 1040 11 as well as international safety rule IEC 285 8185H English_Manuals 8 8 14 11 36 AM Page 1 ...

Page 2: ...eries 3 Mounting Strap 1 Magnetic Target 1 Instruction Manual with Warranty Card 1 Soft Sided Pouch 1 2 Features and Functions Able to project one cross line beam consisting of one horizontal line and one vertical line Magnetic dampening compensation system Laser flashes sounds audible alarm when beyond leveling range Manual mode feature allows unit to be tipped at extreme angles without the audib...

Page 3: ...us eye injury may result Do not operate the tool in explosive environments i e in the presence of gases or flammable liquids Keep the laser tool out of the reach of children and other untrained persons Do not attempt to view the laser beam through optical tools such as telescopes as serious eye injury may result Always turn the laser tool off when not in use or left unattended for a period of time...

Page 4: ...ANGER Class IIIa Laser Product Max Power Output 5mW Wavelength 625 645nm THIS TOOL EMITS LASER RADIATION DO NOT STARE INTO BEAM AVOID DIRECT EYE EXPOSURE 4 Location Content of Warning Labels 8185H English_Manuals 8 8 14 11 36 AM Page 4 ...

Page 5: ... mode button Power LED On Off Switch Rubber Co Molded Housing Laser Output Window Manual Mode LED 1 4 20 thread 5 8 thread Sound Port Window Frame Self Calibrate Screw Plug Battery Cover Side Self Calibrate Screw Plug Battery Cover Screw 8185H English_Manuals 8 8 14 11 36 AM Page 5 ...

Page 6: ...three AA batteries according to the illustrated polarity direction 2 Place the laser on a platform or a tripod 3 Power on the laser by turning the on off switch to the on position and a cross line will be projected Wall Screw Hang Hole Strap Slots 1 4 thread 1 4 thread Laser Attachment Wheel 5 8 thread Locking Knob Magnets IMPORTANT It is the responsibility of the user to verify the calibration of...

Page 7: ... adaptability of the laser Both the laser and the base can be connected with a standard tripod by 5 8 11 thread and camera tripod by 1 4 20 thread With the use of its base the laser can be freely rotated elevated 2 1 2 hung on the wall attached to a metal plate or connected on pipe with use of its strap 1 As shown in fig 1 take out the magnetic base 2 As shown in fig 2 install the laser on the bas...

Page 8: ...e button once to engage the Manual Mode Feature Red light next to manual mode button will turn on and green power LED will stay on 3 Push the button a second time to turn off the Manual Mode Feature Red light will turn off and green power LED will stay on Note When the Manual Mode Feature is engaged the self leveling alarm is deactivated Figure 3 8185H English_Manuals 8 8 14 11 36 AM Page 8 ...

Page 9: ...tersection of the beams as point B 4 Move the laser and the tripod so the laser is positioned approximately 2 feet away from wall 1 see fig 2 Level the tripod and position the laser on the tripod facing wall 1 Turn the laser on and mark the intersection of the beams as point C 5 Turn the laser off and rotate the laser 180 degrees so that it is facing directly to wall 2 6 Turn on the laser and mark...

Page 10: ...e allen wrench clockwise when the horizontal line tilts right Rotate the allen wrench counter clockwise when the horizontal line tilts to the left 3 If the horizontal line is too low or too high carefully disassemble the window frame by removing the outer plastic screw plug and the inner metal screw Use an allen wrench to calibrate the adjustment screws located between the glass prisms Rotate the ...

Page 11: ...Range Up to 150 ft 45m depending upon light conditions Self Leveling Range 5 Power Supply 3 AA alkaline batteries Battery Life Approx battery life 20 hours continuous use Dimensions 2 x 5 25 x 6 25 51x133x159mm Weight 2 lbs 0 93 Kg Working Temperature 14 F to 113 F 10 C to 45 C Center Screw Thread 5 8 11 1 4 20 IP Protection Class 55 8185H English_Manuals 8 8 14 11 36 AM Page 11 ...

Page 12: ...v 3 Installing partitions Hanging pictures Installing baseboards Dormer installation 10 Application Demonstrations Fixing doors and windows Laying tile Setting pipelines Fixing cabinets 8185H English_Manuals 8 8 14 11 36 AM Page 12 ...

Page 13: ... on each of its products You can obtain a copy of the limited warranty for a Johnson Level Tool product by contacting Johnson Level Tool s Customer Service Department as provided below or by visiting our web site at www johnsonlevel com The limited warranty for each product contains various limitations and exclusions Do not return this product to the store retailer or place of purchase Non warrant...

Page 14: ...el Tool s Customer Service Department at 800 346 6682 13 Warranty Registration Enclosed with this instruction manual you will find a warranty registration card to be completed for your product You will need to locate the serial number for your product that is located on the bottom of the unit PLEASE NOTE THAT IN ADDITION TO ANY OTHER LIMITATIONS OR CONDITIONS OF JOHNSON LEVEL TOOL S LIMITED WARRAN...

Page 15: ...ny applicable limited warranty and there will be NO WARRANTY If you need any assistance in locating any accessories please contact our Customer Service Department In the U S contact Johnson Level Tool s Customer Service Department at 888 9 LEVELS In Canada contact Johnson Level Tool s Customer Service Department at 800 346 6682 8185H English_Manuals 8 8 14 11 36 AM Page 15 ...

Page 16: ...omer service department If the unit will not calibrate contact an authorized Johnson service center or Johnson Level Tool s customer service department If the unit beeps and or flashes constantly check to see if the unit is being tilted to angles beyond the self leveling range If so push the horn button to engage manual mode If the unit is being used for a level application place onto a surface th...

Reviews: