Jay-tech FS170, User Manual
The Jay-tech FS170 User Manual is a comprehensive guide that allows users to easily operate and maximize the potential of their FS170 device. By visiting our manualshive.com, users can conveniently download this manual for free, providing step-by-step instructions and valuable information to enhance their experience with the product.
Share
Download


Reviews:
No comments
Related manuals for FS170

IS-TH1 1 Series
Brand: i.safe MOBILE Pages: 80

205799
Brand: Sharper Image Pages: 7

Focus Premium
Brand: Faro Pages: 164

Docking Scanner
Brand: Mustek Pages: 18

SK200-09
Brand: GRAPHTEC Pages: 164

Shapify
Brand: MESSER Pages: 17

Scamax 2600
Brand: J&K Pages: 42

Pro-2032
Brand: Radio Shack Pages: 26

Spectrolino
Brand: GMB Pages: 52

CS40xx
Brand: Oce Pages: 55

DIGIVAL LFR-024
Brand: Abbott Pages: 81

X76007D-WU
Brand: Xerox Pages: 88

20-427 PRO-2054
Brand: Radio Shack Pages: 56

iVu Plus TG Gen2
Brand: Banner Pages: 208

UBC57XLT
Brand: Uniden Pages: 2
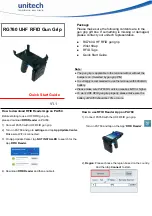
RG760
Brand: Unitech Pages: 2

imageFORMULA DR-3080CII
Brand: Canon Pages: 2

ImageFormula DR-9080C
Brand: Canon Pages: 366


