background image


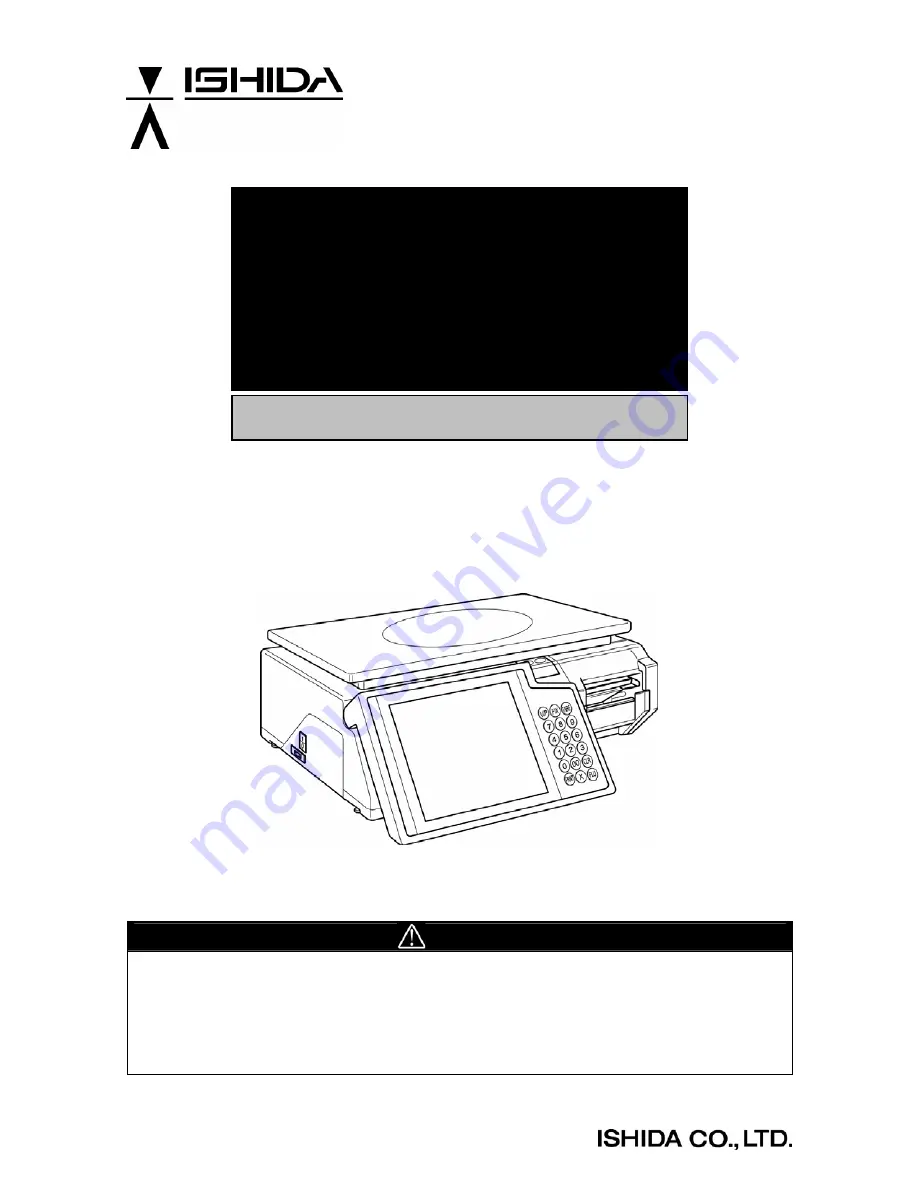
Automatic Scale Register


SR-2000

α


USER’S MANUAL


CAUTION


READ AND UNDERSTAND THIS MANUAL 

  Thoroughly read and understand this manual before installing, operating, inspecting, and 

servicing the machine. 

  Keep this manual in a safe place where you can refer to it whenever necessary. 

  Consult your ISHIDA representative if you have any questions or comments. 

 
PN 89061

Summary of Contents for SR-2000 alpha

Page 1: ...HIS MANUAL Thoroughly read and understand this manual before installing operating inspecting and servicing the machine Keep this manual in a safe place where you can refer to it whenever necessary Consult your ISHIDA representative if you have any questions or comments PN 89061 ...

Page 2: ...nual shall not be copied without permission This manual is protected by copyright and is intended solely for use in conjunction with the machine Please notify us before copying or reproducing this manual in any manner for any other purpose ISHIDA CO LTD 2004 ...

Page 3: ...r indicated on the machine itself Change in Specifications Machine specifications and accessories may be changed at any time due to improvements or other reasons Consult with your ISHIDA representative at any time to confirm the actual specifications of the purchased machine Errors and Omissions The information in this manual has been carefully checked and is believed to be accurate however no res...

Page 4: ...heed the information provided in this manual Failure to heed precautions can result in personal injury or property damage The following signal words are used in this manual Indicates a potentially hazardous situation which if not avoided will result in minor or moderate injury or may result in serious injury or death Additionally there may be significant property damage Indicates a potentially haz...

Page 5: ...down Do not disassemble modify or attempt to repair the machine Doing so may damage the original safety functions Do not hold the cover when carrying the machine Dropping the machine may result in injury or cause the machine to break down Do not hold the operation panel when carrying the machine Doing so may cause the operation panel to break down Do not drop the cassette Dropping the cassette may...

Page 6: ...g or inserting the cassette Careless cassette handling may result in injury or cause the cassette to break down Do not block off the ventilation opening Doing so may result in fire or cause the machine to break down iv SR 2000α User s Manual No 0000A ...

Page 7: ...cause the machine to break down Do not install any other application Doing so may cause the machine to break down Use a soft cloth or the neutral detergent when cleaning this machine Do not use thinner benzene etc Doing so may deform the machine or cause it to break down SR 2000α User s Manual No 0000A v ...

Page 8: ...uct Screen 2 4 2 3 WEIGHING PRODUCT SALES 2 5 2 4 FIXED PRICE PRODUCT SALES 2 7 2 5 TARE WEIGHT SUBTRACTION 2 9 Actual Tare Weight 2 9 Input Tare Weight 2 9 Preset Tare Keys 2 10 2 6 DISCOUNT OPERATIONS 2 11 Amount Discount 2 11 Percent Discount 2 11 Special Price 2 11 2 7 TEMPORARY DATA CHANGE 2 12 Unit Price Change 2 12 Weighing Product Change to Fixed Price Product 2 12 Fixed Price Product Chan...

Page 9: ... TOTAL 4 19 Sales per Day 4 20 Hourly Analysis 4 21 4 3 CUMULATIVE TOTAL 4 23 Various Totals 4 24 4 4 31 DAYS TOTAL 4 26 4 5 NON MOVEMENT PLU 4 28 4 6 PRESET REPORT 4 30 4 7 TOTAL CLEAR 4 31 Chapter 5 PROGRAMING MODE 5 1 5 1 PLU DATA REGISTRATION 5 2 Starting PLU Data Registration 5 2 PLU Data Registration 1 3 5 4 PLU Data Registration 2 3 5 8 PLU Data Registration 3 3 5 10 Finishing PLU Data Regi...

Page 10: ...ADVERTISEMENT MESSAGE 5 42 Message Table Allocation 5 42 Message Edit 5 45 Message Deletion 5 47 5 9 OPERATOR NAME REGISTRATION 5 49 5 10 NUTRITION REGISTRATION 5 51 5 11 EXTRA MESSAGE 1 3 5 53 5 12 COUPON MESSAGE 5 55 5 13 FREE MESSAGE 1 5 5 57 5 14 DEPARTMENT NAME REGISTRATION 5 59 5 15 GROUP NAME REGISTRATION 5 61 5 16 POP MESSAGE 5 63 5 17 CHECK LABEL 5 65 APPENDIX TEXT EDITING A 1 Single Func...

Page 11: ...Chapter 1 BEFORE USING THE MACHINE Chapter 1 BEFORE USING THE MACHINE SR 2000α User s Manual No 0000A 1 1 ...

Page 12: ...is section explains the name of each part and the function of this machine As this manual uses the following names to give further explanation remember the part names described here and read the following pages Front View Rear View 1 2 SR 2000α User s Manual No 0000A ...

Page 13: ...ge a fixed price Also used to change a unit price product to a fixed price product Used to subtract a tare weight Used to issue a label Used to multiply a unit price of the fixed price product Used to call a registered product data Used to delete an entered numerical value Also used to release an error condition SR 2000α User s Manual No 0000A 1 3 ...

Page 14: ...the machine to break down and or may result in danger such as electric shock Connect the grounding wire to protect against electric shock Make sure to connect the attached grounding wire to the grounding terminal Do not install the machine near a TV set or radio Doing so may cause static to the TV set and or radio as this machine emits week electric wave Do not use this machine in location that re...

Page 15: ...e sure to turn off the power switch before placing the machine on a stable platform and adjust the machine inclination by turning the four level adjusters so that the level bubble is located at the center of the window SR 2000α User s Manual No 0000A 1 5 ...

Page 16: ... 2mm between the roll and the Roll Stopper 2 Load a new label roll around the Roll Holder and raise the Roll Stopper to fix the roll position For smoother passing fold the paper end a little 3 Pass the roll paper 1 through 5 as shown in the figure 4 Fix the paper end with the backing paper stopper and gently turn the Winding Bobbin counterclockwise until the label becomes tight 1 6 SR 2000α User s...

Page 17: ...main body to return to its original position and lower the Thermal Head Cover Confirm that the backing paper is wound up smoothly If the backing paper is wound up diagonally reconfirm on the label passing label stop position with the Backing Paper Stopper and the Label Guide width 7 Touch FEED on the screen to issue a label At this time confirm that the label is completely peeled off SR 2000α User...

Page 18: ...nfirm that the paper roll can turn gently with the space from 0 5 to 2mm between the roll and the Roll Stopper 2 Load a new paper roll around the Roll Holder and raise the roll stopper to fix the roll position 3 Pass the paper end 1 through 3 as shown in the figure 4 Slide the label guide to fit the paper width 1 8 SR 2000α User s Manual No 0000A ...

Page 19: ... not to get your fingers caught between the Cassette and the main body 5 Push the Cassette straight into the main body to return to its original position and lower the Thermal Head Cover 6 Cut the paper that comes out of the outlet SR 2000α User s Manual No 0000A 1 9 ...

Page 20: ...nd consult your doctor If you wear contact lenses remove and wash them If the fluid comes into contact with your skin Immediately rinse the area of contact with water and then wash with soap If you notice any skin abnormalities at the area of contact or if any pain persists consult your doctor If the fumes of the fluid are inhaled Immediately move the victim to an area where fresh air is available...

Page 21: ...to use the machine in good conditions 1 Raise the operation panel as shown in the figure 2 Hold the both end of the filter case and pull it out 3 Remove the air intake filter from the filter case and wash the filter 4 Dry the filter and return it into the filter case Then set it to the main body SR 2000α User s Manual No 0000A 1 11 ...

Page 22: ...of the main body Use a cloth or cotton swab for cleaning narrow spaces Use a soft cloth or the neutral detergent when cleaning this machine Do not use thinner benzene etc 1 Remove stains at the top of operation panel as shown in the figure 2 Raise the operation panel as shown in the figure 3 Remove stains at the space between the operation panel and the main body as shown in the figure ...

Page 23: ...ion Mode is used to perform various sales operations The initial screen appears on the display when the machine is turned on To access to the initial screen from the Main Menu screen touch OPERATION on the Main Menu screen SR 2000α User s Manual No 0000A 2 1 ...

Page 24: ...Chapter 2 OPERATION MODE 2 1 OPERATION FLOW Operating procedure in the Operation Mode is shown as per below 2 2 SR 2000α User s Manual No 0000A ...

Page 25: ...Chapter 2 OPERATION MODE 2 2 BASIC SCREENS Initial Screen SR 2000α User s Manual No 0000A 2 3 ...

Page 26: ...can be freely laid out through the preset key registration Weighing Product Screen Function preset keys Special POP Total display Void etc can be freely laid out through the preset key registration Fixed Price Product Screen 2 4 SR 2000α User s Manual No 0000A ...

Page 27: ...number and press the PLU key on the keypad Example PLU number 3 In this case skip step 2 below 2 When a category key has been touched in step 1 above the PLU Select screen appears on the display Then touch a desired PLU key to call Example PLU MEAT 03 3 The PLU data appears on the display See section 2 5 Tare Weight Subtraction for more detailed procedure 4 When a tare weight subtraction is requir...

Page 28: ...procedure Example 0 50 discount See section 2 7 Temporary Data Change for more detailed procedure 7 When changing the data temporarily perform the temporary data change procedure See section 2 8 POP Message Print for more detailed procedure 8 When printing a POP message on the label perform the POP message print procedure 9 Press the PRINT key on the keypad to issue a label When the operator syste...

Page 29: ...PLU number and press the PLU key on the keypad Example PLU number 4 In this case skip step 2 below 2 When a category key has been touched in step 1 above the PLU Select screen appears on the display Then touch a desired PLU key to call Example PLU MEAT 04 3 The PLU data appears on the display 4 When selling more than one piece enter the quantity and press X key on the keypad When selling only one ...

Page 30: ...ata Change for more detailed procedure 6 When changing the data temporarily perform the temporary data change procedure See section 2 8 POP Message Print for more detailed procedure 7 When printing a POP message on the label perform the POP message print procedure 8 Press the PRINT key on the keypad to issue a label When the operator system is used touch the OPERATOR preset key on the screen to is...

Page 31: ...e weight is displayed When canceling the tare subtraction remove the tare from the weighing platter enter 0 and touch the TARE key again 2 Touch the TARE key on the keypad to register the tare weight The registered tare weight appears in the TARE field Input Tare Weight When the tare weight is known enter the tare weight data using the keypad 1 Enter the tare weight and press the TARE key on the k...

Page 32: ... MODE Preset Tare Keys When the TARE preset key is registered simply touch the corresponding preset key 1 Touch the TARE preset key on the screen Example TARE Preset key with 0 020 lb 2 10 SR 2000α User s Manual No 0000A ...

Page 33: ...ple Discount the selling price 8 50 by 10 To perform amount discount preset key must have been registered on the screen 1 Enter the discount percentage using the keypad and touch on the screen The price after discount is displayed and the cancellation lines appear to the price before discount Special Price Selling price of the displayed PLU is temporarily sold at the special price Example Special ...

Page 34: ...n price 1 Enter a new price using the keypad and touch the U P Unit Price key on the keypad or touch the Unit Price data field on the screen T Weighing Product Change to Fixed Price Product Selling price of the displayed product can be temporarily sold with a fixed price Example Change the unit price 12 48 to the fixed price 8 00 1 Confirm that the weighing product screen is displayed 2 Enter the ...

Page 35: ...rice product screen is displayed 2 Press the U P Unit Price key on the keypad Then the display changes a weighing product screen as shown on the right Date Change Various dates can be temporarily changed Example Change the packed date from August 4 2004 to August 5 2004 To perform the date change DATE key must have been preset on the function screen 1 Touch DATE on the screen 2 The date change scr...

Page 36: ...ATION MODE 3 Enter a new date using the keypad and touch the desired date field to change Example New date August 5 2004 4 Touch BACK to return the display to the previous screen 2 14 SR 2000α User s Manual No 0000A ...

Page 37: ...the screen Messages can be freely created from No 7 to No 99 2 Six default messages are shown on the right Touch the desired message on the screen to select Example Message 002 3 The selected message is shown to the right of the PLU name 4 Press the PRINT key on the keypad to issue a label When the operator system is used touch the OPERATOR preset key on the screen to issue a label SR 2000α User s...

Page 38: ...will cancel the previous transaction and the added price of the previous product is subtracted from the total To perform the void operation VOID key must have been preset on the function screen 1 The transaction is finished and the label is issued as shown on the right 2 Touch VOID to cancel the above transaction 2 16 SR 2000α User s Manual No 0000A ...

Page 39: ...aily Total Display Total Display key must have been preset on the function screen 2 Touch Total Display on the screen 3 The daily total appears on the display Confirm the sales totals of quantity weight and price for the products sold so far today Then touch BACK to return the display to the previous screen 4 The previous screen appears on the display again SR 2000α User s Manual No 0000A 2 17 ...

Page 40: ...ucts Automatic Labeling for Weighing Products 1 Confirm that PREPACK is selected on the screen If not touch MANUAL to change to PREPACK X 2 Enter the PLU number Weighing product and press the PLU key on the keypad Example PLU No 3 3 Place the weighing product on the weighing platter 4 When the weighing becomes stable the label is issued Then the machine return to MANUAL status 2 18 SR 2000α User s...

Page 41: ... X 2 Enter the PLU number Weighing product and press the PLU key on the keypad Example PLU No 4 3 Press the PRINT key on the keypad to issue a label Whenever the label is peeled off the next label will be issued continuously To stop issuing labels press the CLEAR key on the keypad Then the machine return to MANUAL status SR 2000α User s Manual No 0000A 2 19 ...

Page 42: ...labeling PRN QTY key must have been allocated on the function key screen 3 Enter the number of labels using the keypad and touch PRN QTY on the function key screen Example 20 labels When stopping the label issue on the way press the CLEAR key on the keypad 4 Press the PRINT key on the keypad to issue specified number of labels When the operator system is used touch the OPERATOR preset key on the s...

Page 43: ...enter this mode from the initial screen touch MENU to access to the Main Menu screen first and touch TOTAL ADJUST to access to the Total Adjustment Add Subtract Menu screen Note If a password is programmed for accessing to the Total Adjustment Mode enter the 6 digit password using the keypad before touching TOTAL ADJUST SR 2000α User s Manual No 0000A 3 1 ...

Page 44: ...quantity weight and or price of the product to be added to the sales total 1 Touch a desired addition type on the screen to select 2 There are four number addition menu screens 3 Enter the PLU number using the keypad and press the PLU key to call Example PLU number 5 3 2 SR 2000α User s Manual No 0000A ...

Page 45: ...eight 2 450 lb Example Price 5 16 See Section 2 6 in Chapter 2 Discount Operations for more detailed procedure 5 When a discount operation is required touch one of the following buttons to select 6 The entered data is displayed in the corresponding INPUT data field and the result is displayed in the corresponding CALCULATION data field Then touch ADD on the screen SR 2000α User s Manual No 0000A 3...

Page 46: ...Chapter 3 TOTAL ADJUSTMENT MODE 7 The confirmation screen appears for execution Touch EXECUTE to execute these additions Then the label will be issued 3 4 SR 2000α User s Manual No 0000A ...

Page 47: ...igh the product to calculate the total price to be added to the sales total 1 Touch a desired addition type on the screen to select 2 There are four weighing addition menu screens 3 Enter the PLU number using the keypad and press the PLU key to call Example PLU number 5 SR 2000α User s Manual No 0000A 3 5 ...

Page 48: ... Operations for more detailed procedure 5 When a discount operation is required touch one of the following buttons to select 6 The weighed data is displayed in the corresponding data field Then touch ADD on the screen 7 The confirmation screen will appear for execution Touch EXECUTE to execute these additions Then the label will be issued 3 6 SR 2000α User s Manual No 0000A ...

Page 49: ...s to be subtracted after checkout input the quantity weight and or price of the product to be subtracted from the sales total 1 Touch a desired subtraction type on the screen to select 2 There are five number subtraction menu screens SR 2000α User s Manual No 0000A 3 7 ...

Page 50: ...ce to be subtracted from the sales total and touch NUMBER SET WEIGHT SET and PRICE SET respectively Example quantity 2 pieces Example Weight 2 450 lb Example Price 5 16 See Section 2 6 in Chapter 2 Discount Operations for more detailed procedure 5 When a discount operation is required touch one of the following buttons to select 3 8 SR 2000α User s Manual No 0000A ...

Page 51: ...INPUT data field and the result is displayed in the corresponding CALCULATION data field Touch SUB Subtraction on the screen 7 The confirmation screen will appear for execution Touch EXECUTE to execute these subtractions Then the label will be issued SR 2000α User s Manual No 0000A 3 9 ...

Page 52: ... product is to be subtracted after checkout actually weigh the product to calculate the total price for subtraction 1 Touch a desired subtraction type on the screen to select 2 There are five weighing subtraction menu screens 3 10 SR 2000α User s Manual No 0000A ...

Page 53: ...ual weight See Section 2 6 in Chapter 2 Discount Operations for more detailed procedure 5 When a discount operation is required touch one of the following buttons to select The weighed data is displayed in the corresponding data field Then touch SUB Subtraction on the screen 6 The confirmation screen will appear for execution Then touch EXECUTE to subtract The label will be issued SR 2000α User s ...

Page 54: ...Chapter 3 TOTAL ADJUSTMENT MODE 3 12 SR 2000α User s Manual No 0000A ...

Page 55: ...the Total Mode from the initial screen touch MENU to access to the Main Menu screen first then touch TOTAL to access to the Total Menu screen Note If a password is programmed for accessing to the Total Mode enter the 6 digit password using the keypad before touching TOTAL SR 2000α User s Manual No 0000A 4 1 ...

Page 56: ...Chapter 4 TOTAL MODE 4 1 DAILY TOTAL Daily Total is performed at the end of the day to obtain the total of various transactions performed on that day 4 2 SR 2000α User s Manual No 0000A ...

Page 57: ...ted on that day is totaled Used to feed a label to the proper peeling position 1 Touch TOTAL PRODUCTION on the screen 2 Press the PRINT key on the keypad to issue a label Then touch MENU to return the display to the Daily Total Menu SR 2000α User s Manual No 0000A 4 3 ...

Page 58: ...croll up for the previous page Used to select the previous item Used to select the next item Used to scroll down for the next page 1 Touch SALES PER DEPT on the screen 2 Press the PRINT key on the keypad to issue a label Then touch MENU to return the display to the Daily Total Menu 4 4 SR 2000α User s Manual No 0000A ...

Page 59: ... data transacted on that day is totaled for each group 1 Touch SALES PER GROUP on the screen 2 Press the PRINT key on the keypad to issue a label Then touch MENU to return the display to the Daily Total Menu SR 2000α User s Manual No 0000A 4 5 ...

Page 60: ...s data transacted on that day is totaled for each PLU 1 Touch SALES BY PLU on the screen 2 Press the PRINT key on the keypad to issue a label Then touch MENU to return the display to the Daily Total Menu 4 6 SR 2000α User s Manual No 0000A ...

Page 61: ...rofit data transacted on that day is totaled for each PLU 1 Touch GROSS PROFIT BY PLU on the screen 2 Press the PRINT key on the keypad to issue a label Then touch MENU to return the display to the Daily Total Menu SR 2000α User s Manual No 0000A 4 7 ...

Page 62: ...transacted on that day is totaled for each markdown product 1 Touch MARK DOWN ITEM on the screen 2 Press the PRINT key on the keypad to issue a label Then touch MENU to return the display to the Daily Total Menu 4 8 SR 2000α User s Manual No 0000A ...

Page 63: ... DESIGNATE PLU on the screen 2 Enter the desired PLU number and press the PLU key to call up the data Example PLU number 1 3 Press the PRINT key on the keypad to issue a label 4 Repeat steps 2 and 3 above for more PLUs 5 Touch MENU to return the display to the Daily Total Menu SR 2000α User s Manual No 0000A 4 9 ...

Page 64: ... to the selected conditions 1 Touch PLU ANALYSIS on the screen When 0 is set all PLUs are selected 2 Enter the report size and touch SET Example Report size 100 3 Touch the desired classification type to select No analysis For each department For each group 4 10 SR 2000α User s Manual No 0000A ...

Page 65: ...Greater price order Greater weight order Greater quantity order Smaller price order Smaller weight order Smaller quantity order 5 Touch DETAILS to display the desired PLU analysis on the screen 6 Press the PRINT key on the keypad to issue a label SR 2000α User s Manual No 0000A 4 11 ...

Page 66: ...Repeat steps 2 through 6 above for more analysis 8 Touch RETURN to return the display to the Daily Total PLU Analysis screen 9 Then touch MENU to return the display to the Daily Total Menu 4 12 SR 2000α User s Manual No 0000A ...

Page 67: ...DE Hourly Analysis A day is delimited every hour and the daily sales data either in price or quantity is displayed for each hourly zone in graphs 1 Touch HOURLY ANALYSIS on the screen SR 2000α User s Manual No 0000A 4 13 ...

Page 68: ... the screen Touch either PCS or PRICE to select Example Select PCS Press the PRINT key to issue the label Example Select PRICE Press the PRINT key on the keypad to issue a label 3 Touch MENU to return the display to the Daily Total Menu 4 14 SR 2000α User s Manual No 0000A ...

Page 69: ...le PLU Sell impossible PLU data found on that day is totaled 1 Touch SALES PER SI PLU on the screen 2 Press the PRINT key on the keypad to issue a label Touch MENU to return the display to the Daily Total Menu SR 2000α User s Manual No 0000A 4 15 ...

Page 70: ...ed PLU Expired PLU data found on that day is totaled 1 Touch SALES PER EX PLU on the screen 2 Press the PRINT key on the keypad to issue a label Touch MENU to return the display to the Daily Total Menu 4 16 SR 2000α User s Manual No 0000A ...

Page 71: ...rd PLU Discard PLU data found on that day is totaled 1 Touch SALES PER DS PLU on the screen 2 Press the PRINT key on the keypad to issue a label Touch MENU to return the display to the Daily Total Menu SR 2000α User s Manual No 0000A 4 17 ...

Page 72: ...LU Rewrapped PLU data transacted on that day is totaled 1 Touch SALES PER RW PLU on the screen 2 Press the PRINT key on the keypad to issue a label Touch MENU to return the display to the Daily Total Menu 4 18 SR 2000α User s Manual No 0000A ...

Page 73: ...Chapter 4 TOTAL MODE 4 2 WEEKLY TOTAL Weekly Total is performed to obtain the total of various transactions performed for a week SR 2000α User s Manual No 0000A 4 19 ...

Page 74: ... Total sales data is totaled for each day of the week 1 Touch SALES PER DAY on the screen 2 Press the PRINT key on the keypad to issue a label Touch MENU to return the display to the Daily Total Menu 4 20 SR 2000α User s Manual No 0000A ...

Page 75: ...ay is delimited every hour and the weekly sales data either in price or quantity is displayed for each hourly zone in graphs Used to call the previous day of the week Used to call the next day of the week SR 2000α User s Manual No 0000A 4 21 ...

Page 76: ... appears on the screen Touch either PCS or PRICE to select Example Select PCS Press the PRINT key on the keypad to issue a label Example Select PRICE Press the PRINT key on the keypad to issue a label 3 Touch MENU to return the display to the Daily Total Menu 4 22 SR 2000α User s Manual No 0000A ...

Page 77: ...Chapter 4 TOTAL MODE 4 3 CUMULATIVE TOTAL Cumulative Total is performed to obtain accumulated transactions for a specified period SR 2000α User s Manual No 0000A 4 23 ...

Page 78: ...See page 4 3 for operating procedure CUMULATIVE GRAND TOTAL PROD See page 4 4 for operating procedure CUMULATIVE TOTAL PER GROUP See page 4 5 for operating procedure CUMULATIVE TOTAL BY PLU See page 4 6 for operating procedure CUM TOTAL GROSS BY PLU See page 4 7 for operating procedure CUM TOTAL MARKDOWN ITEM See page 4 8 for operating procedure 4 24 SR 2000α User s Manual No 0000A ...

Page 79: ...Chapter 4 TOTAL MODE CUM TOTAL DESIGNATE PLU See page 4 9 for operating procedure TOTAL PER PLU ANALYSIS See page 4 10 for operating procedure X SR 2000α User s Manual No 0000A 4 25 ...

Page 80: ...Chapter 4 TOTAL MODE 4 4 31 DAYS TOTAL 31 Days Total is performed to obtain total data for the past 31 days 4 26 SR 2000α User s Manual No 0000A ...

Page 81: ...appears on the screen Touch either PCS or PRICE to select Example Select PCS Press the PRINT key on the keypad to issue a label Example Select PRICE Press the PRINT key on the keypad to issue a label 3 Touch MENU to return the display to the Daily Total Menu SR 2000α User s Manual No 0000A 4 27 ...

Page 82: ...LU on the screen 2 Enter the 8 digit date MMDDYYYY and touch DATE SET on the screen Example Date set JUNE 01 2004 3 Touch either No ORDER or Date Order to select 4 A list of PLUs which have not been sold since the specified date appears on the screen 5 When deleting the PLU enter the PLU number and touch DELETE on the screen Example PLU 21 4 28 SR 2000α User s Manual No 0000A ...

Page 83: ...Chapter 4 TOTAL MODE 6 Press the PRINT key on the keypad to issue a label 7 Touch MENU to return the display to the Daily Total Menu SR 2000α User s Manual No 0000A 4 29 ...

Page 84: ...screen 2 Touch either DAILY JOIN REPORT or CUMULATE JOIN REPORT to select To stop printing touch INTERRPUT To resume printing Touch CONTINUE 3 Press the PRINT key on the keypad to issue a label The confirmation screen appears on the screen for printing a join report Touch OK on the screen to start printing 4 Touch MENU to return the display to the Daily Total Menu 4 30 SR 2000α User s Manual No 00...

Page 85: ...t Used to clear Daily Totals Used to clear Weekly Totals Used to clear 31 days Totals Used to clear Cumulative Totals 3 Touch EXECUTE to clear the selected total data The confirmation screen appears on the screen for deletion Touch EXECUTE on the screen to carry out total clear 4 Touch MENU to return the display to the Daily Total Menu SR 2000α User s Manual No 0000A 4 31 ...

Page 86: ...Chapter 4 TOTAL MODE 4 32 SR 2000α User s Manual No 0000A ...

Page 87: ...operations To enter the Registration Menu screen from the initial screen touch MENU first and touch PROGRAMING to access to the Registration Menu screen Note If a password is programmed for accessing to the Programing Mode enter the 6 digit password using the keypad before touching PROGRAMING SR 2000α User s Manual No 0000A 5 1 ...

Page 88: ...d to select When it is not found on the screen try to find it by using and touch the corresponding field to select Used to select the previous PLU Used to select the next PLU Used to scroll up for the previous screen Used to scroll down for the next screen Or enter a desired PLU number and press the PLU key on the keypad Example PLU No 5 3 Touch the EDIT button on the screen 5 2 SR 2000α User s Ma...

Page 89: ...DE 4 The PLU Data Registration 1 3 screen appears on the display Touch PAGE to access to other PLU Data Registration screens Try to find a desired item on one of three screens on the right SR 2000α User s Manual No 0000A 5 3 ...

Page 90: ...ext editing is complete touch on the screen Touch on the screen to access to the selection screen Then touch one of the following three buttons to select Weighing product Fixed price product Weighing product with a fixed price Example Unit price 5 00 When a unit price is entered the Sales Mode becomes Weigh and Fixed Price becomes 0 Example Fixed price 8 00 When a fixed price is entered the Sales ...

Page 91: ...elected in the Markdown Flag selection above enter a special price and touch Example Special price 7 20 When is selected in the Markdown Flag selection above enter a special price and touch Example Discount amount 2 00 When is selected in the Markdown Flag selection enter a discount percentage and touch Example Discount percentage 10 Example Fixed weight 0 260 lb Example Pack quantity 3 pcs Exampl...

Page 92: ...ays from the pack date to come to the shelf life Touch on the screen to access to the selection screen Then touch one of the following buttons to select When referring to the set reference data When printing the used by date on the label When not printing the used by date on the label Example 5 days to the Used by Date Touch on the screen to access to the selection screen Then touch one of the fol...

Page 93: ...lection screen Then touch one of the following buttons to select When referring to the set reference data When prohibiting the open price When allowing the open price Touch on the screen to access to the selection screen Then touch one of the following buttons to select When referring to the set reference data When prohibiting the forced tare entry When allowing the forced tare entry Example Propo...

Page 94: ... data setting When printing the pack time on the label When not printing the pack time on the label Example Pack time 12 34 Touch Sell by Time Print on the screen to access to the selection screen Then touch one of the following buttons to select When referring to the reference data setting When printing the sell by time on the label When not printing the sell by time on the label Example Sell by ...

Page 95: ...the safe handling on the label Example Safe handling image number 4 Example Coupon message number 3 Example Logo image number 3 Example Label format number 7 Touch on the screen to access to the selection screen Then touch one of the following buttons to select When referring to the reference data setting When using the second label When not using the second label Example Second label format numbe...

Page 96: ...epartment code 3 Example Group code 2 Example Item code 7232 Touch on the screen to access to the selection screen Then touch one of the following buttons to select When referring to the reference data setting When the unit type is not required Example Upper weight limit 8 950 lb Example Lower weight limit 8 500 lb 5 10 SR 2000α User s Manual No 0000A ...

Page 97: ...Chapter 5 PROGRAMING MODE Example Tax number 2 Example Cost price 2 88 Example POP message number 1 SR 2000α User s Manual No 0000A 5 11 ...

Page 98: ...creen 2 The confirmation screen appears on the display for saving Touch EXECUTE to save the data 3 The data is saved and the screen returns to the PLU File Registration screen Then touch MENU to return the display to the Registration Menu screen 5 12 SR 2000α User s Manual No 0000A ...

Page 99: ... PLU File Registration screen 1 Confirm that the Registration Menu screen is displayed Touch PLU FILE PRICE CHANGE on the screen 2 The PLU File Registration screen appears on the display Then find a desired PLU on the screen and touch the field to select the PLU SR 2000α User s Manual No 0000A 5 13 ...

Page 100: ...nit Price key or the FIX key to change the price Example Unit price 2 50 When the unit price is set the fixed price becomes 0 When the fixed price is set the unit price becomes 0 4 Touch MENU to return the display to the Registration Menu screen 5 14 SR 2000α User s Manual No 0000A ...

Page 101: ...t screen appears on the display Then enter the desired PLU number and press the PLU key on the keypad Example PLU number 5 See Appendix Text Editing 3 The PLU number 5 is called Then enter the desired characters using the screen keys and edit the text Example Roast Filet Steak 4 When the registration is complete touch MENU on the screen The confirmation screen appears on the display for saving The...

Page 102: ... range from 7 through 999 1 Confirm that the Registration Menu screen is displayed Then touch CAMPAIGN on the screen 2 The Campaign Registration screen appears on the display Then enter a desired campaign number and press the PLU key on the keypad Example Campaign number 7 See Appendix Text Editing 3 The selected Campaign Data Registration screen appears on the display 5 16 SR 2000α User s Manual ...

Page 103: ...uch the corresponding Markdown Mode field 5 The selection screen appears on the display Then touch the desired campaign type to select 6 Enter the numeric data using the keypad and touch the corresponding MD Amount field to register Example 0 20 7 Repeat steps 4 5 and 6 above for more campaign products SR 2000α User s Manual No 0000A 5 17 ...

Page 104: ...he keypad and touch the corresponding field to register Example Start date July 21 2004 In the same manner register the campaign end time and date 9 When the data entry is complete for the selected campaign number touch RETURN on the screen 10 The confirmation screen appears on the display for saving Then touch EXECUTE The beeper sounds when succeeded 5 18 SR 2000α User s Manual No 0000A ...

Page 105: ...NG MODE 11 The Campaign Registration screen appears on the display Repeat steps 2 through 10 for more registrations 12 Touch MENU to return the display to the Registration Menu screen SR 2000α User s Manual No 0000A 5 19 ...

Page 106: ...ed on this setting Store Name 1 Touch STORE NAME on the Registration Menu screen It is also possible to enter the store number by touching STORE on the screen after entering the store number 2 The Store Name Address Registration screen is displayed Then enter the store number and press the PLU key on the keypad Example PLU number 10 5 20 SR 2000α User s Manual No 0000A ...

Page 107: ...diting 4 The text edit screen appears on the display Then enter the characters using the screen keys and edit the text Example Store name ISHIDA 5 Touch RETURN on the screen The confirmation screen is displayed for saving 6 The confirmation screen appears on the display for saving Then touch EXECUTE on the screen 7 Repeat steps 2 through 6 for more registrations SR 2000α User s Manual No 0000A 5 2...

Page 108: ...hen EDIT on the screen See Appendix Text Editing 2 The text edit screen appears on the display Then enter the address Example Address Kyoto Japan 3 Touch RETURN on the screen 4 The confirmation screen appears on the display for saving Then touch EXECUTE to save the text 5 22 SR 2000α User s Manual No 0000A ...

Page 109: ...the store number then touch STORE display field on the screen Example Store number 10 The store data to be printed on the label is selected 2 Touch MENU on the screen The store name and address will be printed on the label as shown below SR 2000α User s Manual No 0000A 5 23 ...

Page 110: ...n the screen 2 The Time and Date Setting screen appears on the display Then enter the desired date using the keypad and touch the DATE field to register In the same manner register the time Example 15 30 on July 21 2004 3 Touch MENU on the screen The screen returns to the Registration Menu screen 5 24 SR 2000α User s Manual No 0000A ...

Page 111: ... displayed Then touch PRESET KEYS on the screen 2 The Preset Key Registration screen with category keys appears on the display Then touch PAGE on the screen 3 The Preset Key Registration screen with PLU buttons appears on the display Then touch PAGE on the screen 4 Touch REGISTER on the screen SR 2000α User s Manual No 0000A 5 25 ...

Page 112: ...key the data must be deleted first in order to register a new PLU data Touch PAGE on the screen Repeatedly touch PAGE on the screen to turn pages until the desired function is found in the list 7 The second page of preset key list appears on the display Then touch PAGE on the screen 8 The third page of preset key list appears on the display Then touch STANDBY MODE to select 9 Touch the existing PL...

Page 113: ...PLU on the screen to select 12 The Preset Key Registration screen with PLU preset keys appears on the display 13 Enter a PLU number using the keypad and touch the desired blank key on the screen to allocate the PLU data Example PLU 1 and 2 Repeat this step until all desired PLU allocations are complete SR 2000α User s Manual No 0000A 5 27 ...

Page 114: ...reset keys appears on the display Then touch EDIT on the screen 3 Touch the desired PLU preset key Fore more detailed text editing operations see Appendix Text Editing 4 The text edit screen appears for the PLU name Enter the desired characters and edit the text using the screen keys When the text editing is complete touch RETURN on the screen 5 28 SR 2000α User s Manual No 0000A ...

Page 115: ... 5 The confirmation screen appears for saving Then touch EXECUTE to save the data 6 The edited text appears on the selected preset key 7 Repeat steps 3 through 6 above for more registrations SR 2000α User s Manual No 0000A 5 29 ...

Page 116: ...he screen 2 The Preset Key Registration screen with PLU preset keys appears on the display Then touch KEY COLOR on the screen 3 Touch COLOR CHANGE on the screen to get the color list 4 Touch a desired color and touch the corresponding SET button to select Example Blue key with white letters 5 30 SR 2000α User s Manual No 0000A ...

Page 117: ...preset keys 6 Touch a desired PLU preset key to apply the selected colors When the same coloring is applied to other PLU preset keys repeatedly touch desired buttons 7 When continuing to change PLU preset key coloring repeat Steps 3 through 6 above 8 Touch MENU on the screen SR 2000α User s Manual No 0000A 5 31 ...

Page 118: ...ed Then touch PRESET KEYS 2 The Preset Key Registration screen with product category keys appears on the display Then touch PAGE on the screen 3 The Preset Key Registration screen with PLU preset keys appears on the display Then touch LAYOUT on the screen 5 32 SR 2000α User s Manual No 0000A ...

Page 119: ...g to make a key larger confirm that the covering keys are all blank If not delete these keys first by referring to steps 1 through 9 in section 5 7 Preset Keys Registration Example Roast Filet Steak key to quadruple size In this example confirm that LARGE is selected in the above step Then delete the existing MEAT09 key Next touch ROAST FILET STEAK key on the screen SR 2000α User s Manual No 0000A...

Page 120: ...Chapter 5 PROGRAMING MODE 6 Repeat steps 4 and 5 above for more registrations 7 Touch MENU on the screen 5 34 SR 2000α User s Manual No 0000A ...

Page 121: ...r 5 PROGRAMING MODE Function Key Registration Various function keys can be allocated on the preset keys Available function keys are shown in the following 3 pop up screens SR 2000α User s Manual No 0000A 5 35 ...

Page 122: ...ys appears on the display Then touch PAGE on the screen 3 The Preset Key Registration screen with PLU preset keys appears on the display Then touch FUNC on the screen 4 The Preset Key Registration screen with function preset keys appears on the display Then touch PRESET on the screen 5 Touch REGISTER and the Key Type field 5 36 SR 2000α User s Manual No 0000A ...

Page 123: ...ple Select TARE 8 For a function key that requires numeric entry enter a numeric data using the keypad and touch the desired key to allocate Example Tare 1 0 010 lb Example Tare 2 0 020 lb For a function key that does not require numeric entry simply touch the desired key to allocate 9 Repeat steps 6 through 8 for more registrations 10 Touch MENU on the screen to finish this procedure SR 2000α Use...

Page 124: ...C to find out the original page to be copied or At this time confirm that PAGE COPY is displayed in the key type field and remember the original page number Example Original page 3 4 4 When copying the original page to an existing page touch PAGE to display the page to which the original page is copied Or when copying the original page to a new page touch PRESET and NEW buttons to display a new pa...

Page 125: ...h COPY on the screen Example Copy page 3 to the new page 6 The confirmation screen appears on the display for copying Then touch EXECUTE on the screen 7 The original page has been copied to the current page 8 Repeat steps 3 through 7 for more copying 9 Touch MENU on the screen to finish this procedure SR 2000α User s Manual No 0000A 5 39 ...

Page 126: ...e screen 2 The Preset Key Registration screen with product category keys appears on the display Then touch PAGE EDIT on the screen 3 Touch PAGE or FUNC to find out the page to be deleted or Example Delete page 3 4 4 Touch S or T to change the Key Type display field to PAGE DELETE 5 40 SR 2000α User s Manual No 0000A ...

Page 127: ...the screen 6 The confirmation screen appears on the display for deletion Then touch EXECUTE on the screen 7 Repeat steps 3 through 6 above for more deletions 8 Touch MENU on the screen to finish this procedure SR 2000α User s Manual No 0000A 5 41 ...

Page 128: ...Allocation 1 Confirm that the Registration Menu is displayed Then touch AD MSG Advertisement Message on the screen to select 2 The Advertisement Message Registration screen appears on the display Then enter the scroll number using the keypad and touch the Scroll No field Example Scroll number 1 5 42 SR 2000α User s Manual No 0000A ...

Page 129: ...e of the following buttons to select the character size Standard character size Wide character size 5 Touch one of the following buttons to select the display speed Fast flashing or scrolling Medium flashing or scrolling Slow flashing or scrolling 6 Enter the number of display times using the keypad and touch the Repeat field Example 3 display times SR 2000α User s Manual No 0000A 5 43 ...

Page 130: ...advertisement message numbers to each desired field Example Message No 1 on Basic 8 Touch NORMAL SCREEN to change the key display to TOTAL SCREEN 9 Repeat steps 2 through 8 above for Total Screen allocation 5 44 SR 2000α User s Manual No 0000A ...

Page 131: ...ement Message Registration screen appears on the display Then enter the scroll number using the keypad and touch the Scroll No field Example Scroll number 1 3 Touch EDIT on the screen See Appendix Text Editing for more detailed information 4 The text edit screen appears on the display Enter the desired characters and edit the text SR 2000α User s Manual No 0000A 5 45 ...

Page 132: ...diting for more detailed information 5 When the text editing is complete touch RETURN on the screen 6 The confirmation screen appears on the display for saving Then touch EXECUTE to save the registered message 5 46 SR 2000α User s Manual No 0000A ...

Page 133: ... The Advertisement Message Registration screen appears on the display Then enter the scroll number using the keypad and touch the Scroll No field Example Scroll number 1 3 The Advertisement Message Registration screen with the data of the entered message number Then touch DELETE on the screen to delete the displayed text SR 2000α User s Manual No 0000A 5 47 ...

Page 134: ...Chapter 5 PROGRAMING MODE 4 The confirmation screen appears for deletion Then touch EXECUTE on the screen 5 48 SR 2000α User s Manual No 0000A ...

Page 135: ...m that the Registration Menu is displayed Then touch OPERATORS on the screen to select 2 The Operator Registration screen appears on the display 3 Touch a desired field to select Example Operator No 0003 4 Touch EDIT on the screen SR 2000α User s Manual No 0000A 5 49 ...

Page 136: ...ix Text Editing for more detailed information 5 The text edit screen appears on the display Enter the desired characters and edit the text 6 When the text editing is complete touch RETURN on the screen 5 50 SR 2000α User s Manual No 0000A ...

Page 137: ... the keypad and press the PLU key Example Nutrition number 1 3 The Nutrition Data Registration screen with the data of the entered nutrition number appears on the display Then touch EDIT on the screen See Appendix Text Editing for more detailed information 4 The text edit screen appears on the display Enter the desired characters and edit the text When the text editing is complete touch RETURN on ...

Page 138: ...umeric field and touch the corresponding field to register Example Total calories 100 6 Repeat step 5 above for further required items 7 When the registration is complete touch RETURN on the screen 8 The confirmation screen appears on the display for saving Touch EXECUTE on the screen 5 52 SR 2000α User s Manual No 0000A ...

Page 139: ...e display Then enter the message number and press the PLU key on the keypad Example Message No 1 See Appendix Text Editing for more detailed information 3 The text edit screen appears on the display Enter the desired characters and edit the text When the text editing is complete touch RETURN on the screen 4 Repeat steps 2 and 3 above for further registrations SR 2000α User s Manual No 0000A 5 53 ...

Page 140: ...Chapter 5 PROGRAMING MODE 5 Touch MENU on the screen 5 54 SR 2000α User s Manual No 0000A ...

Page 141: ...e display Then enter the message number and press the PLU key on the keypad Example Message No 1 See Appendix Text Editing for more detailed information 3 The text edit screen appears on the display Enter the desired characters and edit the text When the text editing is complete touch RETURN on the screen 4 Repeat steps 2 and 3 above for further registrations SR 2000α User s Manual No 0000A 5 55 ...

Page 142: ...Chapter 5 PROGRAMING MODE 5 Touch MENU on the screen 5 56 SR 2000α User s Manual No 0000A ...

Page 143: ...e Registration screen appears on the display Then enter the message number and press the PLU key on the keypad Example Message No 1 See Appendix Text Editing for more detailed information 3 The text edit screen appears on the display Enter the desired characters and edit the text When the text editing is complete touch RETURN on the screen 4 Repeat steps 2 and 3 above for further registrations SR ...

Page 144: ...Chapter 5 PROGRAMING MODE 5 Touch MENU on the screen 5 58 SR 2000α User s Manual No 0000A ...

Page 145: ...tration screen appears on the display Then enter the department number using the keypad and press the PLU key Example Department No 1 See Appendix Text Editing for more detailed information 3 The text edit screen appears on the display Enter the desired characters and edit the text When the text editing is complete touch RETURN on the screen 4 The confirmation screen appears on the display for sav...

Page 146: ...Chapter 5 PROGRAMING MODE 5 Repeat steps 2 3 and 4 above for further registrations 6 Touch MENU on the screen 5 60 SR 2000α User s Manual No 0000A ...

Page 147: ...een appears on the display Then enter the message number and press the PLU key on the keypad Example Group No 1 See Appendix Text Editing for more detailed information 3 The text edit screen appears on the display Enter the desired characters and edit the text When the text editing is complete touch RETURN on the screen 4 The confirmation screen appears on the display for saving Touch EXECUTE on t...

Page 148: ...Chapter 5 PROGRAMING MODE 5 Repeat steps 2 3 and 4 above for further registrations 6 Touch MENU on the screen 5 62 SR 2000α User s Manual No 0000A ...

Page 149: ...ber 1 through 6 are default settings as follows 1 Confirm that the second page of Registration Menu is displayed Then touch POP MESSAGE on the screen to select 2 The POP Registration screen appears on the display Then enter the message number and press the PLU key on the keypad Example Message No 9 SR 2000α User s Manual No 0000A 5 63 ...

Page 150: ...isplay Enter the desired characters and edit the text When the text editing is complete touch RETURN on the screen 4 The confirmation screen appears on the display for saving Touch EXECUTE on the screen 5 Repeat steps 2 3 and 4 above for further registrations 6 Touch MENU on the screen 5 64 SR 2000α User s Manual No 0000A ...

Page 151: ... the screen to select 2 The Check Label screen appears on the display 3 Enter Start PLU number using the keypad and touch the corresponding SET In the same manner enter End PLU number using the keypad and touch the corresponding SET Example Start PLU No 10 End PLU No 50 4 Touch MENU on the screen SR 2000α User s Manual No 0000A 5 65 ...

Page 152: ...d to confirm the specified character style on the screen Used for return the display to the Registration Menu screen Used to copy the original data to the current data Used to move the cursor back by one character Used to move the cursor in an arrow direction Used to delete a character at the position where the cursor is positioned A 1 SR 2000α User s Manual No 0000A ...

Page 153: ...buttons Touch the FIX button to complete emphasizing the selected characters Used to select capital or small letter SHIFT ON Capital letter SHIFT OFF Small letter Touching this button changes the display in the following order Used to select black letter or red letter Touching this button changes the display in the following order Note Available only when two color print specification is used Used...

Reviews: