background image


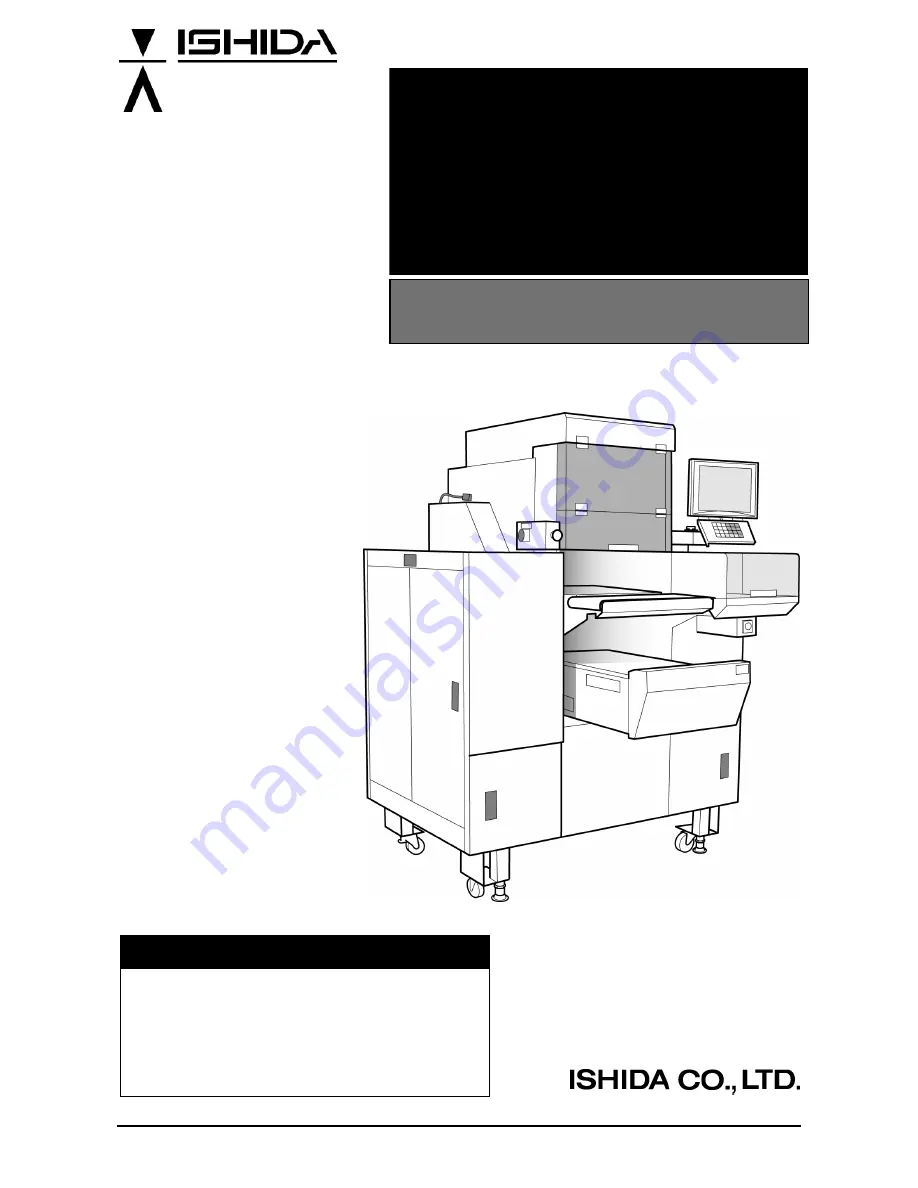
Automatic Weigh/Wrap Labeling Machine 

Omni-4000ST

User’s Manual   


IMPORTANT 

 Read this manual thoroughly, and do not perform 

installation, operation, maintenance, or inspection 
unless you fully understand all of the contents. 

 Keep this manual in a safe place where you can 

refer to it easily while installing, operating, and 
carrying out maintenance or inspections. 

Omni-4000ST User’s Manual 

Summary of Contents for Omni-4000ST

Page 1: ...l thoroughly and do not perform installation operation maintenance or inspection unless you fully understand all of the contents Keep this manual in a safe place where you can refer to it easily while installing operating and carrying out maintenance or inspections Omni 4000ST User s Manual ...

Page 2: ...th respect to the use of the information contained herein Moreover because ISHIDA is constantly striving to improve its high quality products the information contained in this manual is subject to change without notice Every precaution has been taken in the preparation of this manual Nevertheless ISHIDA assumes no responsibility for errors or omissions Neither is any liability assumed for damages ...

Page 3: ...DA representative at any time to confirm the actual specifications of the purchased machine Errors and Omissions The information in this manual has been carefully checked and is believed to be accurate However please understand that the descriptions in this manual may not agree with the actual machine due to machine improvements The information is subject to change without prior notice in the futu...

Page 4: ...ers Warning stickers are affixed to the machine to warn operators of possible dangers Keep these stickers clean at all times Take precautions to ensure that they do not become unreadable or peel off This sticker indicates that the main power should be disconnected when performing any type of internal maintenance or service on the machine This sticker indicates that hands should be kept away from h...

Page 5: ...ar the film cutter ensure to press the Emergency Stop Button first Otherwise the film cutter may come out and cut your hand KEEP HANDS AWAY FROM THE FILM ROLLERS When you need to change the film or do anything near the film rollers ensure to press the Emergency Stop Button first Otherwise your hand may get caught in the film roller DO NOT TOUCH OR ALLOW CLOTHING TO TOUCH THE HEATER CONVEYER The he...

Page 6: ...tioners or refrigerators Places where the floor or foundation is unstable Places subject to a lot of dust or dirt Places with large voltage fluctuations Power Supply Precautions Heed the following precautions about power supply Use a power supply with rated voltage ground Prepare a dedicated power source A power supply that generates voltage variation may cause a malfunction Do not stand on the po...

Page 7: ...that the machine is level If the level is not centered weighing will not be accurate and wrapping will not be performed well Adjust the level adjusting feet until the bubble inside the level indicator is centered Omni 4000ST User s Manual page v ...

Page 8: ...Installation Space Precautions Allow ample space on either side of the machine and behind the machine to ensure easy access for maintenance page vi Omni 4000ST User s Manual ...

Page 9: ... 2 2 PLU CALL UP 2 4 2 3 WEIGHING WRAPPING LABELING 2 8 2 4 WRAPPING ONLY 2 9 2 5 LABELING ONLY 2 10 2 6 TENTAIVE UNIT PRICE CHANGE 2 11 2 7 TENTATIVE CHANGE TO FIXED PRICE 2 12 2 8 TRAY CHANGE 2 13 2 9 MARKDOWN PRICE 2 14 2 10 MANUAL LABELING 2 16 2 11 DATE AND TIME CHANGE 2 18 2 12 CHECKING PRINT ITEMS FOR LABELING 2 21 2 13 MEMO PRESET BUTTON 2 22 2 14 FUNCTION KEYS 2 26 CHAPTER 3 TOTAL MODE 3 ...

Page 10: ...DDRESS REGISTRATION 4 23 4 8 TRAY MESSAGE REGISTRATION 4 26 4 9 DEPARTMENT NAME REGISTRATION 4 32 4 10 CATEGORY PRESET REGISTRATION 4 34 4 11 PLU PRESET REGISTRATION 4 36 4 12 TEXT EDITING 4 37 CHAPTER 5 SETUP MODE 5 1 STARTING PROCEDURE 5 2 5 2 SETUP MENU 5 3 5 3 EXPIRY DATE SETTING 5 4 5 4 PASSWORD SETTING 5 6 5 5 WORD WRAP WIDTH SETTING 5 7 5 6 REFERENCE DATA SETUP 5 8 5 7 TOTAL ADD SETTING 5 1...

Page 11: ...S 1 1 NAME OF EACH PART 1 2 1 2 STROKE KEYS 1 3 1 3 LABELS TRAYS AND FILM 1 4 1 4 OPERATION START END 1 6 1 5 EMERGENCY STOP ON OFF 1 7 1 6 FILM ROLL LOADING 1 8 1 7 FILM THEADING 1 9 1 8 LABEL SETTING 1 12 1 9 DAILY MAINTENANCE 1 16 Omni 4000ST User s Manual page 1 1 1 ...

Page 12: ...Chapter 1 BEFORE USING THIS MACHINE 1 1 NAME OF EACH PART page 1 2 Omni 4000ST User s Manual ...

Page 13: ...Chapter 1 BEFORE USING THIS MACHINE 1 2 STROKE KEYS Omni 4000ST User s Manual page 1 3 ...

Page 14: ...e sucked by the applicator 1 3 2 TRAYS Use the designated trays for this machine Usable tray size Width 95 360mm Length 80 250mm Height 10 50mm Some trays might not be packed depending on the shape material and weight even though the tray sizes are within the acceptable ranges Unusable trays Following trays cannot be used z Fragile trays z Deformed trays zz Round or hollow bottomed trays z Trays m...

Page 15: ...shown below to maintain a consistent wrapping appearance z Contents not fit in the tray z Lopsided contents z Overfilled tray 1 3 3 FILM TYPE Use the film designated by ISHIDA as packing may not be performed if other films are used Contact your ISHIDA service representative for further details regarding usable films Omni 4000ST User s Manual page 1 5 ...

Page 16: ... Arm will start moving as soon as the Main Power Switch is turned ON Do not put your hand inside the machine while the Main Power Switch is turned ON The Heater Conveyer gets very hot and may cause burns Ensure to keep your hand away from the conveyer Do not put your hand inside the machine while performing the return operation 3 The initial screen is displayed 1 4 2 OPERATION END Do not touch the...

Page 17: ... USING THIS MACHINE 1 5 EMERGENCY STOP ON OFF 1 5 1 EMERGENCY STOP ON 1 Press the Emergency Stop button 1 5 2 EMERGENCY STOP OFF 1 Turn the Emergency Stop button clockwise to release Omni 4000ST User s Manual page 1 7 ...

Page 18: ... the lever is parallel with the film core and insert the film roll around the holder until the roll clicks With pushing the end of the film core align the near end with the film on the film position decal Lever Film core 4 Turn the lever vertical to the film core to secure the film roll position Lever Film core 5 Close the Film Replacement Door page 1 8 Omni 4000ST User s Manual ...

Page 19: ...tarting to set the film press the Emergency Stop button 2 Open the Side Cover and use the handle to lift up the Film Set Roller until it locks into position 3 Open the Side Door 4 Evenly cut the top edge of the film and pull it up Omni 4000ST User s Manual page 1 9 ...

Page 20: ...ligned with the line appearing on the roll set position decal 6 Stick the film on both Film Feed Belts 7 Use the handle to slightly lift up to release the lock condition and lower the Film Set Roller Lower the Side Cover 8 Close the side door page 1 10 Omni 4000ST User s Manual ...

Page 21: ...2 The film is fed normally and press the Emergency Stop button Make sure that the Emergency Stop button has been pressed before removing the film Unless the Emergency Stop button is pressed the film cannot be removed because it is pinched by clamps 13 Remove the film 14 Release the Emergency Stop button Omni 4000ST User s Manual page 1 11 ...

Page 22: ... Emergency Stop button Make sure that the Emergency Stop button has been pressed before opening the Printer Cover 2 Open the Printer Cover 3 If the Applicator is positioned in front of the printer move the Applicator to the side 4 Use the lever to open the print head page 1 12 Omni 4000ST User s Manual ...

Page 23: ...e printer unit 6 Release the Label Roll Stopper 7 Set a label roll around the holder and thread the label paper as shown in the figure 8 Set the end of backing paper with the stopper and turn the Label Take up Bobbin counterclockwise until the label slack is taken up Omni 4000ST User s Manual page 1 13 ...

Page 24: ...r 1 BEFORE USING THIS MACHINE 9 Lock the Label Roll Stopper 10 Slide the printer back to its original position 11 Close the Print Head 12 Release the Emergency Stop button page 1 14 Omni 4000ST User s Manual ...

Page 25: ...Chapter 1 BEFORE USING THIS MACHINE 13 Press the FEED key several times to make sure that labels are normally issued Ð 14 Close the Printer Cover Omni 4000ST User s Manual page 1 15 ...

Page 26: ... machine should keep all long hair up wear a hat appropriate clothing and shoes Make sure to wash hands and wear clean gloves before cleaning the machine Wet the cleaning cloth with a mild detergent and wring it thoroughly before use Spray alcohol 80 vol on the areas in direct contact with food or trays for sterilization A numeric key cover may be a good solution if the numeric keys get heavily so...

Page 27: ...n Note When Cleaning Mode is executed the Side Wrapping Plates and Rear Wrapping Plate are released and can be moved manually and the Lift Unit elevates The Heater Conveyer remains hot even after the Main Power Switch has been turned OFF Avoid touching the conveyer as you may burn yourself 4 Turn OFF the Main Power Switch 5 Open the Printer Cover Omni 4000ST User s Manual page 1 17 ...

Page 28: ...Chapter 1 BEFORE USING THIS MACHINE 1 9 2 PLACES TO BE CLEANED page 1 18 Omni 4000ST User s Manual ...

Page 29: ...ONLY 2 9 2 5 LABELING ONLY 2 10 2 6 TENTAIVE UNIT PRICE CHANGE 2 11 2 7 TENTATIVE CHANGE TO FIXED PRICE 2 12 2 8 TRAY CHANGE 2 13 2 9 MARKDOWN PRICE 2 14 2 10 MANUAL LABELING 2 16 2 11 DATE AND TIME CHANGE 2 18 2 12 CHECKING PRINT ITEMS FOR LABELING 2 21 2 13 MEMO PRESET BUTTON 2 22 2 14 FUNCTION KEYS 2 26 Omni 4000ST User s Manual page 2 1 2 ...

Page 30: ...t Keys Main function keys Changes the data when pressed after numeric entry Also displays the print selection screen when touched without numeric entry Performs the scale zero calibration Numeric function keys Changes the wrapping mode Wrap Label Label Wrap Changes the data when pressed after numeric entry Also displays the tray list screen when touched without numeric entry Changes the data when ...

Page 31: ...Chapter 2 NORMAL MODE 2 1 2 EXAMPLE OF WEIGHING PLU SCREEN 2 1 3 EXAMPLE OF FIXED PRICE PLU SCREEN Displays the upper lower weight limit setting screen when pressed Omni 4000ST User s Manual page 2 3 ...

Page 32: ...ss the touch panel with your finger Pressing the panel using pointed objects such as fingernails or mechanical pencils may damage the touch panel 2 Enter a PLU number and press the PLU stroke key or PLU No field on the screen EXAMPLE Call up PLU No 131 3 The designated PLU screen is displayed page 2 4 Omni 4000ST User s Manual ...

Page 33: ...ts such as fingernails or mechanical pencils may damage the touch panel 2 Press the desired category button to make a selection EXAMPLE Call the PLU No 131 Select Beef BNLS Shoulder Steak under the category BEEF 3 The Category Preset List screen is displayed Press the Select Beef BNLS Shoulder Steak field to make a selection 4 The designated PLU screen is displayed Omni 4000ST User s Manual page 2...

Page 34: ...sing pointed objects such as fingernails or mechanical pencils may damage the touch panel 2 Press the PLU No field on the screen 3 The Category Preset List screen is displayed Use the V and U buttons to turn over the screen until you find the desired PLU and press the desired field to make a selection EXAMPLE Call the Select Beef BNLS Shoulder Steak page 2 6 Omni 4000ST User s Manual ...

Page 35: ...screen is displayed 000001 GROUND BEEF 000002 GROUND BEEF SPECIAL 000003 TEXAS GROUND BEEF 000004 OREGON GROUND BEEF 000005 CALIFORNIA GROUND BEEF 000006 UTAH GROUND BEEF 000007 SLICED BEEF 000008 SLICED BEEF SPECIAL 000009 SLICED TEXAS BEEF 000010 SLICED OREGON BEEF 4 Press the desired Memo Preset button to make a selection EXAMPLE Call the SLICED BEEF using Memo Preset button 000004 OREGON GROUN...

Page 36: ...1 Make sure that the desired PLU screen is displayed Do not touch the tray after placing it on the Weigh Platter Otherwise your hand may get caught in the In feed Pusher that moves automatically immediately after the tray is placed 2 Place a tray filled with a commodity in the middle of the Weigh Platter The tray is weighed wrapped labeled and discharged page 2 8 Omni 4000ST User s Manual ...

Page 37: ...ntil the button display changes to WRAP The button display will change in the order WRAP LABEL LABEL WRAP each time the button is pressed Do not touch the tray after placing it on the Weigh Platter Otherwise your hand may get caught in the In feed Pusher that moves automatically immediately after the tray is placed 3 Place a tray filled with a commodity in the middle of the Weigh Platter The tray ...

Page 38: ...n the Printer Cover Wrap mode automatically changes to LABEL when the Printer Cover is opened Do not touch the tray after placing it on the Weigh Platter Otherwise your hand may get caught in the In feed Pusher that moves automatically immediately after the tray is placed 3 Place a tray filled with a commodity in the middle of the Weigh Platter The label is issued page 2 10 Omni 4000ST User s Manu...

Page 39: ...he selected PLU tentatively EXAMPLE Change the unit price from 6 50 to 4 80 tentatively 1 Make sure that the desired PLU screen is displayed 2 Enter a new unit price using numeric keys and press the U P stroke key Î The unit price has been changed to the new unit price tentatively Omni 4000ST User s Manual page 2 11 ...

Page 40: ...he fixed price PLU tentatively EXAMPLE Change the unit price 6 29 to the fixed price 7 00 tentatively 1 Make sure that the desired PLU screen is displayed 2 Enter the fixed price using numeric keys and press the FIX stroke key Î The unit price has been changed to the new fixed price tentatively page 2 12 Omni 4000ST User s Manual ...

Page 41: ...ed Lightly press the touch panel with your finger Pressing the panel using pointed objects such as fingernails or mechanical pencils may damage the touch panel 2 Press the TRAY No field on the screen 3 The Tray Name List screen is displayed 4 Press the desired field to select the tray number to be used The display automatically returns to the PLU screen and the tray to be used has been tentatively...

Page 42: ... Tray No 5 tentatively 1 Make sure that the desired PLU screen is displayed Lightly press the touch panel with your finger Pressing the panel using pointed objects such as fingernails or mechanical pencils may damage the touch panel 2 Press the M D PRICE field on the screen 3 The Markdown Price Mode Setting screen is displayed page 2 14 Omni 4000ST User s Manual ...

Page 43: ...his button after numeric entry will register the discount rate in the markdown price field Special Unit Price Pressing this button after numeric entry will register the special unit price in the unit price field Unit Price Amount Discount Pressing this button after numeric entry will register the discount unit price in the unit price field Unit Price Percent Discount Pressing this button after num...

Page 44: ...your finger Pressing the panel using pointed objects such as fingernails or mechanical pencils may damage the touch panel 2 Press the U button to display the function key screen AUTO LABELING is usually displayed 3 Press the AUTO LABELING button to change the button display to MANUAL LABELING The button display will change between AUTO LABELING and MANUAL LABELING each time the button is pressed p...

Page 45: ...ABEL WRAP each time the button is pressed Do not touch the tray after placing it on the Weigh Platter Otherwise your hand may get caught in the In feed Pusher that moves automatically immediately after the tray is placed 5 Place a tray filled with a commodity in the middle of the Weigh Platter The tray is weighed wrapped and discharged 6 Press the FEED stroke key to issue the label Omni 4000ST Use...

Page 46: ... to Tray No 5 tentatively 1 Make sure that the desired PLU screen is displayed Lightly press the touch panel with your finger Pressing the panel using pointed objects such as fingernails or mechanical pencils may damage the touch panel 2 Press the PACK DATE or SHELF LIFE field on the screen 3 The Pack Date Setting screen is displayed page 2 18 Omni 4000ST User s Manual ...

Page 47: ...me HHMM when you want to print a certain Pack Time X Press one of the following buttons Print the Pack Time Do not print the Pack Time 3 Pack Time Select Press one of the following buttons Select for printing the current time Select for printing a certain time 4 Sell By Date Press one of the following buttons Do not print the Sell By Date Print the Sell By Date Omni 4000ST User s Manual page 2 19 ...

Page 48: ...owing buttons Do not print the Sell By Time Print the Sell By Time 6 Shelf Life Enter the number of days 1 9999 days for Sell By Date X 7 Use By Enter the number of days 1 9999 hours for Sell By Date Press one of the following buttons Print the Pack Date Do not print the Pack Date page 2 20 Omni 4000ST User s Manual ...

Page 49: ...h panel 2 Press the PLU name display field 3 The PLU Information screen is displayed Check whether there are any missing items or mistakes for the selected PLU and make the necessary additions and corrections if any Item fields below the comment field can be registered by pressing the field after numeric entry When the field is pressed without numeric entry displays the list for each item 4 Press ...

Page 50: ...0002 GROUND BEEF SPECIAL 000003 TEXAS GROUND BEEF 000004 OREGON GROUND BEEF 000005 CALIFORNIA GROUND BEEF 000006 UTAH GROUND BEEF 000007 SLICED BEEF 000008 SLICED BEEF SPECIAL 000009 SLICED TEXAS BEEF 000010 SLICED OREGON BEEF Turns over the screen Truncates the PLU name Changes the mode Aborts respective operation mode and returns to the normal display Executes each mode operation and returns to ...

Page 51: ...F 000005 CALIFORNIA GROUND BEEF 000006 UTAH GROUND BEEF 000007 SLICED BEEF 000008 SLICED BEEF SPECIAL 000009 SLICED TEXAS BEEF 000010 SLICED OREGON BEEF 3 Press the REGISTER button UND EF GROUND BEEF GROUND BEEF GROUND BEEF BEEF 010 CED GON EF The data will be overwritten when the registered Memo Preset button is pressed Registration can also be performed by pressing the Memo Preset button after e...

Page 52: ...SPECIAL 000003 TEXAS GROUND BEEF 000004 OREGON GROUND BEEF 000005 CALIFORNIA GROUND BEEF 000006 UTAH GROUND BEEF 000007 SLICED BEEF 000008 SLICED BEEF SPECIAL 000009 SLICED TEXAS BEEF 000010 SLICED OREGON BEEF 3 Press the DELETE button BEEF BEEF BEEF 4 The display changes to the Memo Preset Delete mode Press the desired memo preset to be deleted EXAMPLE Delete the UTAH GROUND BEEF Memo Preset butt...

Page 53: ...Chapter 2 NORMAL MODE 5 Press the CONFIRM button The deletion has been executed and the display returns to the normal screen Omni 4000ST User s Manual page 2 25 ...

Page 54: ... many convenient function keys Main function keys are located at the bottom of the screen and sub function keys on the Function Key screen Æ Numeric function keys Displays the Function Key screen Function keys Function keys page 2 26 Omni 4000ST User s Manual ...

Page 55: ...Chapter 2 NORMAL MODE FUNCTION KEYS Omni 4000ST User s Manual page 2 27 ...

Page 56: ...Chapter 2 NORMAL MODE page 2 28 Omni 4000ST User s Manual ...

Page 57: ...Chapter 2 NORMAL MODE Omni 4000ST User s Manual page 2 29 ...

Page 58: ...fter entering 0 POP number can be set when pressed after numeric entry To delete the setting press the button after entering 0 Coupon message number can be set when pressed after numeric entry To delete the setting press the button after entering 0 Front format number can be set when pressed after numeric entry To delete the setting press the button after entering 0 Image number can be set when pr...

Page 59: ...Chapter 3 TOTAL MODE TOTAL MODE CONTENTS 3 1 TOTAL MENU 3 2 3 2 DAILY ACCUMULATED TOTAL 3 3 3 3 HOURLY TRAY TOTALS 3 9 3 4 TOTAL CLEAR 3 15 Omni 4000ST User s Manual page 3 1 3 ...

Page 60: ...encils may damage the touch panel 1 Make sure that the initial screen is displayed Press the MENU button If a password has been set for entering Total Mode press the TOTALS button after password entry 6 digits 2 Main Menu screen is displayed Press the TOTALS button 3 Total Menu screen is displayed Returns to Main Menu screen page 3 2 Omni 4000ST User s Manual ...

Page 61: ...ACCUMULATED TOTAL button on the Total Menu screen Lightly press the touch panel with your finger Pressing the panel using pointed objects such as fingernails or mechanical pencils may damage the touch panel 2 Daily Total Menu screen is displayed Press the Daily Grand Total button to select the desired report type The Daily Grand Total screen is displayed Omni 4000ST User s Manual page 3 3 ...

Page 62: ...ess the touch panel with your finger Pressing the panel using pointed objects such as fingernails or mechanical pencils may damage the touch panel 2 Daily Total Menu screen is displayed Press the Sales per Department button to select the desired report type The Sales per Department Total screen is displayed page 3 4 Omni 4000ST User s Manual ...

Page 63: ...ress the touch panel with your finger Pressing the panel using pointed objects such as fingernails or mechanical pencils may damage the touch panel 2 Daily Total Menu screen is displayed Press the Sales by PLU button to select the desired report type The Sales by PLU Total screen is displayed Omni 4000ST User s Manual page 3 5 ...

Page 64: ...s the DAILY TOTAL or ACCUMULATED TOTAL button on the Total Menu screen 2 Daily Total Menu screen is displayed Press the Analysis by PLU button to select the desired report type 3 Analysis By PLU screen is displayed Set the number of items to be displayed by pressing SET in the Enter Report Size field after numeric entry Note Enter 0 to display all items and totalize them page 3 6 Omni 4000ST User ...

Page 65: ... a selection Displays and totalizes data in PLU number order Displays and totalizes data in price descending order Displays and totalizes data in weight descending order Displays and totalizes data in quantity descending order Displays and totalizes data in price ascending order Displays and totalizes data in weight ascending order Displays and totalizes data in quantity ascending order 6 Press th...

Page 66: ...4 CALIFORNIA GROUND BEEF 8 0 900 35 10 5 UTAH GROUND BEEF 4 0 600 25 20 6 SLICE BEEF 28 5 740 200 90 7 SLICE BEEF SPECIAL 7 2 800 67 20 8 SLICE TEXAS BEEF 20 6 110 183 30 9 SLICE OREGON BEEF 12 3 604 108 12 10 Moves the cursor up and down Turns over the screen Changes the screen for each classification type set on the Analysis BY PLU screen This is not usable when the classification type is set as...

Page 67: ...Chapter 3 TOTAL MODE 3 3 HOURLY TRAY TOTALS This section explains about how to obtain hourly and tray totals in this machine Omni 4000ST User s Manual page 3 9 ...

Page 68: ...s over the screen Lightly press the touch panel with your finger Pressing the panel using pointed objects such as fingernails or mechanical pencils may damage the touch panel 1 Press the HOURLY TRAY TOTALS button on the Total Menu screen 2 The Hourly Tray Totals screen is displayed Press the HOURLY TOTALS button on the screen 3 Totals for each time zone screen are displayed Select the type of data...

Page 69: ...ay damage the touch panel 1 Press the HOURLY TRAY TOTALS button on the Total Menu screen 2 Press the HOURLY PLU TOTALS on the screen 3 The Hourly PLU Totals screen is displayed Call the desired PLU by pressing the PLU stroke key after numeric entry 0 0 0 0 0 0 0 0 0 0 0 0 0 0 0 0 0 0 0 0 0 0 0 0 0 0 0 0 0 0 0 0 000 0 00 0 H O U R LY P L U T O TA L S Moves the cursor up and down Turns over screen D...

Page 70: ...ach time zone screen are displayed Select the type of data to be analyzed GROUND BEEF 0 0 0 0 0 0 8 4 8 12 7 3 6 3 6 11 6 6 23 13 9 31 18 7 48 29 0 26 15 7 165 55 120 397 29 H O U R LY P L U T O TA L S page 3 12 Omni 4000ST User s Manual ...

Page 71: ... 1 Press the HOURLY TRAY TOTALS button on the Total Menu screen 2 The Hourly Tray Totals screen is displayed Press the HOURLY WRAP TOTALS button to make a selection Totals for each time zone screen are displayed Omni 4000ST User s Manual page 3 13 ...

Page 72: ...Y TRAY 1 Press the HOURLY TRAY TOTALS button on the Total Menu screen 2 The Hourly Tray Totals screen is displayed Press the WRAP TOTALS BY TRAY button to make a selection Wrap Totals by Tray are displayed page 3 14 Omni 4000ST User s Manual ...

Page 73: ...The Total Clear screen is displayed Select the item from the accumulated totals Press the desired button to make a selection of the items to be deleted among DAILY TOTAL TIME ZONE TRAY TOTAL and PERIOD 3 Press the EXECUTE button to clear the selected total Delete confirmation screen is displayed Press EXECUTE to clear the selected items Omni 4000ST User s Manual page 3 15 ...

Page 74: ...Chapter 3 TOTAL MODE page 3 16 Omni 4000ST User s Manual ...

Page 75: ...TRA MESSAGE REGISTRATION 4 17 4 5 POP MESSAGE REGISTRATION 4 19 4 6 COUPON MESSAGE REGISTRATION 4 21 4 7 STORE NAME ADDRESS REGISTRATION 4 23 4 8 TRAY MESSAGE REGISTRATION 4 26 4 9 DEPARTMENT NAME REGISTRATION 4 32 4 10 CATEGORY PRESET REGISTRATION 4 34 4 11 PLU PRESET REGISTRATION 4 36 4 12 TEXT EDITING 4 37 Omni 4000ST User s Manual page 4 1 4 ...

Page 76: ...red POP MESSAGE The POP message can be registered COUPON MSG The coupon message can be registered EXTRA MESSAGE 2 The extra message 2 can be registered EXTRA MESSAGE 3 The extra message 3 can be registered STORE NAME The store name and address can be registered TRAY MESSAGE The tray data such as name size and weight can be registered DEPARTMENT The department name can be registered GROUP The group...

Page 77: ...ister code POP number etc can be registered Register the PLU data after selecting the PLU field listed on the screen Returns to Registration Menu screen Turns back the screen Moves the cursor up and down Turns over the screen Displays PLU Data Registration screen Deletes the selected data Omni 4000ST User s Manual page 4 3 ...

Page 78: ...ration screen is displayed Press the desired PLU filed to make a selection Or enter the desired PLU number 1 999999 using the numeric keys and press the PLU stroke key 3 Press the DETAIL button on the screen 4 PLU Data Registration 1 3 screen is displayed page 4 4 Omni 4000ST User s Manual ...

Page 79: ...he screen Deletes the called PLU data The text edit screen is displayed Displays the called PLU name Also changes to the next registered PLU name when directly pressed REGISTRATION METHOD The table below is the summarized registration examples Select necessary items and make necessary registrations Omni 4000ST User s Manual page 4 5 ...

Page 80: ...Chapter 4 PROGRAMMING MODE page 4 6 Omni 4000ST User s Manual ...

Page 81: ...Chapter 4 PROGRAMMING MODE Omni 4000ST User s Manual page 4 7 ...

Page 82: ...Chapter 4 PROGRAMMING MODE page 4 8 Omni 4000ST User s Manual ...

Page 83: ...N 2 3 SCREEN Saves the PLU data and returns to the previous screen Turns over the screen REGISTRATION METHOD The table below is the summarized registration examples Select necessary items and make necessary registrations Omni 4000ST User s Manual page 4 9 ...

Page 84: ...Chapter 4 PROGRAMMING MODE page 4 10 Omni 4000ST User s Manual ...

Page 85: ...Chapter 4 PROGRAMMING MODE Omni 4000ST User s Manual page 4 11 ...

Page 86: ... 3 3 SCREEN Saves the PLU data and returns to the previous screen Turns over the screen REGISTRATION METHOD The table below is the summarized registration examples Select necessary items and make necessary registrations page 4 12 Omni 4000ST User s Manual ...

Page 87: ...Chapter 4 PROGRAMMING MODE Omni 4000ST User s Manual page 4 13 ...

Page 88: ...Chapter 4 PROGRAMMING MODE page 4 14 Omni 4000ST User s Manual ...

Page 89: ...ered simply by pressing the PLU NAME button on the Registration Menu screen Register the PLU name after calling the desired PLU 1 Press PLU NAME on the Registration Menu screen 2 Text edit screen is displayed Specify the desired PLU EXAMPLE PLU No 1 Omni 4000ST User s Manual page 4 15 ...

Page 90: ...is displayed Enter the desired text using the keyboard on the screen GROUND BEEF 000 001 2046 4 Press the FIX button to confirm the text image 5 Press the RETURN button on the screen Save confirmation screen is displayed Press the EXECUTE button to save the data D BEEF page 4 16 Omni 4000ST User s Manual ...

Page 91: ...egistration Menu screen 2 Extra Message Registration screen is displayed Press the desired message field on the screen to make a selection Or enter the message number 1 999999 and press the PLU stroke key EXAMPLE Message No 1 3 Press the EDIT button 94 For character entry refer to section 4 12 Text Editing 4 Text edit screen is displayed Enter the desired text using the keyboard on the screen 000 ...

Page 92: ...AMMING MODE 5 Press the FIX button to confirm the text image 6 Press the RETURN button on the screen Save confirmation screen is displayed Press the EXECUTE button to save the data page 4 18 Omni 4000ST User s Manual ...

Page 93: ...egistration Menu screen 2 POP Registration screen is displayed Press the desired message field on the screen to make a selection Or enter the message number 1 999 and press the PLU stroke key EXAMPLE Message No 1 3 Press the EDIT button 94 For character entry refer to section 4 12 Text Editing 4 Text edit screen is displayed Enter the desired text using the keyboard on the screen 000 001 078 001 O...

Page 94: ...AMMING MODE 5 Press the FIX button to confirm the text image 6 Press the RETURN button on the screen Save confirmation screen is displayed Press the EXECUTE button to save the data page 4 20 Omni 4000ST User s Manual ...

Page 95: ...stration Menu screen 2 Coupon Message Registration screen is displayed Press the desired message field on the screen to make a selection Or enter the message number 1 999999 and press the PLU stroke key EXAMPLE Message No 1 3 Press the EDIT button 94 For character entry refer to section 4 12 Text Editing 4 Text edit screen is displayed Enter the desired text using the keyboard on the screen 000 00...

Page 96: ...AMMING MODE 5 Press the FIX button to confirm the text image 6 Press the RETURN button on the screen Save confirmation screen is displayed Press the EXECUTE button to save the data page 4 22 Omni 4000ST User s Manual ...

Page 97: ...forth Displays the text edit screen Select 9999 for your own store 1 Press the STORE NAME button on the Registration Menu screen For character entry refer to section 4 12 Text Editing 2 Store Name Address Registration screen for Store No 9999 is displayed The NAME field is automatically selected first When selecting a store number other than 9999 press to find the desired number or enter the store...

Page 98: ...01 096 0001 4 Press the FIX button to confirm the text image 5 Press the RETURN button on the screen Save confirmation screen is displayed Press the EXECUTE button to save the data 6 Press the ADDRESS field to make a selection and press the EDIT button on the screen NAME HYPER ISHIDA ADDRESS 1 2 94 9999 1 2 page 4 24 Omni 4000ST User s Manual ...

Page 99: ... the screen 000 001 096 0001 8 Press the FIX button to confirm the text image 9 Press the RETURN button on the screen Save confirmation screen is displayed Press the EXECUTE button to save the data 10 Registered name and address appear on the screen NAME HYPER ISHIDA ADDRESS SHIGA 1 2 94 9999 Omni 4000ST User s Manual page 4 25 ...

Page 100: ...1 TRAY PROGRAM 1 2 SCREEN Returns to Registration Menu screen Turns over the next screen Returns the wrapper and applicator to their original position Performs the film setting operation Performs the film feeding Displays the tray list Deletes the called tray data 1 Press the TRAY MESSAGE button on the Registration Menu screen 2 Tray Program 1 2 screen is displayed Enter the desired tray number 1 ...

Page 101: ...ace a tray on the weigh platter in the middle of the weigh platter 6 Press the PLU stroke key The wrapping operation starts and the wrapped tray will be discharged 7 Measure the tray and the film and enter each value The weighing area can be used as the scale when WEIGHT is pressed Press WEIGHT again to release this function after weighing 8 Check the finished wrapping condition Change the film te...

Page 102: ... button on the Tray Program screen For character entry refer to section 4 12 Text Editing 2 Text edit screen is displayed Enter the tray name using the keyboard on the screen 3 Press the RETURN button on the screen Save confirmation screen is displayed Press the EXECUTE button to save the data page 4 28 Omni 4000ST User s Manual ...

Page 103: ...RAY PROGRAM 2 2 SCREEN The machine can memorize the label pasting position for each tray either in horizontal or vertical direction 1 Press the PAGE button 2 Tray Program 2 2 Label screen is displayed Omni 4000ST User s Manual page 4 29 ...

Page 104: ...ing position number Labeling Position Adjustment screen is displayed 2 Correct the labeling position Items Operation Right and left labeling position Adjust right and left labeling position The position can be moved in 1mm increments Upper and under label application positions Adjust top and bottom labeling position The position can be moved in 1mm increments Rotation angle Change the labeling ang...

Page 105: ...NG MODE 6 Enter a numeric value 5 8 and press SET in the Label Position Vertical field Decide the labeling position in the same procedure 7 Finally decide the standard labeling position Omni 4000ST User s Manual page 4 31 ...

Page 106: ...ENT button on the Registration Menu screen 2 The Department Name registration screen is displayed 3 Press the desired department filed to make a selection when changing the text Or enter the desired department number 1 9999 and press the PLU stroke key Example Department No 2 4 Press the EDIT button on the screen when changing or creating the selected department name data page 4 32 Omni 4000ST Use...

Page 107: ...ry refer to section 4 12 Text Editing 5 Text edit screen is displayed Enter the department name using the keyboard on the screen 6 Press the RETURN button on the screen Press the EXECUTE button to save the data Omni 4000ST User s Manual page 4 33 ...

Page 108: ... list to be registered to the index is displayed Refer to section 4 10 2 Registering Category Preset Keys from PLU List Deletes all the data in the selected index number 1 Press the CATEGORY PRESET button on the Registration Menu screen 2 Category Preset Registration screen is displayed Select the index to register page 4 34 Omni 4000ST User s Manual ...

Page 109: ...n also be performed by pressing the preset key after numeric entry 4 The PLU Preset Registration screen is displayed Select the PLU to allocate from the list Specify the PLU to allocate with the cursor and press the allocation position key of the preset keyboard Omni 4000ST User s Manual page 4 35 ...

Page 110: ...rsor down Turns over the next screen 1 Press the PRESET KEYS button on the Registration Menu screen PLU preset registration can also be performed by pressing the preset key after numeric entry 2 The Memo Preset Registration screen is displayed Select the PLU to allocate from the list Specify the PLU to allocate with the cursor and press the allocation position key of the preset keyboard page 4 36 ...

Page 111: ... only when two color print specification is used Used to emphasize the characters Touching this key changes the key display in the following order Used to emphasize the characters This key is effective only when the two thermal heads are used Touching this key changes the key display in the following order Used to delete a character at the position where the cursor is positioned Used to delete a c...

Page 112: ...e text on the text display field Used to perform carriage return Used to select either lower case or upper case characters SHIFT ON Lower case characters SHIFT OFF Upper case characters Touching this key changes the key display in the following order 4 12 2 SHIFT ON OFF The SHIFT ON or SHIFT OFF button is used to select either lower case or upper case character Shift OFF Upper case character Shift...

Page 113: ...t the text edit screen is displayed Then enter the desired PLU number and press the PLU key on the operating console Example PLU No 5 2 Text edit screen for the PLU number 5 is called Enter the desired characters Example Roast Fillet Steak Edit the text as necessary 3 When the text editing is completed touch FIX to confirm the edited text image on the text display field Then touch RETURN to finish...

Page 114: ...Chapter 4 PROGRAMMING MODE 4 The confirmation screen appears on the display for saving Then touch EXECUTE to save the text page 4 40 Omni 4000ST User s Manual ...

Page 115: ...e following procedure explains how to emphasize characters EMPHASIZING CHARACTERS FIRST Style 2 function is available only when two color thermal heads are used or 1 Touch to select one of the Style 1 functions or or or Example Reverse Touch STYLE 1 repeatedly until REVERSE appears on the key display 2 Enter the desired characters Example Roast Fillet Steak Touch FIX to confirm the edited text ima...

Page 116: ...erwise enter the desired characters Example Roast Fillet Steak 2 Confirm that SELECT is selected on the screen If not selected touch INSERT to change the key display to SELECT 3 Select REVERSE by touching STYLE 1 repeatedly Example Reverse 4 Use and keys to select the characters to be emphasized page 4 42 Omni 4000ST User s Manual ...

Page 117: ...layed on the text display field Example Roast Fillet Steak 2 Touch ERASE on the screen to delete the entire text 4 12 6 BACK SPACING The following procedure is used to move the cursor back and delete a character if any 1 If you have misspelled press BACK SPACE on the screen to delete the character that has been lastly entered Example Roast Fillet Steal Omni 4000ST User s Manual page 4 43 ...

Page 118: ...e is used to delete a character at the position where the cursor is placed 1 The displayed text is misspelled Example Roast Fillet Steak 2 Place the cursor at the character to be deleted Then touch DELETE on the screen to delete the character page 4 44 Omni 4000ST User s Manual ...

Page 119: ...re the cursor is placed 1 The displayed text is misspelled Example Roast Filet Steak 2 Confirm that INSERT is selected on the screen When not selected touch SELECT to change the key display to INSERT 3 Move the cursor to the position where the character to be inserted Then enter the character L Omni 4000ST User s Manual page 4 45 ...

Page 120: ... yellow If not touch the INPUT field first to declare that the numeric entry will be made Then enter the desired PLU number and press the PLU key on the operating console to designate the PLU file to which the original text is copied 2 Enter the original PLU number using the numeric keys and touch COPY on the screen 3 The copy confirmation screen appears on the display Then touch EXECUTE to copy t...

Page 121: ...Chapter 4 PROGRAMMING MODE 4 The text Roast Fillet Steak of the PLU No 5 is copied to the text display field of the PLU No 25 Omni 4000ST User s Manual page 4 47 ...

Page 122: ...Chapter 4 PROGRAMMING MODE page 4 48 Omni 4000ST User s Manual ...

Page 123: ... CONTENTS 5 1 STARTING PROCEDURE 5 2 5 2 SETUP MENU 5 3 5 3 EXPIRY DATE SETTING 5 4 5 4 PASSWORD SETTING 5 6 5 5 WORD WRAP WIDTH SETTING 5 7 5 6 REFERENCE DATA SETUP 5 8 5 7 TOTAL ADD SETTING 5 11 Omni 4000ST User s Manual page 5 1 5 ...

Page 124: ...ch 2 Press the RETURN button on the Check of Return Operation screen 3 Wait until the initial screen appears Press the MENU button 4 Main Menu screen is displayed Press the SETUP button 5 Setup Menu screen is displayed Setup Menu Screen 1 2 page 5 2 Omni 4000ST User s Manual ...

Page 125: ...ering Registration Setup Total and Subtraction modes Word wrap Set Changes to the Word wrap Width Setting screen Word wrap related data can be set Reference Data Set Changes to the Reference Data Setup screen Reference data can be set for a PLU in which Refer is selected in PLU registration Totals Set Changes to the Total Add Setting screen Set whether or not to add the data to totals Set a maximu...

Page 126: ...Chapter 5 SETUP MODE 5 3 EXPIRY DATE SETTING Changes to the first screen of the Setup Menu Expiry Date Setting Screen Text Edit Screen page 5 4 Omni 4000ST User s Manual ...

Page 127: ...is printed When 0 is set in this field switching does not happen and the text in the Before Switch field is printed Before Switch Select the Before Switch field Press the EDIT button to display the text edit screen After Switch Select the After Switch field Press the EDIT button to display the text edit screen Pack Date Select the Pack Date field Press the EDIT button to display the text edit scre...

Page 128: ...g Screen Display field Function Password Set the password data by pressing this button after 6 gigit numeric entry Enter 000000 and press this button to cancel the password Mode Selection Buttons Press the desired button s to select the mode that requires password entry page 5 6 Omni 4000ST User s Manual ...

Page 129: ...e 1 9999 and press the SET button to set the value unit 0 1mm as a word wrap width value Extra Message Width Enter a numeric value 1 9999 and press the SET button to set the value unit 0 1mm as a word wrap width value Extra Message Pitch Enter a numeric value 1 99 and press the SET button to set the value unit 0 1mm as a gap between characters Omni 4000ST User s Manual page 5 7 ...

Page 130: ...E 5 6 REFERENCE DATA SETUP Turns over the screen Determines the settings and returns to the first screen of the Setup Menu Reference Data Setup 1 2 Screen Reference Data Setup 2 2 Screen page 5 8 Omni 4000ST User s Manual ...

Page 131: ...fied by the Use By Date print setting in PLU registration Pack Time Print Press YES or NO to set whether or not to print the Pack Time This setting is effective only when REFFER is specified by the Pack Time Print setting in PLU registration Pack Time Flag Specify the pack time to be used Clock Use the system clock Designated Use the time designated on the following screen Sell By Time Print Press...

Page 132: ...is effective only when REFFER is specified by the Logo setting in PLU registration Safe handling image number Set the safe handling image number This setting is effective only when REFFER is specified by the Safe Handling Image setting in PLU registration page 5 10 Omni 4000ST User s Manual ...

Page 133: ... Total Add Setting Screen Clears the existing Daily PLU Time Zone Total Cancels the settings and returns to the Total Add Setting Screen Add a commodity to target commodities by pressing this button after selecting the desired PLU or entering the PLU number Delete a commodity from target commodities by pressing this button after selecting the PLU to be deleted Time Zone Set for Individual PLU Scre...

Page 134: ...r or not to add the data to Time Zone Total This is not displayed at a slave machine in master slave specification Tray Total Select whether or not to add the data to Tray Total This is not displayed at a slave machine in master slave specification Daily Total Auto Clear Select whether or not to clear Daily Total when turning off the machine This is not displayed at a slave machine in master slave...

Page 135: ...44 SANNO CHO SHOGOIN SAKYO KU KYOTO 606 8392 JAPAN PHONE 81 75 771 4141 FACSIMILE 81 75 751 1634 URL http www ishidajapan com Design and specifications are subject to change without notice ...

Reviews: