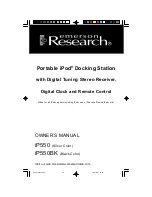
background image

Instruction Manual

FS-23

Summary of Contents for FS-23

Page 1: ...Instruction Manual FS 23 ...

Page 2: ...table or other convenient location allowing quick and easy docking of an iPod and connect it to your audio video system your computer or directly to your TV Before installing and using the iPort please read and follow all of the instructions in this manual carefully iPort FS 23 Box Contents Your FS 23 box should contain the following items 1 iPort dock 1 iPort SR 1 remote control 1 Audio cable 3 5...

Page 3: ...re upgrades iPod Models Supported The iPort FS 23 is compatible with most dockable iPod models including iPod nano 5th generation iPod classic and iPod touch 2nd generation For current compatibility information visit iportmusic com Selecting a Location for the iPort Dock The iPort FS 23 is designed for use in normal interior environments When selecting a location for the system please consider the...

Page 4: ...er Ethernet port Connect to your home network using an Ethernet cable not included that is connected to a hub switch or direct connection with a computer This enables your iPod to sync with your computer using iPortNetSync software downloadable from iportmusic com Component Video Output Has three RCA plugs for connecting to component video inputs of a TV or AV component The 3 5mm video cable conne...

Page 5: ... Local Zone Audio Video System 1 Connect the iPort FS 23 dock to the audio video and computer components as shown in the diagram in Figure 2 on page 6 2 Connect the included audio cable to the iPort s Audio Output jack and to an analog audio source input on the audio system or TV 3 Connect the included component video cable to the iPort s Component Video Output jack and to the component video inpu...

Page 6: ... system IR output 3 5MM CABLE OPTIONAL NOT INCLUDED AUDIO CABLE INCLUDED ETHERNET CABLE OPTONAL NOT INCLUDED COMPONENT VIDEO CABLE INCLUDED 12V power supply To wall outlet To component video input To component video input Figure 2 iPort FS 23 system connections The Audio and video cables can be connected to the TV s Audio and Video Inputs instead of a separate audio system ...

Page 7: ...well 2 To dock the iPod gently slide it down into the iPort docking well as shown in Figure 4 Do not force the iPod down into the dock as you may damage the multi pin connector in the iPort base Note The iPort s menu appears on the connected TV If no video source is detected by your TV check the cable connections If the connections are secure the problem may be video format NTSC Used in North Cent...

Page 8: ...rty programmable learning remote Controlling the iPod Using the iPort s Remote Control 1 Insert your iPod into the iPort dock The Main Menu Figure 5 opens on your TV If you don t see the menu try changing your TV s video source 2 Point the remote control directly at the iPort dock then use the controls as shown in Figure 6 to complete this procedure Your iPort remote control can now control the iP...

Page 9: ...g its scroll wheel or touch screen iPod touch 1 To control the iPod directly using the iPod s controls from the iPort s Main Menu select General Control Mode 2 Press Select on the remote control to close the message window 3 Use the iPod s controls to select photos to view Photos from the docked iPod now display on the TV 3 To return to the iPort s TV menu press and hold Menu for at least three se...

Page 10: ... Menu Figure 7 Main Menu 2 Highlight Music to play music or highlight Video to play video then press Select remote control s center button The menu displays the same information that is shown on the iPod display when listening to music or watching video See Figures 8 and 9 Figure 8 Music screen Figure 9 Video screen ...

Page 11: ...just as you would use the iPod s scroll wheel and center button When music plays the Now Playing screen displays the track information album art if any and playback status Figure 11 Now Playing screen 11 Instruction Manual Previous and next track Repeat and shuffle play Play Pause Volume adjust Figure 10 Playback controls ...

Page 12: ...ou can select the language of the iPort s menus Sound You can set the iPod equalizer setting shuffle mode repeat setting sound check audiobook speed and volume control Note When Volume Control is set to Off you can t adjust the volume using the iPort remote and the volume indicator is not displayed in the Now Playing screen 12 Instruction Manual Figure 12 Configuration menus ...

Page 13: ...d video content stored in an iPhone through the iPort system just as you would play content stored in an iPod Although you can still use the iPhone s telephone functions while it is docked in the iPort they do not function through the iPort itself 1 Dock the iPhone into the iPort dock The iPhone screen displays the message shown in Figure 13 2 If you touch No the iPhone works normally and can rece...

Page 14: ...XP 32 bit or higher MAC OS X v10 4 x PPC version or higher or MAC OS X v10 4 4 Intel version or higher 10 100 Ethernet network connection between the iPort and the computer Installing and Setting Up the Software 1 Download the iPortNetSync software from iportmusic com 2 Double click the file to unzip it then double click the file cosetup exe 3 Follow the on screen instructions to install the iPort...

Page 15: ...of the iPort dock The iPod that is docked in the iPort appears in the iPortNetSync window 4 If your Windows computer prompts you to install a driver follow the prompts to install the recommended driver 5 Click the iPod you want to sync with iTunes then click the Connect button After about 30 seconds iTunes open and the docked iPod appears in the iTunes Devices list 6 Add or remove content to your ...

Page 16: ...d into the power connector on the iPort dock 2 Ensure that the iPod is fully seated into the iPort Status indicator iPort status indicator turns off immediately after docking an iPod 1 Check to see if the iPod is starting up the Apple logo appears on the iPod display The status indicator illuminates when the iPod has completed startup Video No video is displayed on the TV although the iPod shows i...

Page 17: ...oes not detect the iPort or iPod docked in the iPort dock 1 Examine the LED indicators on the Ethernet port on the back of your iPort to troubleshoot the network connection LINK ACTIVITY INDICATOR STATUS INDICATOR Link Activity indicator green Network cable is connected and linked with network hub or switch Status indicator Blinks during network activity Cleaning Your iPort Clean the iPort only wi...

Page 18: ...ANT YOU MUST HAVE PRIOR AUTHORIZATION TO RETURN YOUR iPort 3 If you re directed to return the unit to iPort for repair pack the unit in its original shipping carton If needed you can obtain replacement packaging from us for a small charge Note it is best if you place the box into an additional outer overcarton before shipment to minimize a chance of theft in shipment Please include a copy of the o...

Page 19: ...registered herein and specifically excludes any damage to loudspeakers and other allied or associated equipment which may result for any reason from use with this product iPort shall in no event be liable for incidental or consequential damages arising from any breach of this warranty or otherwise This warranty gives you specific legal rights and you may have other rights which vary from state to ...

Page 20: ...san clemente ca 888 45 iPort www iportmusic com 33 5171 121609aFinal ZDA001U ...

Reviews: