Installation Instruction Sheet
for Integral Twin Spot Emergency Floodlight
3 Year Warranty
Model
Description
Lumens
Dimensions
Weight
ILEMTS035
5W IP65 Twin Spot
Emergency Floodlight
with Self-Test
380
295mm x 52mm x
318mm
1.35Kg
(Gross)
Thank you for purchasing and Integral Led product. When installed correctly this unit will
provide years of service with no lamp changes required. For support or warranty information
please visit
. Always turn off power at the distribution unit before
any maintenance or installation. Please ensure the power cannot be re-connected inadvertently.
General Safety Instructions
1. Always use an approved electrician to install electrical products. Installation should be
carried out in accordance with the current edition of the National Wiring Regulations. If in
doubt, consult a qualified electrician.
2. Provide an uninterrupted mains power supply (Permanent Live) for 24 hours to fully charge
the unit’s batteries.
3. Ensure that ALL electrical connections are tight with no loose strands.
4. Never look directly into the LED light source.
5. To clean the product ensure that the floodlight is disconnected from the mains and cannot be
unintentionally reconnected.
6. Place only upon level and stable surfaces.
7. Do not use in rooms in which there is a danger of explosion.
8. Do not place in water or other liquids.
9. Never attempt to repair this unit yourself. Repairs should only be carried out by the
manufacturer or their authorised service personnel.
Installation Instructions
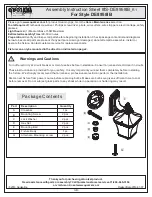
1. Isolate the mains supply prior to wiring. To open the twin spot unscrew the front cover.
2. Feed the Permanent Live cable through the appropriate knock out and mark the screw
positions on the wall.
3. Fix the back plate to the wall.
4. Connect the mains supply to the screw terminal block on the back plate. L = Live, N =
Neutral.
5. Connect the battery to the PCB and write installation date on the battery.
6. Locate the front cover and secure it with the clips provided.