1
Model: iP10
Instruction manual - US English
Size: 102 x 150 mm
Date: May 21, 2012
Mat’l: 128gsm matte finish paper
Color: Black text on white background
Cover
Warranty
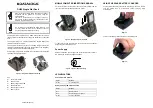
Model iP10
stereo alarm clock to charge
your iPod or iPhone
QUESTIONS? Visit www.ihomeaudio.com
1
2
W E L C O M E
Thank you for choosing the iP10 from iHome. This user guide will get
you up and running quickly and provide helpful hints to maximize
enjoyment. For more information about this and other iHome
products, please visit www.ihomeaudio.com Note that details on
using iHome apps with this unit are not covered in this booklet. For
information on using iHome apps, please visit
www.ihomeaudio.com/apps
G E T T I N G S T A R T E D
This unit ships with the following items. Please check to see that all
items are present.
1 iP10 speaker system
2 100-240V Universal AC power adaptor