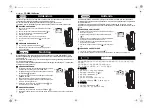
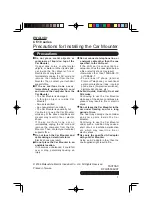
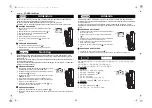
background image

Model iDN45

The Home System 

For Your iPad

®

Questions? For latest instructions, visit www.ihomeaudio.com/support

iDN45 IB_US version
Size: 178 x 178 mm (13 pages)
Printing color: Black
Mat’l: 90gsm book paper
Jan. 9, 13.

P1

Summary of Contents for iHome iDN45

Page 1: ... iDN45 The Home System For Your iPad Questions For latest instructions visit www ihomeaudio com support iDN45 IB_US version Size 178 x 178 mm 13 pages Printing color Black Mat l 90gsm book paper Jan 9 13 P1 ...

Page 2: ...r modifications to this unit not expressly approved by the party responsible for compliance could void the user s authority to operate the equipment NOTE This equipment has been tested and found to comply with the limits for a Class B digital device pursuant to Part 15 of the FCC Rules These limits are designed to provide reasonable protection against harmful interference in a residential installa...

Page 3: ...tton Mode Button EQ Button Alarm Reset Power Button Set Button skip search FWD REV Alarm 1 Button Alarm 2 Button Rear Panel Top Panel 30 pin Dock Play Pause Button Nap Button USB Play Pause Button Clock Button Sleep Button iHome App Indicator P3 Radio Preset Button snooze dimmer mode eq nap radio preset sleep dock usb DC Jack Aux line in Jack FM Antenna line in DC 12V 2 7A Rubberized device rest i...

Page 4: ... on top of the unit The iPad iPhone or iPod will charge while docked Press the Dock Button on the unit to play your iPad iPhone or iPod The 30 pin connector is not compatible with iPhone 5 and new iPad models 3 Setting Clock with AutoSync 4 Radio Dock your iPad iPhone or iPod see step 2 The unit will attempt to autosync to the time on your iPad iPhone or iPod The time on the display will update Th...

Page 5: ...disable autosync and allow you to set the time manually see below 1 Dock your iPad iPhone or iPod on the 30 pin connector on top of the unit In about 3 seconds the unit will sync to your device 2 The unit will now autosync every time a capable iPhone iPod or iPad is docked and at 2 AM each day To manually time sync at any time to a docked device press and release the Clock Button NOTE iPhone time ...

Page 6: ...se Playlist Wake as detailed above For wake to radio after selecting Radio as the wake to source press and release the Alarm Button and then press and release the or Button to select a radio station or press and release the Radio Presets Button to select a preset radio station to wake to see Listening to Radio on page 5 for details on setting radio stations and presets 4 Press and release the Alar...

Page 7: ...onnector AND a USB port located on back of the unit which can play and charge both older iOS devices such as iPhone 4 iPod touch etc AND Lightning devices such as the iPhone 5 using the charging cable that came with the device Play and pause a device connected to the 30 pin dock using the Dock Button and play and pause a device connected to the USB port using the USB Button Only one device can pla...

Page 8: ... setting P8 Sleep Operation Nap Operation Nap mode lets you set an alarm separate from the Alarm 1 and Alarm 2 settings The nap wake to source by default is the buzzer alarm 1 Press the Nap Button located on the top of the unit as needed to adjust the nap timer for 5 10 15 20 30 45 60 90 or 120 minutes or OFF 2 When the nap timer is activated and the display changes back to show the real time pres...

Page 9: ...otherwise all settings may be lost during battery replacement 2 Use a Phillips screwdriver to remove the battery compartment cover located on the bottom of the unit 3 Remove the exhausted CR2450 battery Insert a fresh CR2450 battery checking that the side is facing you Replace the compartment door Note Make sure you dispose of battery properly see your local regulations WARNING Lithium batteries c...

Page 10: ...it should be cleaned only as recommended See the Maintenance section of this manual for cleaning instructions 7 Objects and Liquid Entry Care should be taken so that objects do not fall and liquids are not spilled into any openings or vents located on the product 8 Attachments Do not use attachments not recommended by the product manufacturer 9 Lightning and Power Surge Protection Unplug the unit ...

Page 11: ...nit Please refer to your iPad iPhone iPod manual for details See above for software upgrade information You may need to reset your iPad iPhone iPod Refer to your iPad iPhone or iPod user guide for details on how to perform a reset Using 1st or 2nd generation iPod iPod Shuffle or other devices Unit cannot control those iPod models or other devices iPad iPhone iPod didn t charge up iPad iPhone iPod ...

Page 12: ...e This is normal Turn unit off for awhile or lower volume Lower EQ settings EQ settings are too high Custom snooze time not set Alarm not working AM PM time alarm time not set correctly When setting clock or alarm time take note of the AM PM indicators Alarm time or source selected for alarm 2 not alarm 1 or vice versa Wake schedule setting is not correct 7 days is every day alarm weekday is Mon F...

Page 13: ...ed and the return authorization number No unit can be processed without a return authorization number 4 Write the return authorization number on the side of the shipping package and send the unit prepaid and insured to the Factory Service Center address authorized by SDI Customer Service Disclaimer of Warranty NOTE This warranty is valid only if the product is used for the purpose for which it was...

Reviews: