


Welcome. . .
Thank you for buying an IBM
IntelliStation E Pro computer.
This
contains
information for setting up,
installing options, and preparing
computer. This book also contains
information regarding everyday
use and solving problems.
You can find the most current
information about your computer
at http://www.ibm.com/pc/support/
on the IBM Web site.
User’s Guide
applications to run on your
User’s Guide
Types 6204 and 6214
IntelliStation E Pro
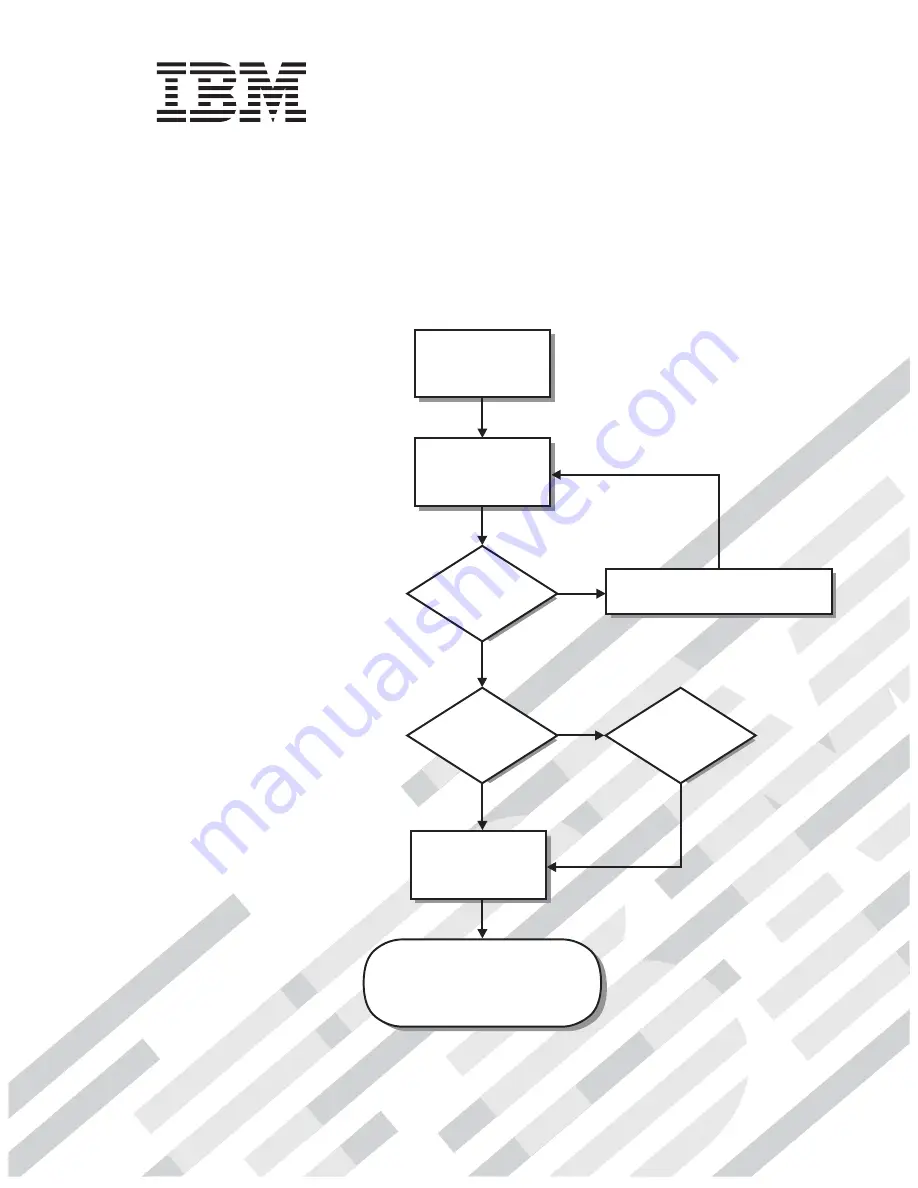
Go to the Computer Support
flowchart inside this cover
Start the computer
Complete the setup
program
Set up the computer
Did the computer
start correctly?
Install another
operating system
Yes
No
No
System is ready to use.
• Click
on your desktop
and register your computer
• Install options and applications
Access IBM
Do you plan to
use Windows XP?
Yes
Summary of Contents for 620410U - IntelliStation E - Pro 6204
Page 3: ...IBM IntelliStation E Pro Types 6204 and 6214 User s Guide...
Page 8: ...vi IBM IntelliStation E Pro Types 6204 and 6214 User s Guide...
Page 14: ...xii IBM IntelliStation E Pro Types 6204 and 6214 User s Guide...
Page 16: ...xiv IBM IntelliStation E Pro Types 6204 and 6214 User s Guide...
Page 26: ...10 IBM IntelliStation E Pro Types 6204 and 6214 User s Guide...
Page 36: ...20 IBM IntelliStation E Pro Types 6204 and 6214 User s Guide...
Page 44: ...28 IBM IntelliStation E Pro Types 6204 and 6214 User s Guide...
Page 54: ...38 IBM IntelliStation E Pro Types 6204 and 6214 User s Guide...
Page 130: ...114 IBM IntelliStation E Pro Types 6204 and 6214 User s Guide...
Page 136: ...120 IBM IntelliStation E Pro Types 6204 and 6214 User s Guide...
Page 138: ...122 IBM IntelliStation E Pro Types 6204 and 6214 User s Guide...
Page 140: ...124 IBM IntelliStation E Pro Types 6204 and 6214 User s Guide...
Page 152: ...136 IBM IntelliStation E Pro Types 6204 and 6214 User s Guide...
Page 158: ...142 IBM IntelliStation E Pro Types 6204 and 6214 User s Guide...
Page 164: ...148 IBM IntelliStation E Pro Types 6204 and 6214 User s Guide...
Page 165: ......
Page 166: ...IBM Part Number 59P5622 Printed in the United States of America 59P5622...


