manualshive.com logo in svg
background image

Interactive Touch Display

User’s Manual

i3TOUCH E1055 4K
i3TOUCH E1065 4K
i3TOUCH E1075 4K
i3TOUCH E1086 4K

Содержание i3TOUCH E1055 4K

Страница 1: ...Interactive Touch Display User s Manual i3TOUCH E1055 4K i3TOUCH E1065 4K i3TOUCH E1075 4K i3TOUCH E1086 4K ...

Страница 2: ...11 14 15 Contents Safety Warning Statements Connection and Setting Menu Operation Maintenance Prepare to Install Simple Troubleshooting 7 2 1 ...

Страница 3: ... lifetime and the display performance do not display high brightness image for long time Temperature Do not place the unit near or over a radiator or a heater If your unit is suddenly moved from a cold to a warm place please unplug the power cable and do not turn it on at least 2 hours making sure the moisture inside the unit is all evaporated Normal operating temperature is 0 40 Humidity Do not e...

Страница 4: ...o ti n g Care Mai n ten ance HOME button back to main interface Return button return to previous level menu Menu button call up function menu Volume down button turn down volume Volume up button turn up volume Items Function description Tap to enter EnergySaving function Press at least 2 seconds to enter standby mode ...

Страница 5: ...ing RJ45 terminals Serial interface used for mutual transfer of data between devices AC power input connecting AC power supply LAN USB HDMI IN AUDIO IN VGA IN TOUCH AV IN COAX OUT RS232 To open or shut down AC power supply I means power on O means power off 13 12 11 10 9 8 7 6 5 4 3 2 1 AC IN High definition multimedia interface signal input connect to PC with HDMI output set top box or other vide...

Страница 6: ...3 Remote Control 4 Installation Co n n ect in g an d Set t i n g Me n u Op e r a ti o n Tr o u b l e s h o o t in g C a r e M a i n t e n a n c e 1 Remote control button instruction ...

Страница 7: ... Buttons function Lock and unlock Touch function Freeze and zoom One key for blank screen Backspace key Direction key press this button for upwards selection Direction key press this button for left selection Direction key press this button for right selection Direction key press this button for downwards selection Confirmation key press this key to confirm selection state Quickly start writing soft...

Страница 8: ...f battery components and make the following clip buckled to the bottom Range of remote control 2 Remote Control Instruction Remote control can work normally within the range of 8 meters distance 30 degrees left and right from the remotecontrol receiver in order to protect environment please dispose waste battery into recycling box 6 Installation Co n n ectin g an d Setti n g Men u Op erati o n Tro...

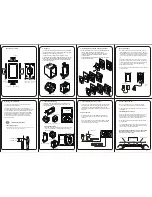
Страница 9: ...MI OUT Audio OUT USB Interface Support Resolution 800 600 1024 768 1920 1080 In st allat io n Connecting and Setting M en u Op er a ti o n Tr o u b l e s h o o t i n g C a r e M a i n te n a n c e 1 Use VGA cable to connect to VGA output port of external computer and meanwhile use headphone audio cable to connect to external computer audio output interface 2 Use USB cable to connect to external co...

Страница 10: ...o equipments with AV output yellow for video red for right sound channel and white for left sound channel 2 After cable connection plug in power cord and switch power on 3 Press to turn equipment on 4 Press INPUT key to switch to AV port HDMI Cable DVD Disc Player 1 Use HDMI cable to connect audio and video equipment with HDMI output 2 After cable connection plug in power cord and switch power on ...

Страница 11: ...io device with coaxial input 2 After cable connection plug in power cord and switch power on 3 Press to turn equipment on 4 Video Output Connection 1 Use HDMI cable to connect display devices with HDMI in and use audio cable to connect sound output 2 After cable connection plug in power cord and switch power on 3 Press to turn equipment on 4 Press INPUT key to switch to HDMI port Projector Audio C...

Страница 12: ...n c e Internet 5 LAN Connection Network Cable 6 RS232 Connection Serial Port Cable Computer After using serial port cable to connect central control equipment and machine certain function of the machine can be controlled via central control equipment such as machine ON OFF and adjustment of sound volume etc RS232 LAN ...

Страница 13: ...all up touch menu method is shown above Setting Menu General Setting Press INPUT button on remote control or via touch A method to call up General Setting menu Press button on remote control to select the channel you need Press the Enter button on remote control or directly click with touch pen to confirm selected input channel Press return key on remote control or click blank area outside menu wi...

Страница 14: ...th touch pen to open or close mute state Press Back on remote control or click blank area outside menu with touch pen to exit menu Press Enter on remote control to enter adjustment mode and press button or directly click with touch pen to adjust each option Press Enter Back to exit adjustment Press button on remote control to select Audio setting menu Press Back on remote control or click blank ar...

Страница 15: ...e control to enter adjustment mode and press button or directly click with touch pen to adjust each option Press Enter Back to exit adjustment You can also click the Auto icon to adjust automatically Press Back on remote control or click blank area outside menu with touch pen to exit menu Press button on remote control or directly click with touch pen to select the option Press button on remote co...

Страница 16: ...ith finger 1 Check whether driver is properly installed and make correction 2 Check whether touch pen is facing the screen No picture and no sound With horizontal or vertical stripes or image dithering No color color is weak With image but without Only one speaker has VGA output without 1 Check whether the machine is started state 2 Check whether signal wire is well plugged whether INPUTis corresp...

Страница 17: ...ir even a little fabric softener or tableware detergent with warm water Please use a soft cloth to be completely soaked in the mixture Please take out cloth and twist to half dry state to wipe machine screen Repeat for several times pay attention not to squeeze water flow into machine when wiping machine Please use dry soft lint free cloth to wipe front frame No use of machine for a long time In c...

Страница 18: ......

Страница 19: ......

Страница 20: ...WWW I3 TECHNOLOGIES COM INFO I3 TECHNOLOGIES COM AUTHORISED RESELLER ...
Отзывы: