

U vindt de laatste informatie omtrent Readiris Pro 11 op www.irislink.com
Trouvez les dernières informations sur Readiris Pro 11 sur www.irislink.com
Find the latest information about Readiris Pro 11 at www.irislink.com
Format
Select the output target (Word, Excel, HTML editor, WordPad, Acrobat Reader, StarOffice or any other external
output formats). You can even send the recognized document into a new e-mail and immediately share the
information! Choose the text formatting of the recognized document, running text, word formatting or full
autoformatting. In that case you can activate the “Flowing Text™” mode with the option “Use columns instead
of frames” for an easier editing.
Format
Sélectionnez le format de sortie (Word, Excel, éditeur HTML, WordPad, Acrobat Reader, StarOffice ou n'importe
quel format de sortie externe). Vous pouvez même envoyer le document reconnu dans un nouvel e-mail et
partager immédiatement l’information ! Choisissez le formatage de texte du document reconnu: texte continu,
formatage des mots ou formatage automatique complet. Dans ce dernier cas, vous pouvez activer le mode
"Texte Flottant™" en cochant la fonction « Utiliser des colonnes et non des cadres » pour une édition plus facile.
Formaat
Selecteer het uitvoerdoel (Word, Excel, HTML editor, WordPad, Acrobat Reader, StarOffice of andere externe
uitvoerformaten). U kunt het herkende document zelfs met een nieuwe e-mail meesturen en de informatie
onmiddellijk delen! Kies het tekstformaat van het herkende document, lopende tekst, woordformatering of
volledige autoformatering. In dat geval kunt u de modus “Flowing Text™” activeren met de optie “Kolommen
gebruiken in de plaats van kaders” om gemakkelijker te bewerken.
Multipage
Represents the various images opened in Readiris. The current
page is highlighted.
Pages multiples
Représente les différentes pages ouvertes dans Readiris. La page
en cours est mise en évidence.
Meerbladig
Geeft de verschillende afbeeldingen weer die geopend zijn in
Readiris. De huidige pagina is geselecteerd.
Status Windows:
Indicates all the useful information about the scanned document.
Fenêtre d’état:
Indique toutes les informations utiles au sujet des documents numérisés.
Windows status :
Toont alle nodige informaties over de gescande documenten.
When your document is open in Readiris, use your right-click to access useful
functions:
Magnifying glass
Copy as Text: allows to select a text zone and to paste it into any application: the text is
immediately retyped!
View: gives access to the different zoom levels
Window: allows to change the block type (Text/Table/Graphic) or to delete it if you don’t
want to recognize it.
Quand votre document est ouvert dans Readiris, utilisez votre clique-droit pour
accéder à des fonctions pratiques :
Loupe
Copier comme texte : permet de sélectionner une zone de texte et de la coller dans toute
application : le texte est immédiatement retapé !
Vue : donne accès aux différents niveaux de zoom
Fenêtre : permet de changer le type du bloc (Texte/Graphique/Tableau) ou de le supprimer
si vous ne souhaitez pas le reconnaître.
Als uw document geopend is in Readiris, klik dan met de rechter-muisknop om
toegang te krijgen tot een aantal nuttige functies:
Vergrootglas
Kopiëren als tekst: maakt het mogelijk een tekstzone te selecteren en deze in om het even
welke toepassing te plakken: de tekst wordt onmiddellijk hertypt!
Bekijken: biedt toegang tot de verschillende zoomniveaus
Venster: maakt het mogelijk om het bloktype te wijzigen (Tekst/Figuur/ Tabelvenster) of
om het te verwijderen als u het niet wil herkennen.
Tip / Astuces / Tip
Select Window
Sélectionnez la fenêtre
Selecteer vensters
Draw text window
Dessinez une fenêtre texte
Teken tekstvensters
Draw graphic window
Dessinez une fenêtre graphique
Teken grafische vensters
Draw table window
Dessinez une fenêtre tableau
Teken tabelvensters
Draw barcode window
Dessinez une fenêtre codes à barres
Teken barcodevensters
Draw handprint window
Dessinez une fenêtre écriture manuscrite
Teken handgeschrevenvensters
Analyze page
Analyse de page
Pagina analyseren
Ignore Exterior Zone
Ignorer la zone extérieure
Buitenkant van zone negeren
Deskew page
Redresser la page
Bladzijden rechtzetten
Select and sort windows
Sélectionner et trier les fenêtres
Tekstvenster selecteren en ordenen
Fit to window
Pleine page
Volle bladzijde
Print the document thumbnails
Imprimer les "imagettes" des documents
Beeld van de geprinte documenten
Fit to width
Pleine largeur
Volle breedte
Actual size
Taille réelle
Ware grootte
Rotate the image
Rotation de l’image
Rotatie van het beeld
Magnifying glass
Loupe
Vergrootglas
Learn
Enable or disable the interactive learning
phase. Interactive Learning is enabled by
default.
Apprentissage
Activez ou désactivez la phase
d'apprentissage interactif. L'apprentissage
interactif est activé par défaut.
Leren
Schakel de interactieve leerfase in of
uit. Interactief leren is standaard
ingeschakeld.
Languages
Click on the “Language” button to select
one of the 123 languages.
Langues
Cliquez sur le bouton "Langue" pour
sélectionner l'une des 123 langues.
Talen
Klik op de knop “Talen” om één van de
123 talen te selecteren.
Recognize and Save
Perform the document recognition and save the result in the selected output format.
Reconnaître et Enregistrer
Effectuez la reconnaissance du document et sauvegardez-le dans le format de sortie sélectionné.
Herkennen en Opslaan
Voer de documentherkenning uit en sla het resultaat op in het geselecteerde output formaat.
Recognition / Reconnaître / Herkennen
Scanner
Allows you to set up your scanner. Readiris works with all TWAIN scanners available on the market.
New!
Indicate Readiris a timespan between 2 automatic scanning and easily scan a book on a flatbed
scanner.
Numériseur
Vous permet de régler votre numériseur. Readiris fonctionne avec tous les TWAIN scanners
disponibles sur le marché.
Nouveau!
Indiquez à Readiris un intervalle de temps entre 2 numérisations
automatiques et numérisez facilement un livre sur un scanner à plat.
Scanner
Deze knop kunt u gebruiken om uw scanner in te stellen. Readiris ondersteunt alle TWAIN scanners
die beschikbaar zijn op de markt.
Nieuw!
Geef aan Readiris een tijdspanne tussen 2 automatische
scans en scan gemakkelijk een boek op een flatbed scanner.
Options
The “Options” button allows to enable or disable 3 functions: the Page Deskewing (straightens pages),
the Page Rotation and the Page Analysis (automatically draws frames around text, tables and
graphics). Page analysis is enabled by default.
Options
Permet d’activer ou de désactiver 3 fonctions : Redressement des pages, Détecter l’orientation de la
page et Analyse de page (dessine automatiquement des cadres autour des textes, des tableaux et des
graphiques). L’analyse de page est activée par défaut.
Opties
Met behulp van de knop “Opties” kunnen drie functies worden ingeschakeld of uitgeschakeld:
Bladzijden rechtzetten, Oriëntatie bladzijde detecteren en Pagina-analyse (tekent automatisch een
kader rond tekst, tabellen en figuren). Pagina-analyse is standaard ingesteld.
Source
Click on this button to select your image source: the scanning or the opening of
existing image files.
Source
Cliquez sur ce bouton pour sélectionner la source de l’image : la numérisation ou
l’ouverture de fichiers image existants.
Bron
Klik op deze knop om uw beeldbron te selecteren: scannen of een bestaand
beeldbestand openen.
Open or Scan
You can open a prescanned document when the “Open” button is displayed or directly scan a paper document
from Readiris when the “Scan” button is displayed. To change the “Open” button in “Scan” button click on the
“Source” button.
Ouvrir ou Numériser
Vous pouvez ouvrir un document pré-numérisé quand le bouton "Ouvrir" est affiché ou directement numériser un
document papier depuis Readiris quand le bouton "Numériser" est affiché. Pour afficher l’un ou l’autre bouton,
cliquez sur le bouton "Source".
Openen of scannen
U kunt een reeds gescand document openen wanneer de knop “Openen” wordt weergegeven of u kunt
rechtstreeks een papieren document scannen vanuit Readiris wanneer de knop “Scannen” wordt weergegeven.
Om de knop “Openen” te veranderen in de knop “Scannen”, dient u op de knop “Bron” te klikken.
Scanning / Numériser / Scannen
OCR Wizard
The wizard guides you through the OCR process. Answer a few question
and you'll obtain a recognized document.
Assistant OCR
L'assistant vous guide à travers le processus OCR. Répondez à quelques questions
et vous obtiendrez un document éditable.
OCR Wizard
De wizard leidt u door het OCR-proces. Beantwoord een aantal vragen en u verkrijgt meteen een herkend
document.
Snelle startgids
Linkerwerkbalk:
uw documenten in twee eenvoudige stappen verwerven
1
Scan uw documenten of open PDF- of beeldbestanden
Open gemakkelijk beeldbestanden of haal documenten op van scanners of digitale camera’s.
1. Schakel indien nodig de juiste systeemopties in (Bladzijden rechtzetten, Pagina-analyse, Oriëntatie bladzijde detecteren) door op “Opties” te klikken.
2. Klik op de knop “Bron” om de beeldbron te selecteren: scannen of bestaande bestanden openen. Klik vervolgens op “Scannen” om het scannen te starten
of op “Openen” om een bestand op uw harde schijf te openen.
Kies om het even welk document:
Complexe kolommen, teksten, figuren en tabellen. Laserkwaliteit, verlaagde kwaliteit of dot matrix.
Documenten bestaande uit één of meer bladzijden, meertalig (Readiris ondersteunt tot 123 talen).
Open PDF-bestanden of documenten opgeslagen in TIFF-, BMP-, JPEG- en JPEG2000-formaat of gescand in kleur, zwart-wit of grijswaarden.
2
Uw documenten herkennen
1. Klik op de knop “Taal” en selecteer de taal
2. Bepaal het uitvoerformaat van het OCR-resultaat door te klikken op de knop “Formaat”.
Stuur het automatisch naar de doeltoepassing: Word, Excel, Acrobat, Internet Explorer, HTML-editors, WordPerfect, StarOffice enz.
Sla het document in de meest populaire uitvoerformaten zoals HTML, TXT, RTF, PDF, Word, Excel enz.
Open automatisch de toepassing van het overeenkomende bestand om uw document te bewerken met de optie “Opslaan en openen” of
Stuur het herkende document rechtstreeks mee met een nieuwe e-mail en verdeel de informatie onmiddellijk!
Hercreëer de lay-out van het oorspronkelijke document. Als u “Brondocument hercreëren” kiest, kunt u de modus “Flowing Text™” activeren om
gemakkelijker te kunnen bewerken met de functie “Kolommen gebruiken in de plaats van kaders”.
3. Klik op “Herkennen en Opslaan” om uw document te verwerken.
Rechterwerkbalk:
Optimaliseer de herkenning met knoppen
Indien nodig helpt de rechterwerkbalk u om comfortabel te werken op het documentbeeld.
Maak uw eigen tekst-, figuur- en tabelzones of vraag Readiris om de pagina automatisch te analyseren
Ontwerp indien nodig ook barcode en handgeschreven zones. Readiris herkent niet automatisch deze zones, je moet een rechthoek er omheen tekenen
door de barcode en handschrift knoppen te gebruiken
Bepaal een beperkte herkenningszone met de knop “Buitenkant van zone negeren”
Zet de bladzijde recht of roteer de bladzijde
Selecteer en sorteer de gewenste tekstzones
Zoom in op het document om details te bekijken
U heeft uw documenten snel, eenvoudig en nauwkeurig omgezet in een elektronisch formaat. U kunt uw document
nu bewerken in uw favoriete toepassing, uw document opslaan voor toekomstig gebruik of het document de
wereld rondsturen naar familie, vrienden of collega’s.
Handmatig configureren
1.
Start Readiris Pro op
2.
Klik op het Readiris Pro startscherm
3.
Klik op “Annuleren” in het wizardscherm
4.
Klik op de knop “Scannerinstelling bepalen”, klik op de knop “Scannermodel”
5.
Selecteer uw scanner in de lijst. Selecteer “Twain other models” indien uw
scanner niet in de lijst voorkomt. Klik op “OK”
6.
Klik op de knop “Configureren” en verifieer uw beeldbron. Klik op “Selecteren”
en klik op “OK”
7.
Kies de resolutie van uw scanner (een resolutie van 300 dpi wordt aanbevolen)
en het formaat van uw document (formaat A4 – niet beschikbaar als u een
Twain-scanner gebruikt)
8.
Selecteer de kleurmodus grijswaarden of kleur voor een beter resultaat
9.
Klik op de knop “Taal” om de taal van het document aan te geven
10.
Klik op de knop “Formaat” om het uitvoerformaat van uw document te
selecteren
11.
Plaats een document in uw scanner en klik op de knop “Scannen”
Met de wizard
1.
Start Readiris Pro op
2.
Klik op het Readiris Pro startscherm
3.
Klik op de knop "Volgende" in de OCR wizard
4.
Selecteer uw scanner in de lijst. Selecteer “Twain other models” indien uw
scanner niet in de lijst voorkomt. Klik op “OK”
5.
Klik op de knop “Configureren” en verifieer uw beeldbron. Klik op “Selecteren”
en klik op “OK”
6.
Kies de resolutie van uw scanner (een resolutie van 300 dpi wordt aanbevolen)
en het formaat van uw document (formaat A4 – niet beschikbaar als u een
Twain-scanner gebruikt)
7.
Selecteer de kleurmodus grijswaarden of kleur voor een beter resultaat
8.
Klik op de knop “Volgende”
9.
Kies de taal van uw document, klik op de knop “Volgende”
10.
Selecteer het gewenste uitvoerformaat door indien nodig op “Wijzigen” te
klikken. Klik op de knop “Volgende”
11.
Plaats een document in uw scanner en klik op “Starten”
Eerste stappen bij het gebruik van Readiris Pro
1] Sluit uw scanner aan op uw pc en installeer de bijgeleverde software.
Test uw scanner. Neem bij problemen contact op met de fabrikant van uw scanner.
2] Plaats de zelfstartende Readiris cd-rom in uw pc.
Vul uw gebruikersnaam én de firmanaam in (“privé” voor thuisgebruikers).
Kies het gewenste type installatie: de volledige installatie wordt aangeraden
Klik op "Installeren"
Klik op "Voltooien"
Vul het serienummer in (dat zich op de DVD-doos bevindt) en registreer het nadien
Volg de instructies op het scherm, klik op “Beëindigen”.
De eerste keer dat u Readiris gebruikt moet u uw scanner configureren (manueel of met de wizard).
Guide pratique de l'utilisateur
Barre d’outils de gauche :
acquérez et traitez vos documents en 2 étapes faciles
1
Numérisez vos documents ou ouvrez des fichiers PDF ou image
Ouvrez facilement des fichiers image ou saisissez vos documents à partir d'un scanner ou d'un appareil photo numérique
1. Activez les options (Redressement des pages, Détecter l’orientation de la page, Analyse de page) en cliquant sur "Options".
2. Cliquez sur le bouton "Source" pour sélectionner la source de l’image ; la numérisation ou l’ouverture de fichiers existants. Puis cliquez sur "Numériser"
pour démarrer la numérisation ou sur "Ouvrir" pour ouvrir un fichier depuis votre disque dur.
Choisissez tous types de document :
Textes, tableaux, mises en page complexe, graphiques, de qualité laser ou matricielle
Des documents d'une seule ou plusieurs pages, multilingues (Readiris reconnaît jusqu’à 123 langues)
Ouvrez des fichiers PDF ou aux formats JPEG, JPEG2000, TIFF, BMP,… ou numérisés en couleur, en noir et blanc ou en niveaux de gris.
2
Reconnaissez vos documents
1. Sélectionnez la langue de votre document en cliquant sur le bouton "Langues"
2. Définissez le format de sortie du résultat OCR (bouton "Format")
Envoyez-le automatiquement vers Word, Excel, Acrobat Reader, Internet Explorer, un éditeur HTML, WordPerfect, StarOffice, etc.
Sauvergardez-le dans les formats de sortie les plus connus tels que HTML, TXT, RTF, PDF, Word, Excel, etc. et :
Ouvrez automatiquement l’application correspondant au format choisi pour éditer votre document grâce à l’option "Enregistrer et ouvrir".
Envoyez directement le document reconnu par courrier électronique et partagez immédiatement l'information !
Recréez la mise en page du document original. Si vous choisissez l’option "Recréer le document d’origine", vous pouvez activer le mode "Texte Flottant™"
pour une édition plus facile en cochant la fonction "Utiliser des colonnes et non des cadres".
3. Cliquez sur "Reconnaître et Enregistrer" pour traiter votre document.
Barre d’outils de droite :
Optimisez la reconnaissance grâce à des boutons intuitifs
Si besoin, la barre d’outils de droite vous aide à travailler confortablement sur l’image du document.
Dessinez vos propres zones de texte, de tableau et de graphique ou demandez à Readiris Pro d’analyser automatiquement la page
Dessinez également les zones de codes à barres et d’écriture manuscrite. Readiris n’identifie pas de façon automatique ces zones. Vous devez dessiner un
cadre autour de celles-ci à l’aide des boutons « codes à barres » et « écriture manuscrite »
Définissez une zone de reconnaissance limitée avec le bouton « Ignorer la zone extérieure »
Redressez ou faites pivoter la page
Sélectionnez et ordonnez les zones de texte selon votre intérêt
Agrandissez l’image du document pour voir les détails
Vous avez converti vos documents en format électronique avec rapidité, facilité et précision. Vous pouvez à présent les
éditer dans votre application favorite, les sauvegarder pour un usage ultérieur ou les distribuer dans le monde entier,
à votre famille, vos amis, vos collègues.
Configuration manuelle
1.
Lancez Readiris Pro
2.
Cliquez sur l'écran de démarrage de Readiris Pro
3.
Cliquez sur "Annuler" dans l'écran de l'assistant
4.
Cliquez sur l'icône "Numériseur" et suivez le processus de configuration
5.
Sélectionnez votre numériseur dans la liste, si votre numériseur ne figure pas
dans la liste, sélectionnez "Twain other models", cliquez sur "OK"
6.
Cliquez sur "Configurer", vérifiez votre "Source", cliquez sur "Select" et cliquez
sur "OK"
7.
Choisissez la résolution de votre scanner (300 dpi sont recommandés) et le
format de votre document (A4 – format non disponible si vous utilisez un
scanner Twain).
8.
Sélectionnez "gris" ou "couleur" pour de meilleurs résultats
9.
Cliquez sur l'icône "Langue" pour sélectionner la langue du document
10.
Cliquez sur l'icône "Format" pour sélectionner le format de sortie de votre
document
11.
Insérez un document dans votre numériseur et cliquez sur "Numériser"
A l'aide de l'assistant
1.
Lancez Readiris Pro
2.
Cliquez sur l'écran de démarrage de Readiris Pro
3.
Dans l'assistant OCR, cliquez sur "Suivant"
4.
Sélectionnez votre numériseur dans la liste, si votre numériseur ne figure pas
dans la liste, sélectionnez "Twain other models", cliquez sur "OK"
5.
Cliquez sur "Configurer", vérifiez votre "Source", cliquez sur "Select" et cliquez
sur "OK"
6.
Choisissez la résolution de votre scanner (300 dpi sont recommandés) et le
format de votre document (A4 - format non disponible si vous utilisez un
scanner Twain).
7.
Sélectionnez "gris" ou "couleur" pour de meilleurs résultats
8.
Cliquez sur "Suivant"
9.
Choisissez la langue de votre document, cliquez sur "Suivant"
10.
Sélectionnez le format de sortie en cliquant sur "Modifier" si nécessaire, cliquez
sur "Suivant"
11.
Insérez un document dans votre numériseur et cliquez sur "Démarrer"
Premiers pas pour l’utilisation de Readiris Pro
1] Connectez votre scanner à votre PC et installez le logiciel fourni avec votre scanner.
Testez votre scanner et si vous rencontrez un quelconque problème, contactez le fabricant de votre scanner.
2] Insérez le CD-ROM Readiris à démarrage automatique dans votre PC.
Introduisez votre nom d’utilisateur ET le nom de votre société ("privé" pour les particuliers).
Veuillez sélectionner un type d'installation : l’installation standard est recommandée.
Cliquez sur “Installer”.
Cliquez sur “Terminer”.
Introduisez votre numéro de série (référez-vous au dos de la boite du DVD) et ensuite enregistrez-vous.
Lors de votre première utilisation de Readiris, vous devez configurer votre scanner (à l’aide de l’assistant ou
manuellement)
.
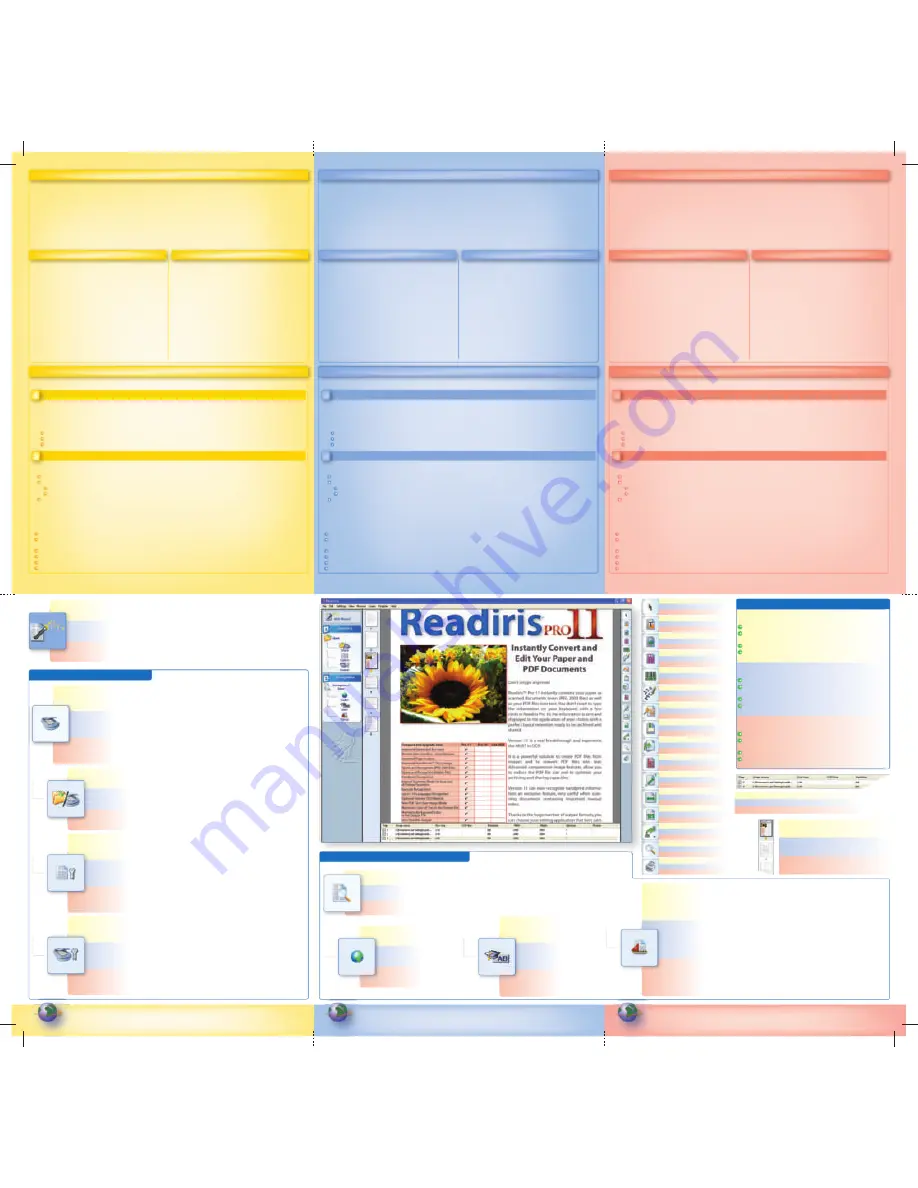
Quick User Guide
Left Toolbar:
acquire and process your documents in 2 easy steps
1
Scan your documents or open PDF or image files
Easily open image files or capture documents from scanners or digital cameras
1. Enable the proper system options if needed (Page Deskewing, Page Analysis, Page Orientation) by clicking on “Options”.
2. Click on the “Source” button to select the image source; the scanning or the opening of existing files. Then click on “Scan” to start the scanning or on
“Open” to open a file from your hard disk.
Choose any document:
Complex columns, texts, graphics and tables. Laser quality, degraded or dot matrix.
Single or multipage documents, multilingual (Readiris supports up to 123 languages).
Open PDF files or documents saved in TIFF, BMP, JPEG, JPEG2000 or scanned in color, in black and white or grayscale
2
Recognize your documents
1. Click on the “Language” button and select the language document
2. Define the output format of the OCR result by clicking on the “Format” button.
Send it automatically to the target application: Word, Excel, Acrobat, Internet Explorer, HTML editors, WordPerfect, StarOffice, etc.
Save it in the most popular output formats such as HTML, TXT, RTF, PDF, Word, Excel, etc. and:
Open automatically the application of the corresponding file to edit your document with the "Open after saving" option or
Send directly the recognized document in a new e-mail and share immediately the information!
Recreate the layout of the original document. If you choose "Recreate source document", you can activate the “Flowing Text™” mode for an easier
editing with the "Use columns instead of frames" function
3. Click on “Recognize and Save” to process your document.
Right Toolbar:
Optimize the recognition with smart buttons
If needed, the right toolbar helps you to work comfortably on the document image.
Design your own text, graphic and table zones or ask Readiris to automatically analyze the page
Design also the barcode and handprint zones when needed (Readiris doesn’t identify automatically these zones, you must draw a frame around them
using the “barcode” and “handprint” buttons
Define a limited recognition zone with the “Ignore exterior zone” button
Straighten or rotate the page
Select and sort the text zones of interest
Zoom on the document to see the details
You have transformed your documents into electronic format quickly, easily and accurately. You can now edit your
document in your favorite application, save your document for later use or distribute the document around the
world to family, friends or colleagues.
Configuring manually
1.
Launch Readiris Pro
2.
Click on the Readiris Pro splasch screen
3.
Click on "Cancel" in the wizard screen
4.
Click on the "Define scanner settings" button, click on the "Scanner model"
button
5.
Select your scanner in the list, if your scanner is not in the list, select "Twain
other models", click on "OK"
6.
Click on "Configure", check your "Source", click on "Select" and click on "OK"
7.
Choose the Resolution of your scanner (300 dpi are recommended) and the
Format of your document (format: A4/letter - not available if you use a Twain
scanner).
8.
Select grayscale or color if you have a bad quality document
9.
Click on the "Language" icon to select the language of the document
10.
Click on the "Format" icon to select the output format of your document
11.
Insert your document in your scanner and click on the "Scan" icon
Using the wizard
1.
Launch Readiris Pro
2.
Click on the Readiris Pro splash screen
3.
In the OCR Wizard, click on "Next"
4.
Select your scanner in the list, if your scanner is not in the list, select "Twain
other models", click on "OK"
5.
Click on "Configure", check your "Source", click on "Select" and click on "OK"
6.
Choose the Resolution of your scanner (300 dpi are recommended) and the
Format of your document (format: A4/letter - not available if you use a Twain
scanner).
7.
Select grayscale or color for better results
8.
Click on "Next"
9.
Choose the language of your document, click on "Next"
10.
Select the output format by clicking on "Change" if necessary, click on "Next"
11.
Insert a document in your scanner and click on "GO"
First steps to use Readiris Pro
1] Connect your scanner to your PC and install the software delivered with your scanner.
Test your scanner. If you experience any problem contact your scanner manufacturer.
2] Insert the auto-running Readiris CD-ROM in your PC
Fill in your user name AND your company name ("private" for home users)
Select a setup type: complete is recommended
Click on “Install”
Click on “Finish”
Insert your serial number (refer to the sticker on the DVD box) and after that please register it
The first time you use Readiris you need to configure your scanner (using the wizard or manually).


