background image


49-21-19x4-5 - 

www.hydroair.dk

 – March 2009 


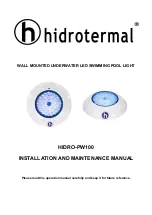
SLIMLITE COLOUR CHANGE/STOP INCL. TRANSFORMER 

Ø52 mm: 21-1954-5 & Ø83 mm: 21-1974-5 


Specifications 

Rated voltage: 

230V 

Rated power: 

Ø52 = 1W / Ø83 = 1.6W 

Installation depth: 

Maximum 1m 

Expected lifetime: 

50.000 hours 


21-19x4-5: 

Slimlite – colour change/stop LED light incl. connector and standard touch. 


Important 

The Slimlite requires external potentiel equalization. 
 

Installation 

1. 

Drill a 42 or 64 mm hole in the tub for the LED bulb. 

2. 

Fix the small silicone gasket (4) on the body (1) and add, if necessary, silicone. Pass the lead, 
transformer & body through the hole from the inside of the tub. 

3. 

Place the foam gasket (3) (from outside) around the body. 

4. 

Fix the nut (2) from outside and fasten it tightly on the body. 

5. 

Drill a 32 mm hole in the bathtub rim for the touch. Place it in position and hand tighten the nut from


the backside of the tub. The touch can be mounted without nut if removal from front side is wished.   


In this case, use a little silicone to hold it in position and place the touch in the hole. 

6. 

Connect the signal cable from the LED bulb and the cable from the touch with the two black IPX5 
connectors. 

7. 

Carry out external potential equalization via the connector (5) on lightbody. 

8. 

Connect the cable to a 230V power supply. 


Summary of Contents for SLIMLITE

Page 1: ...y silicone Pass the lead transformer body through the hole from the inside of the tub 3 Place the foam gasket 3 from outside around the body 4 Fix the nut 2 from outside and fasten it tightly on the body 5 Drill a 32 mm hole in the bathtub rim for the touch Place it in position and hand tighten the nut from the backside of the tub The touch can be mounted without nut if removal from front side is ...

Page 2: ...der Innenseite der Wanne ein 3 Bringen Sie die PE Dichtung 3 von der Rückseite am Lampengehäuse an 4 Montieren Sie die Mutter 2 an der Rückseite und ziehen Sie diese am Lampengehäuse fest an 5 Zur Befestigung des Schalters bohren Sie ein 32 mm Loch in den Rand der Badewanne Danach bringen Sie ihn in Position und ziehen die Mutter auf der Rückseite des Wannenrandes mit der Hand fest Der Schalter ka...

Page 3: ... et le corps du spot par l orifice depuis l intérieur de la baignoire 3 Placez le joint en mousse 3 à partir de l extérieur autour du corps du spot 4 Fixez l écrou 2 à partir de l extérieur et serrez le fermement sur le corps du spot 5 Percez un trou de 32 mm de diamètre dans le bord de la baignoire pour la touche Positionnez l écrou et serrez le à la main à partir de l arrière de la baignoire Il ...

Page 4: ...is nødvendigt Før ledning transformer og lampehus gennem hullet fra karrets inderside 3 Sæt skumpakningen 3 på lampehuset fra karrets yderside 4 Sæt møtrikken 2 på fra karrets yderside og fastspænd møtrikken på lampehuset 5 Bor et 42 mm hul i badekarrets kant til touchen som så placeres i den rigtige position Spænd derefter møtrikken fra bagsiden af karret Touchen kan også påsættes uden møtrik såf...

Reviews: