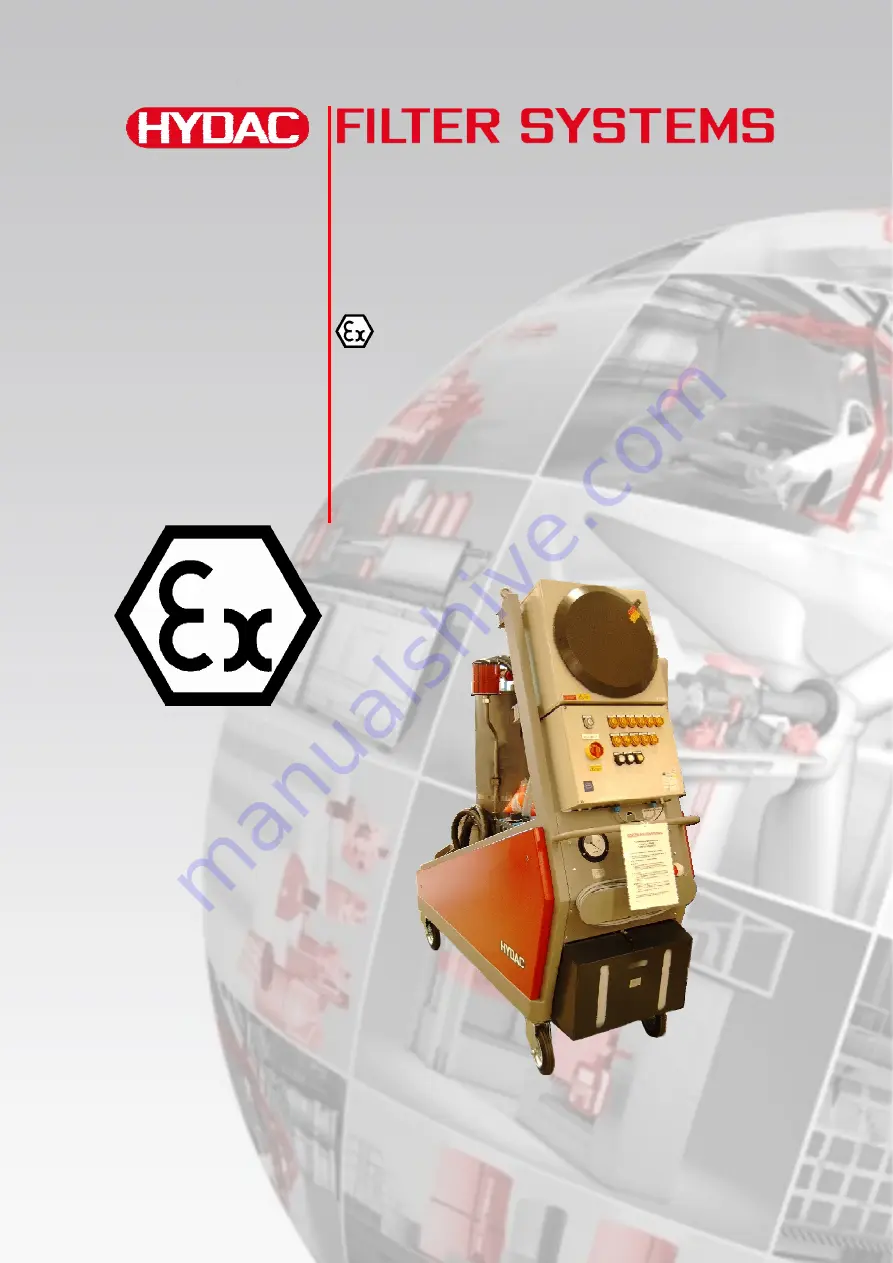
background image


FluidAqua Mobil 

FAM 15/30/50/70 ATEX 


 II 2G IIB3 T4 (+10°C<Ta<40°C) 


Operating and Maintenance Instructions 


E

E

n

n

g

g

l

l

i

i

s

s

h

h


(

(

t

t

r

r

a

a

n

n

s

s

l

l

a

a

t

t

i

i

o

o

n

n


o

o

f

f


o

o

r

r

i

i

g

g

i

i

n

n

a

a

l

l


i

i

n

n

s

s

t

t

r

r

u

u

c

c

t

t

i

i

o

o

n

n

s

s

)

)


Documentation no.: 3193049h 


Summary of Contents for FluidAqua Mobil FAM 15 ATEX

Page 1: ...50 70 ATEX II 2G IIB3 T4 10 C Ta 40 C Operating and Maintenance Instructions E En ng gl li is sh h t tr ra an ns sl la at ti io on n o of f o or ri ig gi in na al l i in ns st tr ru uc ct ti io on ns s Documentation no 3193049h ...

Page 2: ...ational GmbH Industriegebiet 66280 Sulzbach Saar Telephone 49 0 6897 509 1511 Fax 49 0 6897 509 1394 E mail guenter harge hydac com HYDAC FILTER SYSTEMS GMBH All rights reserved No part of this work may be reproduced in any form print photocopy or by other means or processed duplicated or distributed using electronic systems without the written consent of the publisher These documents have been cr...

Page 3: ...fety Information and Instructions 13 Hazard symbols 13 Signal words and their meaning in the safety information and instructions 15 Structure of the safety information and instructions 16 Observe regulatory information 16 Proper Designated Use 17 Explosion protection as per ATEX 95 19 Improper Use or Use Deviating from Intended Use 20 Qualifications of personnel target group 21 Wear suitable cloth...

Page 4: ...ne 39 Electrical Connection of the FAM 40 Check direction of rotation 41 Preparing the rotary vane vacuum pump 42 Filling the seal chamber of the evacuation pump 43 Operating Elements on the unit 44 Starting up the unit 45 Setting the vacuum pressure 45 Venting the filter housing 46 Shut off FAM 47 FAM in manual operation 47 Error messages troubleshooting 48 H5 If the vacuum column is overfilled 5...

Page 5: ...ction strainer 75 Changing the air filter element 76 Vacuum pump maintenance 76 Vacuum pump components 77 Changing the oil and oil filter of the vacuum pump 79 Replacing the air de oiling element of the vacuum pump 80 Test vacuum column level sensor 81 Switching Status Level Sensor Vacuum Column SPS 82 Testing the Float Switch in the Oil Pan 83 Replacing filter element on the oil mist separator 84...

Page 6: ...ou should keep it in the vicinity of the product so it is always at your fingertips Note that the information on the unit s engineering contained in the documentation was that available at the time of publication There may be deviations in technical details figures and dimensions as a result If you discover errors while reading the documentation or have suggestions or other useful information plea...

Page 7: ...duct e g purchasing options etc may result in the information in the operating instructions no longer being completely accurate or sufficient After modification or repair work that affects the safety of the product has been carried out on components the product may not be returned to operation until it has been checked and released by a HYDAC technician Please notify us immediately of any modifica...

Page 8: ...ow I determine which topic I am looking for WHERE can I find the information I m looking for The documentation has a table of contents at the beginning There I select the chapter I m looking for and the corresponding page number de HYDAC Filtertechnik GmbH BeWa 123456a de Seite x Produkt Kapitel 200x xx xx The documentation number with its index enables you to order another copy of the operating a...

Page 9: ...ured on the cover sheet of the operating and maintenance manual and in the lower left corner of each page after the part number Index e Manual revised Index f Manual revised Note regarding explosion groups IIA to IIB3 supplemented according to the TÜV report Index g Manual revised Index h Manual revised FAM70 size expansion Maintenance instructions also ...

Page 10: ...ou should keep it in the vicinity of the product so it is always at your fingertips Note that the information on the unit s engineering contained in the documentation was that available at the time of publication There may be deviations in technical details figures and dimensions as a result If you discover errors while reading the documentation or have suggestions or other useful information plea...

Page 11: ...product e g purchasing options etc may result in the information in the operating instructions no longer being completely accurate or sufficient After modification or repair work that affects the safety of the product has been carried out on components the product may not be returned to operation until it has been checked and released by a HYDAC technician Please notify us immediately of any modif...

Page 12: ...in the future What do I want to know I determine which topic I am looking for WHERE can I find the information I m looking for The documentation has a table of contents at the beginning There I select the chapter I m looking for and the corresponding page number The documentation number with its index enables you to order another copy of the operating and maintenance instructions The index is incr...

Page 13: ... unit unless all the safety devices are present Secure the hazardous areas which may arise between the unit and other equipment Maintain the unit inspection intervals prescribed by law Document the results in an inspection certificate and keep it until the next inspection Hazard symbols These symbols are listed for all safety information and instructions in these operating instructions which indic...

Page 14: ...0 Atex 3193049h en us 2013 06 19 2013 06 19 Risk of burns due to hot surfaces Substances that are health hazards or irritants Danger from explosive atmosphere Danger of explosion in explosive atmospheres This symbol marks safety indications that refer particularly to explosion protection ...

Page 15: ...ER DANGER indicates a danger with a high risk and which will lead to death or serious injury if not avoided WARNING WARNING indicates a danger with a medium risk and which can lead to death or serious injury if not avoided CAUTION CAUTION indicates a danger with a low risk and which can lead to minor injury if not avoided NOTICE NOTICE indicates a danger which will lead to damage to property if no...

Page 16: ...d the signal word indicate the severity of the danger Warning instructions listed before an activity are laid out as follows SIGNAL WORD Type and source of danger Consequence of the danger HAZARD SYMBOL Measures to avert danger Observe regulatory information Observe the following regulatory information and guidelines Legal and local regulations for accident prevention Legal and local regulations f...

Page 17: ...0 C Risk of explosion Note the maximum permissible hydraulic fluid temperature of 70 C Install a radiator upstream of the unit if necessary When work is done in explosion prone areas the safety of persons and equipment depends on the observance of all relevant safety regulations The installation and maintenance personnel thus carries particular responsibility Exact knowledge of the applicable regu...

Page 18: ... IN N 5 50 05 52 24 4 G Ge ea ar r o oi il ls s a ac cc c t to o D DI IN N 5 51 15 51 17 7 a an nd d D DI IN N 5 51 15 52 24 4 O Ot th he er r h hy yd dr ra au ul li ic c a an nd d l lu ub br ri ic ca at ti io on n o oi il ls s w wh hi ic ch h r re eq qu ui ir re e o or r a ar re e c co om mp pa at ti ib bl le e w wi it th h N NB BR R s se ea al ls s F FA AM M x xx x B B x x x x x xx xx xx x x xx ...

Page 19: ... qu ui ip pm me en nt t g gr ro ou up p II Potentially explosive atmospheres in which vapors or gas air mixtures are likely to occur Equipment category 2G Equipment providing for a standard degree of safety Designated for cases in which atmospheres posing an explosion hazard can be expected to occur very rarely and if so only briefly Explosion hazard subgroup IIB3 Typical gases Town gas acrylonitr...

Page 20: ...AC Filter Systems GmbH will assume no liability for any damage resulting from such use The user alone shall assume any and all associated risk Improper use may result in hazards and or will damage the unit Examples of improper use Operation in a potentially explosive atmosphere other than the identified one Operation with a non approved medium Operation with a non approved medium temperature 70 C ...

Page 21: ...list training and several years work experience They are able to assess and perform the work assigned to them they are also able to recognize potential hazards Activity Person Knowledge Transport storage Forwarding agent Specialist personnel Proof of knowledge of cargo securing instructions Safe handling operation of hoisting and lifting equipment Hydraulic electrical installation first commission...

Page 22: ...ing snagged on projecting parts You can be severely injured or killed Wear close fitting clothing Do not wear any rings chains or any other jewelry Wear work safety shoes Stoppage in an emergency EMERGENCY STOP In the event of an emergency turn the main switch by 90 in a counter clockwise direction to shut down the entire unit The entire unit downstream of this switch is voltage free and depressur...

Page 23: ...e grips provided for shifting Drain the unit completely before transport Seal off the inlets and or outlets On the mobile FAM wind the suction and pressure hose and the connection cable around the holders provided for this purpose and secure them Move the FAM manually using the rollers When doing so use only the grips provided on the FAM frame for pushing Before shifting the unit make sure to rele...

Page 24: ...e damaged destroyed Use only suitable lifting accessories to raise or lash the FAM Take care to ensure that the lifting accessories does not cause any pressures to be brought to bear against the components on the FAM Train truck For transport by rail or truck supports must be placed under the mobile FAM so that the rollers are subjected to no load pressure The FAM is to be secured with suitable be...

Page 25: ...be reported to the forwarding agent or the department in charge immediately the unit may not be commissioned until this damage is properly remedied The following items are supplied Qty Name 1 FAM connection ready with suction and pressure hose 2 Drive handle 7x10 to open the control cabinet 1 Blasolube 300 dose 900 grams to lubricate the control cabinet lock 1 Documentation consisting of Operating...

Page 26: ... be found in solution The integrated fluid filter ensures an efficient separation of solid particles The fluid is degassed through a vacuum created in the vacuum column Performance features The FAM is able to reduce the water content of those fluids described in the chapter Suitable Fluids to less than 100 ppm Typical dewatering rates ISO VG46 FAM 15 1 0 l h FAM 30 1 7 l h FAM 50 2 2 l h FAM 70 2 ...

Page 27: ...FAM overview FAM 15 30 50 70 ATEX en us Page 27 96 BeWa FAM15 70 Atex 3193049h en us 2013 06 19 2013 06 19 FAM overview ...

Page 28: ...r the separation of solid particles 12 Fluid filter differential pressure indicator 13 Ball valve for the manual drainage of the fluid filter 14 Check valve 15 Ball valve 16 Float switch in the oil pan 17 Vacuum pump 18 Ball valve 19 Fill level switch dry running protection of the evacuation pump 20 Oil mist separator 21 Air filter and air dryer 22 Throttle valve for vacuum setting 23 Vacuum sucti...

Page 29: ...ontrol valve 4 Vacuum column 6 Level switch 7 Vacuum pressure gauge 9 Evacuation pump with electrical motor 10 Pressure relief valve 11 Fluid filter for the separation of solid particles 16 Float switch in the oil pan 17 Vacuum pump 19 Fill level switch dry running protection of the evacuation pump 21 Air filter and air dryer 22 Throttle valve for vacuum setting 24 Operating panel and control cabi...

Page 30: ...umn until the level switch 02 is reached The 2 2 directional valve closes and the procedure begins again The vacuum in the vacuum column sucks atmospheric air out through the air filter This air flows down into the vacuum column and is sucked out by the vacuum pump By virtue of this flow of air the air picks up the humidity of the fluid The monitoring of the vacuum pump is limited to the pressure ...

Page 31: ...Hydraulic diagram FAM 15 30 50 70 ATEX en us Page 31 96 BeWa FAM15 70 Atex 3193049h en us 2013 06 19 2013 06 19 Hydraulic diagram ...

Page 32: ...re relief valve 11 Fluid filter for the separation of solid particles 12 Fluid filter differential pressure indicator 13 Ball valve for the manual drainage of the fluid filter 14 Check valve 15 Ball valve 16 Float switch in the oil pan 17 Vacuum pump 18 Ball valve 19 Fill level switch dry running protection of the evacuation pump 20 Oil mist separator 21 Air filter and air dryer 22 Throttle valve ...

Page 33: ...th suction and pressure lines to the tank and cleans the medium to be found there in continuous operation Purifying and transferring by pumping The FAM is connected to the contaminated oil tank with the suction hose and pumps the fluid into the tank for the purified oil while cleaning it at the same time IN OUT The fill level of clean oil tank is to be monitored constantly during this process to p...

Page 34: ...aled over an extended period of time Setting up the unit Observe the following points when setting up the unit Set up the unit horizontally on a level surface Special mounting is not required Lock the immobilization brakes on the wheels to avoid unintended movement of the unit mobile version only Set up the unit directly beside the tank that is to be cleaned Observe the maximum permitted suction p...

Page 35: ...espective hose type Marking the hose with the symbol M Limit value 10 2 Marking the hose with the symbol Limit value 106 The hose connection must ensure a highly conductive transition between the hose and FAM tube as well as between the hose and tank tube If this is not the case all conducting parts such as the metal mouth piece at the end of the hose are to be grounded separately Connecting condu...

Page 36: ...ss as low as possible use as few threaded connections as possible Connect all connectors to the FAM without initial stress The pressure at the inlet outlet depends on the height differential between the FAM fluid surface in the tank port aspiration height P height and the line losses P line If the FAM is above the fluid surface in the tank determine the pressure as follows P 1 bar P height P line ...

Page 37: ...cosity mm s D Density kg dm Mineral oil based hydraulic fluid has a density of 0 9 kg dm This applies to straight pipe runs and hydraulic oils Additional threaded connections and pipe bends increase the pressure differential Keep the height difference between the pump and the oil level in the tank as minimal as possible Hoses must be suitable for suction pressures of at least 0 5 bar Avoid constri...

Page 38: ...ttom of the tank Do not prime in the sump Never prime without a built in suction screen The greatest contamination is found on the bottom of the tank All impurities and other particles are deposited on the bottom of the tank Use a negative pressure resistant flexible hose or a pipe for the suction side connection Make sure that the cross section of the connected hoses piping is at least as large a...

Page 39: ...ressure port return flow line NOTICE Return port connection OUT closed off The unit will be damaged Check to be sure that all of the locking fixtures at the outlet are in open position each time before start up To prevent air from entering the medium make sure that the pressure hose with lance is always below the oil level in operation ...

Page 40: ...le may only be performed by a technician with corresponding knowledge and skills Make sure that the voltage and frequency specifications on the FAM type label correspond to the existing mains voltage If a plug is present on the FAM or if a plug is mounted then the FAM is to be operated from a correspondingly fused socket In order to keep the keep the temperature increase of th electric motors with...

Page 41: ...f the motors A rotation direction arrow on the fan cover of the motor identifies the correct direction of rotation Make sure there is a clockwise rotating field If this is not the case then the phases can be rotated in the 16A 32 A connection plug with the aid of the phase changing switch in the plug For the 63A version the two phases must be switched on the terminal block S0 e g L1 and L2 Prior t...

Page 42: ...uires oil as its operating medium Check the oil level before star up topping up with vacuum pump oil VE101 if necessary To fill the rotary vane vacuum pump the oil is filled in through the filling screw plug c until the oil filling has risen above the MIN marking in the viewing glass n The oil quantity between the MIN MAX markings is 0 3 liters You may only use synthetic vacuum pump oil to fill th...

Page 43: ...to be purified having a viscosity of ISO VG 10 VG 100 This is needed in order to prevent dry running of the shaft seals Dry running of the pump would result in premature wear and tear and impermissible heating at the sealing lip or dust lip This also prevents the ingress of air into the fluid Check the fill level of the reservoir 1 at least once a week and top off as needed 2 1 max 7 ml 1 Item Nam...

Page 44: ...n message lamps 11 H5 H14 H4 H5 H6 H7 H8 H15 H9 H10 H11 H12 H13 H14 S1 H1 S2 H2 S3 H3 Function keys Inscription Function S1 Start delay Start FAM starting and changeover to purification mode S2 Stop overrun Stop FAM run down and evacuation of the vacuum column S3 Malfunction Acknowledging all corrected malfunctions Switching from automatic to manual operation Operating status lamps Inscription Ope...

Page 45: ...tric circuit diagram A5 in the control cabinet and is eliminated by pressing the button S1 Start delay or the button S3 Malfunction The system now begins with the starting phase The vacuum pump starts up the inlet valve opens and the vacuum column is filled When the vacuum chamber is filled to filling level 02 the evacuation pump is started up and the starting phase is finished The purification op...

Page 46: ...ICE Air in the fluid filter The filter element is not utilized completely Bleed the fluid filter after each shut down filter element replacement The fluid filter is to be bled through the bleed port X in the cover until fluid emerges Use an Allen key wrench to carefully open the ventilation plug X in the cover for this purpose It is not necessary to unscrew the ventilation plug X completely out it...

Page 47: ...al operation is very helpful when searching for a fault You can switch pumps on off in a targeted way To switch to manual operation press the button Malfunction S3 for at least 6 seconds After you have switched to manual operation the operating status lamp H4 flashes In manual operation the allocation of buttons S1 S3 is as follows Inscription Description S1 Start delay Switching evacuation pump O...

Page 48: ...o the vacuum column Check shut off device in the suction pipe check suction strainer suction hose could have become attached to the floor Check vacuum pump and clean as required H7 Outlet clogged No medium is being pumped out of the FAM The vacuum pump is not being emptied Check shut off devices in the return line and check pressure relief valve of the evacuation pump H8 Temperature V pump Vacuum ...

Page 49: ...g protection Check suction strainer check suction pipe suction hose could be attached to the floor Check vacuum pump and clean as required H14 Level switch 01 02 03 Level switch defective Check level switch and replace if necessary H15 Pressure V pump Pressure in the vacuum pump is too high Exhaust filter cartridge is used up Replace exhaust filter cartridge see operating instructions of vacuum pu...

Page 50: ...mn overfilled 1 Press the RESET button 2 Select manual menu 1 and start the evacuation pump 3 Can the vacuum column be emptied within 3 5 minutes from level 03 to level 01 a Yes proceed to Step 5 4 b No proceed to Step 6 5 Excessive foaming Vacuum in the vacuum column too high Reduce the vacuum e g from 300 mbar abs 400 mbar abs 6 Check the evacuation pump for proper functioning 7 The fault is rep...

Page 51: ... the shut off fittings in the suction line If they are closed then open them Check clean the suction screen 4 Press the RESET button to acknowledge reset the fault 5 Does the fault repeat after 4 minutes a Yes proceed to Step 7 6 b No proceed to Step 8 7 Check the following points Check the suction pipe for cross section constriction Check the functioning of the vacuum pump in manual mode Are all ...

Page 52: ...cuum column emptying pump pressure limit 5 bar 2 Check the position of the shut off devices in the return line If they are closed then open them Check clean the suction screen 3 Press the RESET button to acknowledge reset the fault 4 Does the fault repeat after 4 minutes a Yes proceed to Step 6 5 b No proceed to Step 7 6 Check the pressure relief valve of the evacuation pump for proper functioning...

Page 53: ...igh 2 Check the fill level in the vacuum pump If necessary fill up with the correct vacuum pump oil 3 Press the RESET button to acknowledge reset the fault 4 Does the malfunction recur after the vacuum pump has started a Yes proceed to Step 6 5 b No proceed to Step 9 6 The vacuum pump or the controller in the control cabinet is defective 7 Repair or replace the vacuum pump or the defective parts o...

Page 54: ...for the unit and start it by pressing the main switch 4 Check the direction of rotation of the pumps a The fault recurs proceed to Step 6 5 b The fault does not recur proceed to Step 7 6 Switch off the unit at the main switch and check the network cable and plug or the electrical connection to the unit 7 The fault is repaired NOTICE Incorrect rotation direction of the pump electric motor The unit ...

Page 55: ... unit at the main switch 3 Close the ball cocks on the IN and OUT connections 4 Empty the filter housing via the drain ball valve 5 Replace the filter element according to the description on page 69 6 Open the ball cocks on the IN and OUT connections 7 Switch on the unit at the main switch 8 Does the malfunction repeat after 4 minutes a Yes proceed to Step 10 9 b No proceed to Step 11 10 Check the...

Page 56: ...Description Malfunction Float switch 1 Empty the oil collecting pan 2 Press the RESET button to acknowledge reset the fault 3 Start up the unit 4 Check the unit for leaks and fix them 5 Does the malfunction reappear after 2 seconds a Yes proceed to Step 7 6 b No proceed to Step 8 7 Check the float switch and the feed lines 8 The fault is repaired ...

Page 57: ...ction switch and or the voltage capacity of the fuse in accordance with the motor type plate and or the heater type plate a The fault recurs proceed to Step 4 3 b The fault does not recur proceed to Step 8 4 Measure the current consumed by the motor 5 Close the control cabinet door Supply power to the unit Switch on the unit at the main switch and start the unit a The fault recurs proceed to Step ...

Page 58: ...eight Reduce the absolute pressure in the vacuum column e g from 500 mbar abs 400 mbar abs Increase the hydraulic fluid temperature Increase the cross section of the suction hose Shorten the suction hose Check the 2 2 way solenoid valve on the IN connection 3 Suction port in the tank sucks in air Position the suction port lower in the reservoir The reservoir to be cleaned is too small 4 Check the ...

Page 59: ...level sensor and remove the level sensor 3 Manually check the switching points on the level switch a Switching points are available proceed to Step 5 4 b Switching points not available proceed to Step 6 5 Inspect the plug and the cable to and in the control cabinet for the PLC for proper functioning proceed to Step 7 6 Replace the level switch a Function is available proceed to Step 8 7 b Function...

Page 60: ...g element is used up clogged 3 Replace the air de oiling element 4 Press the RESET button to acknowledge reset the fault 4 Does the malfunction recur after the vacuum pump has started a Yes proceed to Step 6 5 b No proceed to Step 9 6 The vacuum pump or the controller in the control cabinet is defective 7 Repair or replace the vacuum pump or the defective parts of the controller 8 Check the pressu...

Page 61: ...work on the FAM must only be performed by personnel who are both authorized and suitably trained for this purpose To prevent defects in the system perform maintenance work regularly However the intervals between inspections should not exceed a maximum of one year When determining the inspection intervals take the following conditions into consideration Ambient conditions Set up in the open Wind ra...

Page 62: ...AM is to be taken out of service until the defect is remedied Repair and servicing work is not permitted on damaged flameproof enclosures evacuation pump motor In this case replace the installed component assembly Visual checks Daily check all hoses pipelines for leaks Regularly check by visual check the electrical equipment for possible damage to lines the plug sensors or cabling and the devices ...

Page 63: ...e measurement technology equipment Underpressure manometer Dynamic pressure manometer at the fluid filter X Check fault indicator lamps 74 X Change the air filter if this has not been required earlier 76 X Clean the suction strainer 75 X Lubricate the electrical cabinet lock 68 X Rotary Valve Pump Vacuum Pump Check oil level 77 X Check oil for discoloration See operating instructions of vacuum pum...

Page 64: ...See operating instructions of vacuum pump X Check the measuring and security technology for proper functioning See operating instructions of vacuum pump X Change intake air filter clean intake strainer See operating instructions of vacuum pump X Replacing the Air De oiling Element 80 X Emptying Filling Pump Check the filling level of the reservoir to the seal chamber and top off if necessary 67 X ...

Page 65: ...e power consumption of all engines and compare the values with the type label X Perform electrical safety inspection in accordance with DIN VDE 0702 and or corresponding national regulation X Measure power consumption of the heater and compare values with type label applies only to versions with integrated heater X Function Test Check and clean the level sensor in the vacuum column X Float switch ...

Page 66: ...sual inspection Are the entries tight Inspection by pulling Is the sealing within the entry in satisfactory condition Inspecting the internal condition of the control panel Is the interior in perfect condition Visual inspection Is the seal system undamaged Visual inspection Are the electrical contact points in perfect condition Function test Is the interior dry and clean Visual inspection Is the i...

Page 67: ...d stopping plugs seated correctly Are all unused openings sealed with certified sealing elements Are all covers and partition plates associated with energized components in place and firmly attached Is the ground wire connected Filling the seal chamber of the evacuation pump Check the filling level of the reservoir to the seal chamber weekly top off if necessary For topping off use the medium to b...

Page 68: ...u can obtain this lubricant from HYDAC as a spare part the part no is in the spare parts list Proceed as follows to lubricate the threads 1 Switch the unit off pull the mains plug and bring the unit out of the area at risk for explosion 2 Open the lock x by turning the driver counterclockwise and remove it 3 Remove any residue of the lubricating grease that is present on the lock and on the switch...

Page 69: ... To o c ch ha an ng ge e t th he e f fi il lt te er r e el le em me en nt t y yo ou u n ne ee ed d t th he e f fo ol ll lo ow wi in ng g Filter element N15DMxxx quantity and type dependent on version Allen wrench size 6 mm Fork wrench size 13 mm To change the filter elements proceed as follows 1 Switch off the unit at the main switch and make sure it cannot be inadvertently switched back on 2 Clos...

Page 70: ...ch the fluid 2 Open the drain fitting and collect the escaping fluid in the tray Once the housing has been completely drained close the drain fitting 3 Screw in the air bleed screw x by hand in a clockwise direction and tighten it firmly using a 10 mm Allen wrench 4 Release the housing tensioning clamps 1 and remove them Remove the cover a Remove the intermediate piece b ...

Page 71: ...Page 71 96 BeWa FAM15 70 Atex 3193049h en us 2013 06 19 2013 06 19 5 Turn the locking cap on the top filter element by 90 in counterclockwise direction 1 and lift the locking cap off 2 6 Turn all filter elements 90 in a counterclockwise direction and remove them ...

Page 72: ...he old filter elements in an environmentally friendly manner 8 Clean the inside of the filter housing of coarse dirt Check the O rings on the filter housing for damage If necessary replace them 9 Insert the filter element into the bayonet fitting 1 and lock it in place by turning each individual filter element 90 in the clockwise direction 2 ...

Page 73: ...g tensioning clamp 1 and tighten it with a torque of 20 Nm Secure using the lock nut Put the cover a on the intermediate piece b Mount the upper housing tensioning clamp 2 and tighten it with a torque of 20 Nm Secure using the lock nut We recommend applying lubricant containing a slip additive to the threads of the housing tensioning clamp each time filters are changed so that it remains easy to r...

Page 74: ...housing can escape via the slot on the air bleed screw Bleed the filter housing through the air bleed screw x until operating fluid comes out Tighten the air bleed screw 14 The filter element change is now complete Checking the fault indicator lamp After the FAM is switched on all fault indicator lamps light up for 2 seconds Check to see whether all fault indicator lamps light up Replace any defec...

Page 75: ...ainer insert is fitted at the pump inlet This strainer insert must be cleaned at regular intervals e g by flushing it with solvent or blow flushing it with compressed air 1 Unscrew the screw plug 1 counterclockwise with an open jaw wrench 50 mm 2 Remove the strainer insert 3 and clean it 3 Check strainer insert 3 and sealing ring 2 on the screw plug for damage Replace it if necessary 4 Insert the ...

Page 76: ... qu ue en nt tl ly y a as s r re eq qu ui ir re ed d b by y t th he e a am mb bi ie en nt t a ai ir r c co on nd di it ti io on ns s e e g g d du us st ty y h hu um mi id d Unscrew the air filter by hand Screw on the new air filter by hand Vacuum pump maintenance The vacuum pump must be serviced by BUSCH Service every 16000 operating hours but at the latest after 4 years Oil mist or increased curr...

Page 77: ...Performing maintenance inspection FAM 15 30 50 70 ATEX en us Page 77 96 BeWa FAM15 70 Atex 3193049h en us 2013 06 19 2013 06 19 Vacuum pump components ...

Page 78: ...erminal box c Oil filling screw plug d Type label e Oil separator F Temperature switch g Grounding connection H Ring bolt i Suction port connection j Flame arrester with cut off valve k Flame arrester l Gas outlet m Axial flow fan n Oil sight glass o Drain plug p Air de oiling element q 2 Temperature switch for frost protection mode optional T Rotor u Level switch optional ...

Page 79: ...arts list Fork wrenches SW 27 SW 32 To change the oil oil filter proceed as follows 1 The vacuum pump must be at operating state temperature when the oil is changed Put the FAM into operation for 10 minutes 2 Switch off the FAM at the main switch 3 Wait until the pressure in the vacuum column has reached atmospheric pressure 1000 mbar absolute 4 Drain the vacuum pump oil at the oil drain plug o Th...

Page 80: ...s a soiled air de oiling element To replace the air de oiling element proceed as follows 1 Unscrew and remove the 4 fastening screws on the gas outlet l and the flame arrester k 2 Undo the safety screw on the flat spring 3 Remove the leaf spring 4 Replace the seal on the gas outlet l 5 Install the leaf spring 6 Tighten the leaf spring safety screws 7 Screw on the flame arrester k and the gas outle...

Page 81: ...lease the safety screw on the level sensor plug Pull out the plug Carefully remove the cover together with the level sensor Attach the cover to the vacuum column as shown Clean the dirt off of the level sensor C Ch he ec ck k t th he e f fu un nc ct ti io on ni in ng g o of f t th he e f fl lo oa at t l le ev ve el l s se en ns so or r u us si in ng g t th he e P PL LC C i in np pu ut ts s M Mo ov...

Page 82: ...ul lt t m me es ss sa ag ge e V Va ac cu uu um m c ch ha am mb be er r o ov ve er rf fi il ll le ed d m mu us st t a ap pp pe ea ar r o on n t th he e t te ex xt t d di is sp pl la ay y A Ac ck kn no ow wl le ed dg ge e t th he e m me es ss sa ag ge e w wi it th h t th he e R RE ES SE ET T k ke ey y P Pe er rf fo or rm m t th he e a as ss se em mb bl ly y i in n r re ev ve er rs se ed d o or rd de...

Page 83: ... raise the float switch in the oil pan 2 The unit must switch off and the fault message Pan overfilled must appear in display of the control panel 3 Release the float switch and acknowledge the fault message by pressing the F3 key 4 The unit continues to operate You have tested the function of the float switch positively 5 If the unit does not switch off after the lifting of the float switch and n...

Page 84: ... separator is located between the vacuum column and the vacuum pump A filter element is used to retain the oil mist and the oil in the oil mist separator and the oil is collected in the separator pot where it is continuously suctioned off and returned to the vacuum column The filter element for part no see replacement parts list is to be replaced on a regular basis in accordance with the maintenan...

Page 85: ...essure has been established in the vacuum column Rotate the separator pot 2 1 8th of a turn to the left bayonet seal and remove from the bottom Turn the used filter element clockwise to remove and dispose of it in an environmentally correct manner Insert the new filter element and screw it into the separator head 1 by turning it counterclockwise Insert the separator pot 2 into the separator head 1...

Page 86: ...m N15DM010 03115180 1 2 3 4 Filter element 20 µm N15DM020 00349576 1 2 3 4 Filter element 30 µm N15DM030 03048790 1 2 3 4 O Ring for filter housing 270x10 NBR 6005449 1 2 2 4 Air filter 0160 MU 003 M 01265765 1 1 1 1 Suction strainer assy consisting of Suction strainer Sealing ring 00635055 06010807 06034076 1 1 1 1 1 1 1 1 1 1 1 1 Vacuum pressure gauge 00639989 1 1 1 1 Pressure hose 1 1 1 1 Sucti...

Page 87: ...ephone 49 0 6897 509 1174 Fax 49 0 6897 509 846 E mail filtersystems hydac com Regular inspection and maintenance work is indispensable for ensuring trouble free operation and long service life for your FluidAqua Mobil Our HYDAC Servicenter offers you these tasks within agreed upon time frames and at fixed prices HYDAC SERVICE GMBH Friedrichsthaler Strasse 15a Werk 13 66540 Neunkirchen Heinitz Ger...

Page 88: ...torage Pull out the power plug and securely fasten the hoses and power cord to the FAM Store the FAM in a clean dry condensation free space Observe the following storage conditions Storage temperature 0 50 C Relative humidity max 75 non condensing Disposing of the FAM Dispose of the packaging material in an environmentally friendly manner After dismantling the unit and separating the various mater...

Page 89: ... 50 Hz 17 l min 36 l min 56 l min 76 l min Operating pressure 4 5 bar 4 5 bar 4 5 bar 4 5 bar Viscosity range 15 500 mm s 15 500 mm s 15 500 mm s 15 500 mm s Electrical power consumption 1900 W 2700 W 3200 W 5100 W IP class IP 55 IP 55 IP 55 IP 55 Length of the electrical connection cable 10 m 10 m 10 m 10 m Length of hoses 5 m 5 m 5 m 5 m Hoses material NBR NBR NBR NBR Inlet outlet G1 G1 G1 G1 G1...

Page 90: ...message 4 50 F filling 31 43 47 50 66 69 80 Filter 7 11 20 50 66 71 88 91 98 Filter element 71 88 91 filtration 27 75 Float switch 4 29 30 33 50 58 67 Flow rate 27 38 91 Fluid filter 29 30 33 Fluid level indication 29 33 Forwarding agent 21 G Gear pump 91 H Hazard symbol 3 13 Hydraulic diagram 4 32 Hydraulic oil 47 I Imprint 2 3 IN 4 37 39 47 53 57 60 Inlet 4 29 30 33 53 91 Internal pipe diameter ...

Page 91: ... 30 31 33 35 53 59 Signal word 3 15 signal words 16 Specialist personnel 21 Start delay 31 45 47 49 Suction hose 33 88 Suction port connection 80 Switching point 61 T Temperature 19 50 80 Throttle valve 29 30 33 to shut down 23 Transport 21 transporting 24 Type label 80 V Vacuum 5 29 30 33 43 49 50 52 65 78 79 81 84 88 Vacuum column 29 30 33 52 Vacuum pressure gauge 29 30 33 88 Vacuum pump 5 29 30...

Page 92: ......

Page 93: ......

Page 94: ......

Page 95: ......

Page 96: ...iet Postfach 1251 66280 Sulzbach Saar 66273 Sulzbach Saar Germany Germany Phone 49 0 6897 509 01 Central Fax 49 0 6897 509 846 Technical Department Fax 49 0 6897 509 577 Sales Department Internet www hydac com E mail filtersystems hydac com ...

Reviews: