Husqvarna SC18A, Operator'S Manual
The Husqvarna SC18A Operator's Manual is a comprehensive guide for users of this cutting-edge equipment. This essential manual provides detailed information and instructions on how to operate and maintain your SC18A, ensuring optimal performance and longevity. Download this manual for free from our website manualshive.com, to help you get the most out of your Husqvarna SC18A.
Share
Download


Reviews:
No comments
Related manuals for SC18A

PLG029
Brand: PROCONCEPT Pages: 44

VIRM47
Brand: Vito Agro Pages: 64

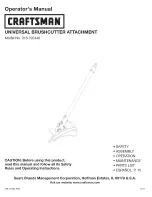
170.172440
Brand: Craftsman Pages: 36
316.792440
Brand: Craftsman Pages: 32

KPRA
Brand: KitchenAid Pages: 44

VLS3.60
Brand: VersaLASER Pages: 121

TE-TC 620 U
Brand: EINHELL Expert Pages: 92

FSM-200
Brand: Lux Tools Pages: 26

KBC-2600 SERIES
Brand: SMC Networks Pages: 10

IR-310
Brand: Nakanishi Pages: 2

YT-85001
Brand: YATO Pages: 116

HW 96
Brand: Far Tools Pages: 14

RC5015
Brand: Land Pride Pages: 342

Powerplus POWXG3016
Brand: VARO Pages: 15
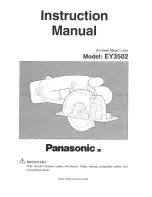
EY3502 - CORDLESS METAL SAW
Brand: Panasonic Pages: 20

BT180N
Brand: NUTOOL Pages: 48

PBT4346T
Brand: Lawn-King Pages: 33

SIWM DIGITAL Paris700
Brand: Vector Welding Pages: 11


