Huawei AAU3940, Hardware Maintenance Manual
The Huawei AAU3940 Hardware Maintenance Manual is an essential resource for users seeking to understand and maintain their Huawei AAU3940 product. This comprehensive manual can be easily accessed and downloaded for free from our website, ensuring that you have all the necessary information to maximize the performance and longevity of your device.
Share
Download


Reviews:
No comments
Related manuals for AAU3940
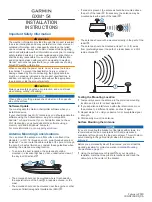
GXM 54
Brand: Garmin Pages: 4

GPS-702-GG
Brand: Novatel Pages: 2

DISH 1000.2
Brand: Dish Network Pages: 22

PA-02
Brand: Retro Antenna Pages: 4

SLX 32 Element Digital TV Aerial
Brand: SLX Pages: 2

27776R
Brand: SLX Pages: 2

ValuLine VHLP1 Series
Brand: CommScope Pages: 13

SC2-W800
Brand: RFS Pages: 2

V-6R
Brand: Hy-Gain Pages: 7

VB-216SAT
Brand: Hy-Gain Pages: 11

VB-214FM
Brand: Hy-Gain Pages: 10

BF-600
Brand: Steren Pages: 2

AKL/8M
Brand: Label Italy Pages: 7

B0767JM8V1
Brand: AmazonBasics Pages: 28

ANT-9020
Brand: Steren Pages: 16

2M18 series
Brand: M2 Antenna Systems Pages: 6

120
Brand: Triax Pages: 8

TRAV'LER SK-73UP
Brand: Winegard Pages: 12


