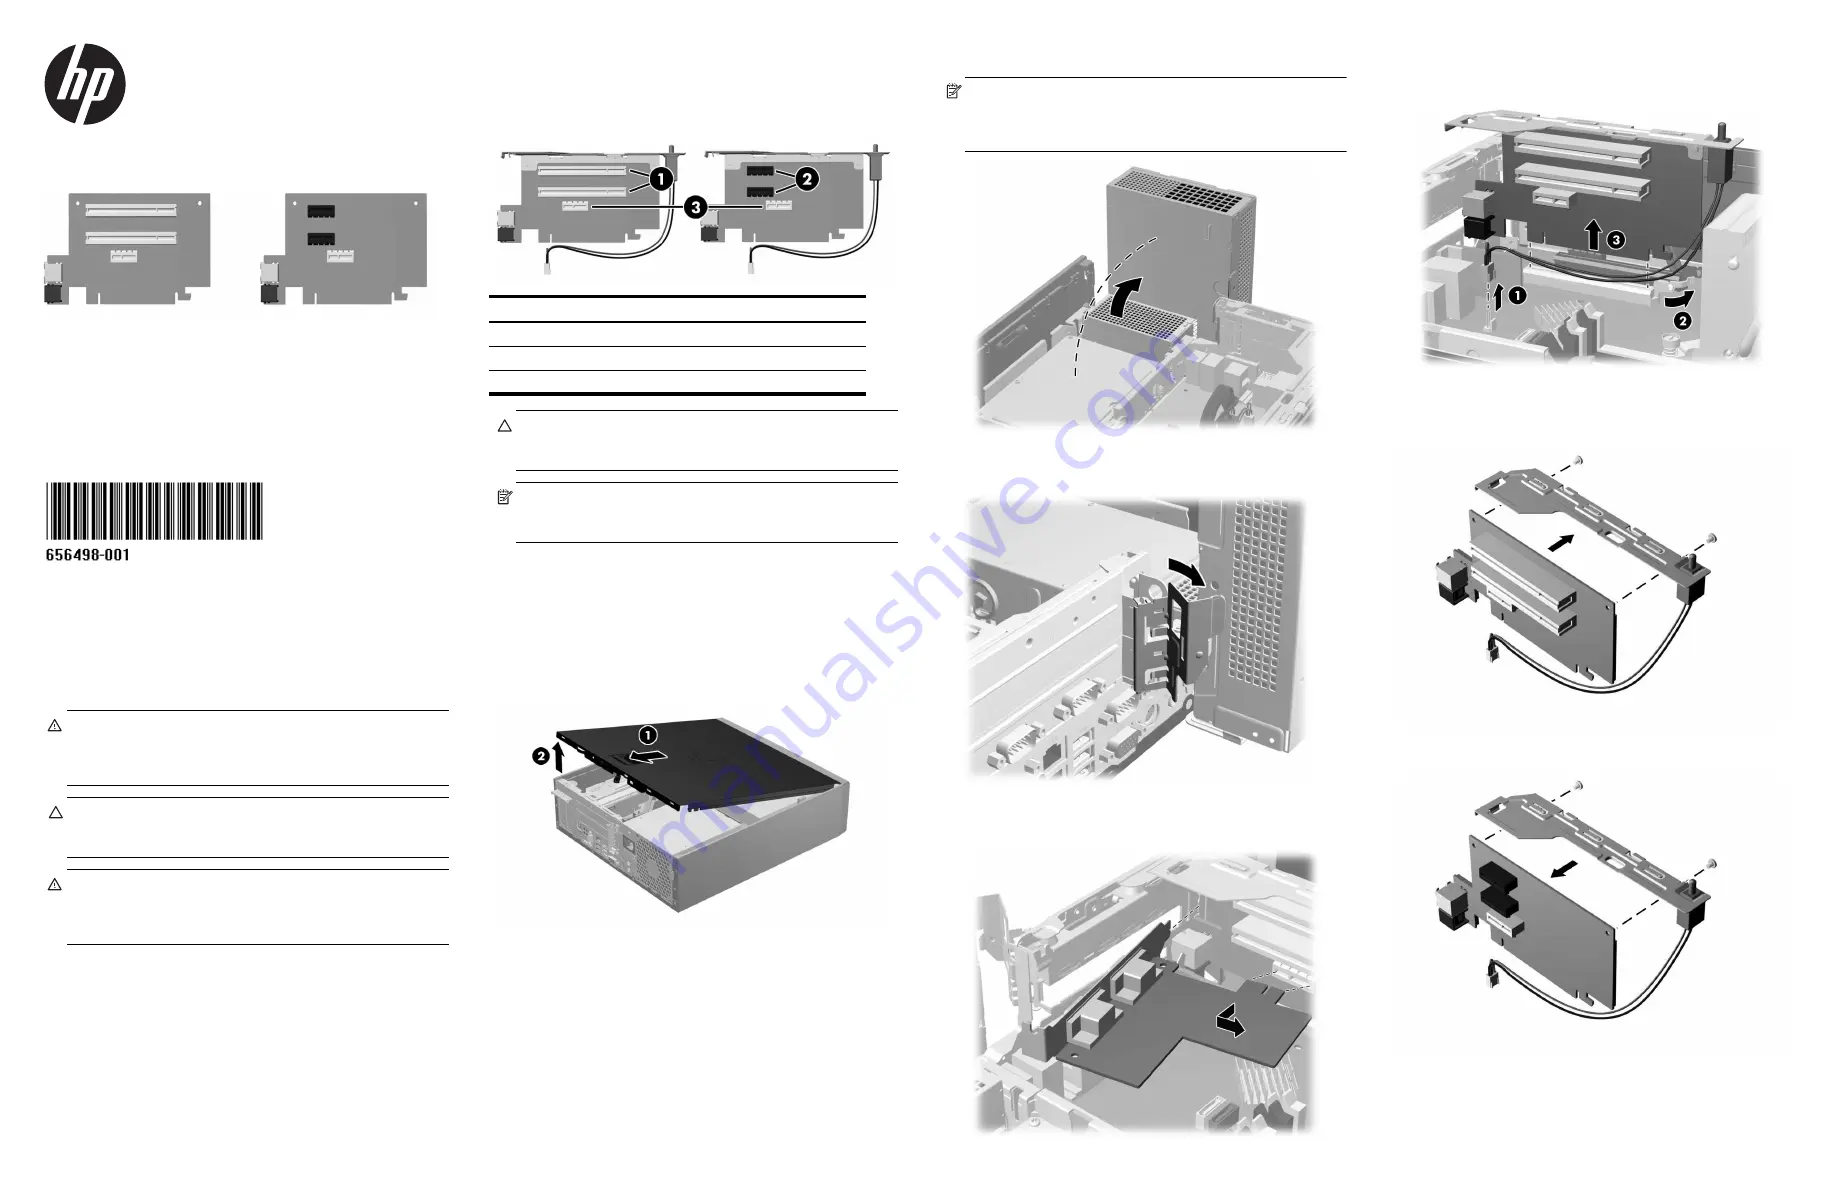
PCI or PCIe Riser Card
Installation Guide
HP rp5800 Retail System
© Copyright 2011 Hewlett-Packard Development Company, L.P. The
information contained herein is subject to change without notice.The only
warranties for HP products and services are set forth in the express warranty
statements accompanying such products and services. Nothing herein should
be construed as constituting an additional warranty. HP shall not be liable for
technical or editorial errors or omissions contained herein.
Printed in
First Edition: May 2011
Before Your Begin
Before installing the riser card be sure to power off the rp5800 and
disconnect the power cord from the power outlet.
WARNING!
To avoid the risk of serious injury, ensure that the
power cord is unplugged from the electrical outlet at the wall
before installing the riser card. Failure to do so may expose you to
the risk of electric shock.
CAUTION:
To avoid the risk of damage to the system, ensure that
the power cord is unplugged from the electrical outlet at the wall
before installing the riser card.
WARNING!
ONLY the accessories and equipment listed below
are authorized for connection to the 24V PoweredUSB port on the
riser card. Accessories and equipment that are not listed below
may cause a hazardous condition if connected.
•
HP Hybrid Thermal Printer with MICR -- FK184AA
•
HP Hybrid Thermal Printer with MICR and Imaging --
FK185AA
•
HP USB Single Station Thermal Receipt Printer -- FK224AA
•
HP USB Receipt Printer (Serial) -- BM476AA
•
HP USB Receipt Printer -- EY023AA
Contact your retailer before connecting equipment not listed above to
the 24V PoweredUSB interface.
PCI and PCIe Riser Card Configurations
There are two riser cards available from HP for the rp5800 computer.
One has two PCI slots and the other has two PCI Express x1 slots. On
both cards the bottom slot is designated for the Powered Serial Port
expansion card.
CAUTION:
The Powered Serial Port expansion card slot
3
on the
riser card looks very similar to a PCIe x1 expansion card slot. DO
NOT attempt to install a PCIe x1 card in the bottom slot.
NOTE:
Although there are three slots in each riser card, you can
only install two expansion cards in the riser card: one in the top
slot and one in either the middle slot or the bottom slot.
Installing the Riser Card
1.
Turn off power to the system and disconnect the power cord from
the power outlet.
2.
Slide the access panel handle toward the rear of the computer
1
then lift the access panel up and off the computer
2
.
3.
Rotate the power supply all the way back to access the full-height
expansion card retention latch.
NOTE:
If you are using a PS/2 mouse and/or PS/2 keyboard,
make sure they are unplugged from the rear of the computer so
that the connectors do not block the power supply from rotating all
the way back.
4.
Pull back the green tab on the full-height expansion card retention
latch to open the latch
5.
If one or two expansion cards are installed in any of the riser card
expansion slots, remove the cards.
6.
To remove the existing riser card, disconnect the hood sensor
cable from the system board
1
, pull back the arm on the back of
the riser card slot
2
, then lift the riser card out of the riser card slot
3
.
7.
Remove the two screws that secure the metal bracket to the top of
the card and remove the bracket. You do not need to remove the
hood sensor from the bracket.
8.
Install the metal bracket onto the new riser card using the two
screws that secure the bracket in place.
No.
Riser Card Slots
1
PCI Expansion Card slots
2
PCI Express x1 Expansion Card slots
3
Powered Serial Expansion Card slots


