background image

Important Safeguards 

- 1 - 

i


Instruction Manual 


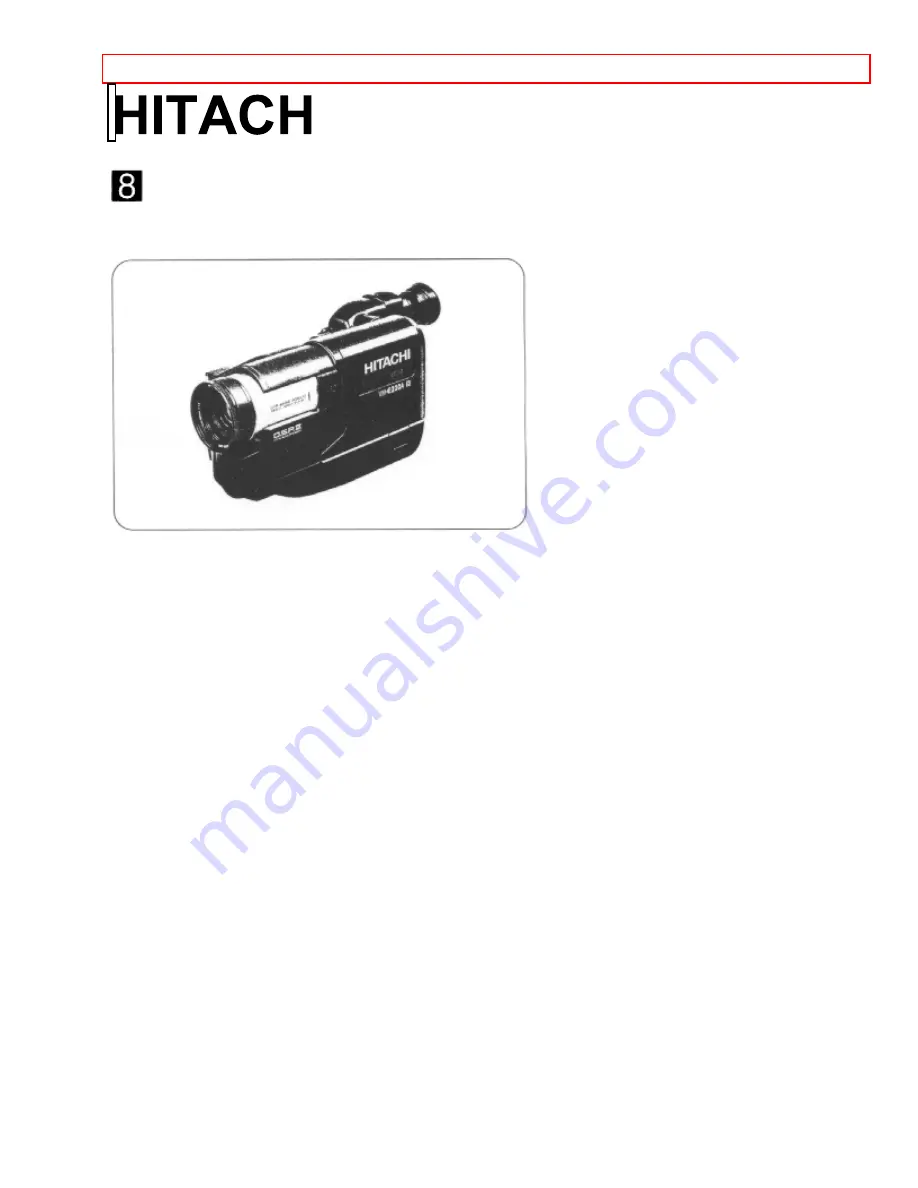
8mm Video Camcorder 

VM-E220A 


Hitachi Home Electronics (America), Inc. 

HITACHI (HSC) CANADA INC 

3890 Steve Reynolds Blvd., Norcross, GA 30093


3300 Trans Canada Highway, Pointe Claire,


Tel. 770-279-5600


Quebec, H9R 1B1, CANADA


Tel. 514-697-9150


HITACHI SALES CORPORATION OF HAWAII, INC 


3219 Koapaka Street, Honolulu, Hawaii 96819


Tel. 808-836-3621


Thank you for buying a Hitachi product. Please take time to become familiar with the manual and how it is set up. 
Keep it handy for feature reference. 

QR14541 © Hitachi, Ltd. 1996   


Printed in Japan KR-H(N) 

Summary of Contents for VME-220A - Camcorder

Page 1: ...ans Canada Highway Pointe Claire Tel 770 279 5600 Quebec H9R 1B1 CANADA Tel 514 697 9150 HITACHI SALES CORPORATION OF HAWAII INC 3219 Koapaka Street Honolulu Hawaii 96819 Tel 808 836 3621 Thank you for buying a Hitachi product Please take time to become familiar with the manual and how it is set up Keep it handy for feature reference QR14541 Hitachi Ltd 1996 Printed in Japan KR H N ...

Page 2: ...Recording 22 Advanced Techniques 24 Date Recording 25 Using the Power Zoom 26 Using the Digital Zoom 26 Using the INST ZOOM Instant Zoom Button 27 Using Auto Focus 27 Using Manual Focus 28 Using Instant Review 28 Using Quick Edit 29 Using Macro 29 Date Search 29 Dubbing from the camcorder to a VCR 30 Recording Television Programs 30 Using the Optional Wireless Remote Control 31 Using Memory 33 Usi...

Page 3: ...umstances copyright law may apply to private in home videotaping of copyrighted materials This Class B digital apparatus meets all requirements of the Canadian Interference Causing Equipment Regulations The liquid crystal display LCD panel is made by highly precise technology More than 99 99 of its picture elements pixels are effective but some less than 0 01 may appear as colored bright dots This...

Page 4: ...ure is sensed TAPE flashes in the viewfinder Remove the cassette and set the CAM OFF VIDEO switch to OFF then wait for about one hour Important Safeguards In addition to the careful attention devoted to quality standards in the manufacture of your video product safety is a major factor in the design of every instrument But safety is your responsibility too This page lists important information tha...

Page 5: ...turer as they may cause hazards Caution Maintain electrical safety Powerline operated equipment or accessories connected to this unit should bear the UL listing mark or CSA certification mark on the accessory itself and should not have been modified so as to defeat the safety features This will help avoid any potential hazard from electric shock or fire If in doubt contact qualified service person...

Page 6: ...wer supply cord or plug is damaged b If liquid has been spilled or objects have fallen into the video product c If the video product has been exposed to rain or water d If the video product does not operate normally by following the operating instructions Adjust only those controls that are covered by the operating instructions Improper adjustment of other controls may result in damage and will of...

Page 7: ...or use Please read and understand this section thoroughly before moving on A Getting Started section to familiarize yourself with the controls and prepare you for recording A Basic Techniques section to allow you to use your video camcorder quickly and confidently before advancing to the more sophisticated features of the Hitachi VM E220A Advanced Techniques to help you with some of the exciting s...

Page 8: ...that does not have audio video input jacks you will need to use the optional RF adapter model VM RF86A R The RF adapter can be purchased by calling the telephone number below For your convenience Visa Master Card and American Express credit cards are accepted The RF adapter can also be purchased by mail by sending either money order or your credit card information to the following address HiTRON I...

Page 9: ...ive an operating time of approximately 55 minutes but this is reduced to a half to one third depending on how often you use zoom and start stop functions Charge the battery at a temperature range of 50 F 10 C 86 F 30 C to prevent damage to the battery 1 Plug the AC adapter charger power cord into an AC outlet Make sure that the wide blade fits into the wide slot If it doesn t fit try reversing it ...

Page 10: ...ting time When operation time becomes too short to be useful replace the battery If the POWER light begins to flash during charging remove the battery and then reattach it to the AC charger adapter If the POWER light continues to flash after several attempts to attach it the battery is unable to take a charge and must be replaced Do not attach a hot battery to the AC adapter charger Allow it to co...

Page 11: ...ts original position before storing the camcorder in its case or carrying the camera recorder around to avoid damaging the viewfinder or camcorder Eyepiece Adjustment To use the electronic viewfinder turn this control for your optimum focus adjustment Adjustment the Hand Strap Adjust the hand strap to best fit your hand After adjustment hook the hand strap s pad securely Loading Batteries Clock Ba...

Page 12: ...tery safely in accordance with local laws Do not dispose of in fire Note Do not short circuit the batteries Note Do not take apart the batteries Note Do not hold the batteries with the metallic tweezers Note Do not re charge the batteries Note Keep the batteries in a dark cool dry place Camcorder Batteries Using Battery Pack Before you install the battery for the first time it must be fully charge...

Page 13: ...t the cover will not close Note Always remove the battery from the camcorder after use Note We cannot guarantee against malfunctions of the camcorder which occur when you use battery packs other than those specified Note Always attach a battery by the procedure described here Attaching a battery forcibly could damage it Removing the Battery Pack 1 Lift the OPEN lever and pull it up The power suppl...

Page 14: ...source or charge the battery before continuing to use the camcorder Using Alkaline Dry Cell Batteries The camcorder can be powered by six alkaline dry cell batteries inserted into the power supply attachment holder The continuous operation time of the camcorder depends on the type of alkaline batteries used Please ensure that CAM OFF VIDEO switch is in the OFF position whenever attaching or detach...

Page 15: ...ly and ask your nearest dealer to inspect the camcorder this will be at your own expense Note Do not let the batteries or the terminals of the camcorder get dirty If they are dirty use a dry cloth to wipe off the dirt completely Note It is recommended that you use a battery pack to power the camcorder when using a DC camera light If a camera light is used when the camcorder is powered by batteries...

Page 16: ...ill cannot make fit the blades fully into the outlet either contact an electrician to replace your obsolete outlet or use a polarized cord or outlet accessory 2 Connect one end of the DC cord provided to the DC IN jack of the camcorder Connect the other end of the DC cord to the DC OUTPUT of the AC adapter charger Note The AC adapter charger can be used around the world An AC plug adapter is requi...

Page 17: ... The camcorder automatically closes Caution Be sure that you push the cassette holder embossed PUSH LOCK to close the holder Otherwise the holder will not click into place and the tape may be slack which could lead to damage Note If TAPE flashes in the viewfinder remove the cassette and check that the tape is not damaged is not slack or no dust adheres to it etc After making sure that there is no ...

Page 18: ... or playback 10 seconds later the remaining tape will be displayed When the cassette is ejected the display will disappear is displayed for 10 seconds after the tape starts to run Note The tape remaining display appears 10 seconds after the tape starts to run Note When the remaining tape time becomes less than about three minutes TAPE END flashes in the viewfinder Setting the Date and Time Take th...

Page 19: ...ock starts Note After the date and time are set AUTO appears and the camcorder enters the automatic date recording mode See Date Recording on page 32 Correcting the Date and Time 1 Press the DATE TITLE button while pressing the STOP button The flashing cursor appears at the month 2 Move to where you need to make the correction with the STOP button and use the F F and REW to correct 3 Press the DAT...

Page 20: ...eview the last few seconds of the tape you are recording PLAY Button Use to playback recorded tapes Right side Battery cover Illustration 11 FOCUS Control Buttons Press these buttons simultaneously to select manual or automatic focus For manual focusing Using Manual Focus p 35 press the F or N buttons to bring the subject into focus When using manual focus FOCUS appears in the viewfinder 12 Diopte...

Page 21: ...o ensure connections are correct This section guides you through basic recording and playback Practice the basic techniques of recording and playback on something unimportant such as traffic or a short tour of your backyard Once familiar with how the machine works you can move to the more sophisticated features with less stress Let s get started Making a Basic Recording The Hitachi VM E220A uses P...

Page 22: ...eft channel AUDIO IN jack 2 Connect the free square plug to the AUDIO OUT and VIDEO OUT jacks of the camcorder 3 Insert a previously recorded cassette into the camcorder 4 Turn on your VCR and place it in the camcorder input mode consult your VCR manual for details Operate the television as you normally do to see the signal coming from the VCR 5 Hold down the red button on the CAM OFF VIDEO switch...

Page 23: ...utput adapter matching the channel selected on your television 7 Insert the previously recorded cassette into the camcorder 8 Hold down the red button on the CAM OFF VIDEO switch while sliding the switch to VIDEO 9 Press the PLAY button to begin playback 10 Press the STOP button when finished Simple Playback Using the Electronic Viewfinder 1 Insert the cassette Inserting and Removing Cassettes p 1...

Page 24: ...ither the remote control or the camcorder Note The indication showing double speed playback does not appear Note When double speed playback is activated both the picture and sound are played back at twice the normal speed This will cause noise lines to appear on the picture and the sound to become warbled With some tapes the width of the noise band may vary or noise may flow Note With some TVs the...

Page 25: ...s less than 10 seconds long Note If the date changes while recording continues over 10 seconds the new date is recorded for about 10 seconds the next time you make a recording TITLE and Date Automatic Title and Date Recording This option records the date and created title see Creating and Recording a Title on page 43 automatically once a day at the beginning of recording for 10 seconds Note When T...

Page 26: ...digital zoom function shown below has been engaged When the power zoom switch is operated the zoom position is displayed in the viewfinder for about 5 seconds and then disappears The zoom position is displayed in 10 steps Using the Digital Zoom The digital zoom increases the magnification of the power zoom by 2 times You must place the subject you wish to magnify at the center of the viewfinder No...

Page 27: ... disappears from the viewfinder Note This instant zoom has certain limitations and may degradate at extreme magnification and amplify camcorder s movement Using Auto Focus The camcorder focuses the subject in the center of the viewfinder automatically unless the manual focus is engaged If FOCUS appears in the viewfinder manual focus is engaged Press the FOCUS control buttons simultaneously to retu...

Page 28: ...u can adjust the focus manually 2 Use the power zoom T control to zoom up completely to your subject If you don t use the T control to zoom to the picture you want the picture may fall out of focus when actual recording starts 3 Press the Focus control F far or N near button until the subject is in focus 4 Use the power zoom W control to zoom back to the picture you desire Note To return to auto f...

Page 29: ...ess and hold the power zoom control W The camera focuses on the subject automatically Check your lighting as it tends to be insufficient when filming close up Date Search The date search function memorizes the start and end positions of recordings you made on a specific day so you can easily locate those positions later as long as the cassette is left in the camcorder Note Be sure that the date an...

Page 30: ...d down the red button of the CAM OFF VIDEO switch while you slide the switch to VIDEO 4 Insert the recorded tape in the camcorder and a blank tape into the VCR Set the VCR to record 5 Play the tape from the camcorder while recording on the VCR Note If the VCR is connected to a television and the VCR TV selector is set to VCR you can monitor the tape being dubbed Recording Television Programs If yo...

Page 31: ... ON OFF Button only on the remote control Use this button to create and record titles for your tapes Creating and Recording a Title p 43 4 COUNTER RESET Button only on the remote control Use this button to reset the linear timer counter to 0 00 00 5 DISPLAY Button Use this button to select the viewfinder and TV display Using the Display Button p 42 This button can be used instead of the DATE TITLE...

Page 32: ...hi VCR may malfunction when you use the camcorder s wireless remote control How to attach the optional remote control holder to a generally available shoulder strap It is recommended that you fit the remote control into the holder and attach the holder to the shoulder strap so as not to lose the remote control and for convenience when shooting outdoors 1 Attach the holder to the shoulder strap 2 A...

Page 33: ...e linear time counter This feature works in F F as well Using the Display Button Pressing the DISPLAY button on the remote control allows you to switch the displays in the viewfinder When the camcorder is turned on the linear time counter appears Pressing the DISPLAY button once displays the linear time counter with the memory feature When a recorded tape is in the camcorder during the VIDEO mode ...

Page 34: ...the red button on the CAM OFF VIDEO switch and slide it to either CAM or VIDEO 3 Press the TITLE ON OFF button on the remote control and a flashing cursor appears in the viewfinder 4 Use the STOP button to place the cursor where you wish to begin your title 5 Use the F FWD and REW buttons to select the first character of your title 6 Once you ve selected a character press the STOP button to set it...

Page 35: ...t on the tape where you wish to record the title 4 Press the TITLE ON OFF button on the remote control again to stop recording the title Note Recording the title during tape transfer will erase a portion of your recorded material Using Audio Video Dubbing Use audio video dubbing to record audio and video from the camcorder s built in microphone and camera onto a previously recorded tape in the cam...

Page 36: ...en search forward or back through the tape without affecting the tape in the VCR Use the F FWD and REW buttons to search the tape Press the PLAY button to resume normal playback To resume recording on the tape in the VCR press the Start Stop button and then the S EDIT button To fast forward or rewind the tape press the STOP button then F FWD or REW To return to recording on the tape in the VCR pre...

Page 37: ...VCR SET button and hold it If the remote control code has been set the VCR channel is counted up automatically Note Your VCR should have an infrared remote control Note If the channel on the VCR does not change with the above operation you need to switch the remote control code of your VCR Refer to the VCR s instruction manual If the channel still does not change after you have changed the VCR s r...

Page 38: ...ote control to the camcorder Note If your VCR has two stereo AUDIO IN jacks connect the audio plug to the left channel AUDIO IN jack 2 Insert a recorded tape into the camcorder 3 Set the CAM OFF VIDEO switch of the camcorder to VIDEO Turn the recording VCR on and select line input 4 Press the PROGRAM button of the remote control The program display appears in the viewfinder Note If your VCR is con...

Page 39: ...ogramming start again from the beginning or press the COUNTER RESET button to return to the previous steps one by one and enter the correct program data Note After the simple programmable edit is finished the programmed data is erased If you want to continue editing other segments repeat steps 5 12 Note Most VCRs recording machine may be released from the record pause mode if it continues for more...

Page 40: ... DC camera light with paper plastic or other object as the cooling vents may become blocked possibly causing the camera light to overheat Never use the DC camera light in the vicinity of explosive or highly flammable materials Always allow the DC camera light to cool fully before storing The DC camera light becomes very hot during use of the camera light or immediately after use Be careful that yo...

Page 41: ...ly before turning the light on Note Only replace the camera light bulb with VM CP4L optional to reduce the risk of fire Viewfinder Bright Color and Tint Control This small BRIGHT COLOR and TINT controls are set at the factory and should require no adjustment If they ever require adjustment use a plastic screwdriver Make the adjustments with caution to prevent damaging the miniature controls Genera...

Page 42: ...s used either heavily or seldom Defective parts are covered by the warranty Normal maintenance is the responsibility of the owner Consult your dealer or local VCR service center for recommendations regarding normal maintenance based on your use patterns location and the age of the camcorder Troubleshooting Quality is very important at Hitachi We inspect and check every camcorder carefully at the f...

Page 43: ...uttons to erase it Auto focus does not operate Auto Focus does not operate if a special effects filter is attached or the objects shown on page34 are being recorded The created title does not appear after creating a title Insert the clock battery then create a title Do not remove the clock battery RECORDING TV PROGRAMS OFF THE AIR Symptom Check Point Correction The camcorder cannot be set to the r...

Page 44: ...amcorder Tape is damaged Try another cassette Date search function does not operate Slide the CAM OFF VIDEO switch to VIDEO Insert the clock battery set the date and time then start recording Do not remove the clock battery after recording Do not eject the recorded cassette Leave it in the camcorder The playback picture moves rapidly and noise appears Also sound speeded up from normal is heard The...

Page 45: ...the power source and the date title battery And after about one minute the display in the viewfinder will be reset Then set the information again The camcorder does not operate when alkaline batteries are inserted Check that the polarities of the batteries are correct Insert six batteries ...

Page 46: ...ecording Dimensions 3 11 16 W x 4 3 4 H x 8 5 16 D 94mm x 120mm x 211mm Weight 1 87 lbs approx 850g without battery pack lens hood lens cap or cassette Operating temperature 32 F 104 F 0 C 40 C Storage temperature 4 F 140 F 20 C 60 C Video Recorder Specifications Format 8mm Record playback Two video record playback heads Video signal EIA standard NTSC color Tape speed 14 3mm sec Video input 1 0Vp ...

Page 47: ...ration of Hawaii 3219 Koapaka St Honolulu HI 96819 Tel 808 836 3621 Accessories Add Excitement We know that once you discover how much your Hitachi VM E220A can add to your life you will want to use these accessories for even more excitement Converter lenses adapters for synchro editing and car cords are just a few of the exciting accessories available to you from Hitachi Hitachi takes you to wher...

Page 48: ... current back order status on the model s you ordered we will notify you Thank you for allowing us Hitachi and HiTRON to be of service to you our valued customer Order form VM E520A VM E521A iIntroduced in 96 97 product line Mention as current product Warranty 1 year parts 90 days labor iiNo this camera does not have fading as a feature ...

Reviews: