Hitachi C43-FL9000, Instruction Manual
The Hitachi C43-FL9000 Instruction Manual is a comprehensive guide for users seeking assistance with their Hitachi C43-FL9000 device. This manual provides step-by-step instructions and helpful tips to ensure optimal usage and performance. Download this manual for free from our website to unlock the full potential of your Hitachi C43-FL9000.
Share
Download


Reviews:
No comments
Related manuals for C43-FL9000

MH741
Brand: BenQ Pages: 73

TEQ-C6989
Brand: TEQ Pages: 21

JPC SIDE PLATE POUCH SET MARITIME
Brand: Crye Precision Pages: 2

ARCLED1107AW
Brand: ProLights Pages: 36

Harmony PF-DC Series
Brand: Taga Pages: 12

EP770
Brand: Optoma Pages: 67

R9002250
Brand: Barco Pages: 56

R9002041
Brand: Barco Pages: 33

MV-136
Brand: CATU Pages: 2

8964WSS
Brand: Dukane Pages: 44

PT_AT6000E
Brand: Panasonic Pages: 6

PT-TW340
Brand: Panasonic Pages: 8

PT-AH1000E
Brand: Panasonic Pages: 4

PT_AT6000E
Brand: Panasonic Pages: 75

PT-LX22U
Brand: Panasonic Pages: 74

PT-LX22E
Brand: Panasonic Pages: 72
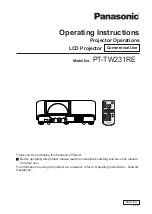
PT-TW231RE
Brand: Panasonic Pages: 79

PT-FW100NTE
Brand: Panasonic Pages: 79


