Hills Heritage Hoist 7-Line, Product Manual
The Hills Heritage Hoist 7-Line is a reliable product designed to simplify your laundry routine. For detailed instructions and usage guidelines, refer to our comprehensive Product Manual available for free download on our website. Discover hassle-free laundry solutions with the Hills Heritage Hoist 7-Line today!
Share
Download


Reviews:
No comments
Related manuals for Heritage Hoist 7-Line
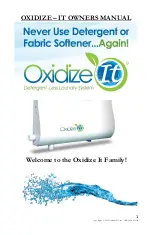
Oxidize It OX4000-A
Brand: Oxidizer Pro Pages: 12

Infiniti BE86R
Brand: Conair Pages: 2
WF0500NXWG
Brand: Samsung Pages: 45

ZCM 641
Brand: Zanussi Pages: 8

MA-TK3080CK/AA
Brand: Samsung Pages: 2

AW12A7JA
Brand: Samsung Pages: 18

L60SPLX10
Brand: Logik Pages: 2

77 67 04
Brand: Conrad Electronic Pages: 2

08-3843
Brand: Project Source Pages: 2

297-1001
Brand: Project Source Pages: 4

0339211
Brand: Allen + Roth Pages: 15

309464
Brand: AquaPur Pages: 46

60519
Brand: AquaPur Pages: 53

385248 2107
Brand: AquaPur Pages: 80

AFR 3 D1
Brand: AquaPur Pages: 98

110861
Brand: AquaPur Pages: 93


