HID iCLASS SE U90 Series, User Manual
The HID iCLASS SE U90 Series provides reliable security access control solutions. Easily set up and configure your device with the free user manual available for download from our website. Ensure seamless operation with step-by-step instructions and troubleshooting tips. Access the manual at manualshive.com.
Share
Download


Reviews:
No comments
Related manuals for iCLASS SE U90 Series

AS230+
Brand: Aopos Pages: 70

CT2213
Brand: Neilsen Pages: 12
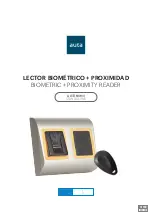
721154
Brand: Auta Pages: 10

HLink-Optical
Brand: Datapath Pages: 13

P-620-HA
Brand: Cansec Pages: 14

YKZA3RDF
Brand: Aiwa Pages: 22

BeSpoke Premium Audio pt296-00142
Brand: Scion Pages: 189

ADP1100
Brand: Danpex Pages: 3

BV9976B
Brand: Boss Audio Systems Pages: 36

ZU-1870MA6T2
Brand: Panasonic Pages: 11

CQ-DFX601N
Brand: Panasonic Pages: 2

CQ-DFX501N
Brand: Panasonic Pages: 2

CQ-DFX777EW
Brand: Panasonic Pages: 8

CQ-DFX777EW
Brand: Panasonic Pages: 8

CQ-DFX783N
Brand: Panasonic Pages: 21

CQ-DF602W
Brand: Panasonic Pages: 10

CQ-DF202W
Brand: Panasonic Pages: 10

CQ-DFX202N
Brand: Panasonic Pages: 24


