background image

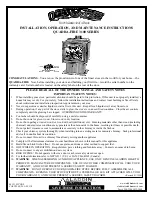
W O O D C O O K S T O V E S

     ATTENTION INSTALLER: 

Leave this manual with appliance

INSTALLATION

AND OPERATING

INSTRUCTIONS

SAVE THESE

INSTRUCTIONS

FOR FUTURE USE

Note: Please read these instructions
thoroughly before attempting to install
this unit.

SAFETY NOTICE: 

IF THIS STOVE IS NOT PROPERLY

INSTALLED, A HOUSE FIRE MAY RESULT. FOR YOUR
SAFETY, FOLLOW THE INSTALLATION DIRECTIONS.
CONTACT LOCAL BUILDING OR FIRE OFFICIALS
ABOUT RESTRICTIONS AND INSTALLATION
INSPECTION REQUIREMENTS IN YOUR AREA.

IMPORTANT: 

Check around oven chamber on a 

weekly

basis for soot and creosote accumulation. Clean the
chamber thoroughly from the top, side and bottom with
the rake (part #1425) provided. Burn the stove hot daily to
reduce creosote accumulation. Use only dry wood aged
for one year. 

Failure  to do so could result in chimney fire

and void the warranty.

The Oval and Sweetheart
cookstoves are listed to CSA
Standard B366.2M ULC
Standard S-627 & UL 1482 by
Warnock Hersey Professional
Services Ltd.

NOTE: Warnock Hersey NBR
is 219.

SweetHeart

SweetHeart
With Towel Rack
#2602

SweetHeart

With Reservoir

#2603

Oval
With Towel Rack
#1902

Oval

With Reservoir

#1903

Manual #1705

051502

PLEASE NOTE: Specifications contained in this manual are subject to change with out notice

The temperature registered by the oven door
thermometer may not necessarily correspond with
the reading taken with the thermometer inside the
oven. 

For accurate oven temperatures, refer to the

interior oven thermometer.

OVERFIRING CAUTION:

Repeated or extended overfiring
will void warranty on this
appliance. See page 28 for details.

©  2002 HEARTLAND APPLIANCES INC.

1050 Fountain St N. Cambridge, Ontario, Canada N3H-4R7

Business 

(519) 650-5501

 Fax (519) 650-3773 Toll Free Phone: 1-800-361-1517  Toll Free Fax: 1-800-327-5609

Summary of Contents for Oval 1902

Page 1: ...dosocouldresultinchimneyfire and void the warranty The Oval and Sweetheart cookstoves are listed to CSA Standard B366 2M ULC Standard S 627 UL 1482 by Warnock Hersey Professional Services Ltd NOTE Warnock Hersey NBR is 219 SweetHeart SweetHeart With Towel Rack 2602 SweetHeart With Reservoir 2603 Oval With Towel Rack 1902 Oval With Reservoir 1903 Manual 1705 051502 PLEASE NOTE Specifications contai...

Page 2: ...oor under the range must be sealed Do not set unopened glass or metal containers intheoven orinthewarmingcabinet oron the cooking surface Grease accumulation is the cause of many cooking fires Clean the oven compartment regularly Do not attempt to extinguish a grease fire with water Cover grease fires with a pot lid or baking soda Avoid the use of aerosol containers near the range Never place pans...

Page 3: ...tion or the removal or defacing of the serial plate cancels all obligations of this warranty Service during this warranty must be performed by a factory Authorized Service Person 2 Warranty applies to product only in the country in which it was purchased 3 Heartland is not liable for any claims or damages resulting from any failure of the Wood Cookstove or from service delays beyond their reasonab...

Page 4: ...weetheartFireDoorDamper 17 Starting Up a Coal Fire 17 RechargingtheFire 18 Disposal of Ashes wood and coal 18 UseCaution 18 Using the Oven and Cooking Surface19 StoveTopCooking 19 OvenCooking 20 WaterReservoir 20 Trouble Shooting 22 ChimneysandDraft 22 How Chimneys Work 22 Factors that Affect Draft 22 Checking an Existing Chimney 22 Saftey Practices 23 What To Do If You Have a Chimney Fire 23 Main...

Page 5: ...omes Safety Notice If your stove is not properly installed and maintained a house fire may result For your safety follow all installation operation and maintenance directions Contactlocalbuildingofficialsaboutrestrictions and installation inspection requirements in your area Makeshift compromises in the installation may result in hazardous conditions including a house fire Spend some time becoming...

Page 6: ...l screw before installing flu body do not remove these nuts from the screws nuts fit thru holes in flu body only remove the first level of nuts and washers reinstall 3 sheet metal screw after installing flu body Warning Thestoveisveryheavy Sincethelegsmaydiginto a soft floor do not locate the stove or even set it to rest on a surface that could be imprinted Werecommendthat3or4personsbeavailabletoa...

Page 7: ...talled with the body mounting flange up 5 Adjust base sections to the most upper position and tighten up the nuts and bolts Assemble Stove to Base 1 The range body rests directly on the base no bolts are required Werecommendthat3or4 personsbeavailable to assist in the lifting of the stove and that gloves should be worn to protect hands from cuts 2 Do not lift the stove by the nickel trim With 2 pe...

Page 8: ...e under normal use 2 Thethreeprongedtoolholder 1440 isusedtohangthe lid lifter poker and scraper To mount the holder locate the two 1 4 holes on the firebox side of the warming cabinet back Fasten with the bolts supplied 3 A pipe damper installation is optional depending on your installation and chimney configuration Your dealer can supply you with a damper Thedamperinstallationshouldbedonebeforef...

Page 9: ...rheat The clearance distance should be empty except for non combustible heat shields Air flowing between the stove and stovepipe and nearby surfaces carries away heat continued on page 10 Do not fill the empty space with any insulating material If you plan to install a Fresh air Kit with your stove be aware of the greater clearances required See page 9 Chart of Clearances andpage12 FreshAirKit for...

Page 10: ...8 20 3 18 45 7 22 1 2 57 15 30 1 2 77 47 27 1 8 69 0 3 9 Note Dimensions in brackets are metric cm Hearth Hearth Hearth 8 20 3 C o m b u s t i b le W a l l 24 61 0 C o m b u st ib ie W al l 11 13 16 30 0 18 46 18 7 8 47 9 13 1 4 33 7 20 1 4 51 5 27 1 8 8 with heat shield kit from w all to center of pipe 21 with out heat shield from wall to center of pipe Heat shield extends 10 from back of the sto...

Page 11: ...t heat shield from wall to center of pipe Heat shield extends 14 from back of the stove top Com bustible Wall Top Vi ew 18 16 with heat shield 25 With out heat shield from the wall to the back of the stove top 18 1 4 46 0 4 10 0 26 1 4 66 5 62 157 5 1 3 16 3 0 11 1 4 28 6 31 7 8 81 0 11 4 28 6 3 7 5 5 1 4 13 3 8 20 3 33 83 8 8 20 3 42 1 2 123 1 Hearth 24 61 0 Combustable Wall 18 45 7 24 60 9 Heart...

Page 12: ...etHeart 25 69 66 66 50 58 132 61 121 Centimeters 10 27 26 26 20 23 52 24 48 Inches Oval 25 68 66 91 50 86 132 61 121 Centimeters 10 27 26 36 20 34 52 24 48 Inches WITH HEAT SHIELD SweetHeart 25 8 61 61 5 31 132 61 121 Centimeters 10 3 24 24 2 12 52 24 48 Inches Oval 25 8 61 91 5 44 132 61 121 Centimeters 10 3 24 36 2 17 52 24 48 Inches When a heat shield is installed dimensions B D E and F are tak...

Page 13: ...n a cold chimney should be between 0 01 and 0 15 water column your dealer may be able to check this foryou 24 600mm 10 3 metres 36 900 mm Clearance Reductions There are many alternate decorative methods to reduce clearancestocombustiblematerials Seeyourdealer orlocal fireorbuildingofficialtoensuretheappropriatestandardsare being met with these alternatives In Canada refer to the Installation Code ...

Page 14: ...hed to the chimney Besurethereareno weaklinks inthesystem 3 Thecrimpedendsofpipesectionsshouldpointdownward toward the stove so that any soot or creosote that falls fromtheinsideofthepipewillbefunnelledintoacleanout or fall into the stove 4 Thechimneyconnectorshouldbeatleasttheheightofthe warmingcabinetbeforea90degreeturnisinstalled with no more than two 90 degree turns 5 Ahorizontalrunofstovepipe...

Page 15: ...ll to heat water last year By installing the water jacket in your cookstove youcanreduceorvirtuallyeliminateyourhotwater utility bill Installation is Easy The water jacket can be installed in the stove in less than a minute using only a slot screwdriver The water jacket is a hollow baffled chamber that fits in the firebox Two pipes and a pump installed from the water jacket to the electric or gas ...

Page 16: ...l operation You will achieve the best performance and overallefficiencybyburningfirewoodthathasbeensplit stackedandair driedundercoverfromrainforatleastoneyear Burning improperly seasoned or green wood can be a frustrating experience leading to poor performance smoky fires and a build up of creosote Do not burn saltwater driftwood refuse rubber tires etc Use of improper fuels can cause a fire haza...

Page 17: ... your new stove operates as a heater and cooking stove Understandingtheprimaryprinciplesoftheairintakecontrols theovendamper theflamepathforthefireandtherelationship tothechimneywillgiveyouaverycomprehensiveunderstanding of what you are trying to accomplish with the stove Before starting the stove lift the key plate handle and rest the arm in the top hook of the cabinet bracket Open both the top l...

Page 18: ... of the closet bracket Crumple six to eight single sheets of newspaper into loose balls and place them on the wood grate Cut 10 15 pieces of kindling into strips approximately 1 2 by 1 2 by 10 long Place the kindling on the newspaper Place 2 or 3 more pieces of crumpled newspaper on top of the kindling Ensure that the wood grate slides are open Lighting the charge is of your personal preference On...

Page 19: ...itywhichallows you to use your stove during the summer months with less heat radiating from the firebox Oval 1 Slide the wood grate from the lower firebox position and remove the wood grate slide 2 Set the wood grate on top of the firebrick You are now ready for summer cooking lower standard position wood grate positions for oval stove upper summer position upper summer position lower standard pos...

Page 20: ...m the firedoor Loosen the three screws that hold the cover plate over the damper holes Replace the cover plate with the coal damper lettered side out Tighten screws just enough to hold the damper plate on but also allow it to slide freely back and forth Lock screws in position with a nut on each screw thread A wood break in fire should be done before attempting to burn coal see page 13 C O Illustr...

Page 21: ...is under 5 before a recharge is started it may benecessarytoaddkindlingwoodtoincreasethecombustion level so that more coal can be added 1 Coalnevershouldbeaddedunlessthereisareasonably hot fire The coal bed should be bright and vigorous 2 If the fire is burning hot and there is a deep bed of coals full loads of coal can be added at any time However if there is not a deep bed of coals it is best to...

Page 22: ...e cooking surface This is caused by the stiff new gasket under the keyplate As the gasket compresses over time the keyplate will drop to a position even with the rest of the cooktop Toallowfornormalsettling wehavepurposelycreatedaslight upwardwarpatthemiddleofyouroval keyplate As the keyplate heats and cools it will eventually settle to a flat position The time period for settling will be differen...

Page 23: ...epending on your wood and chimney conditions it would typically takethreeorfourchargesofcordwoodtoestablishagood base for oven cooking meaning 1 1 2 to 2 hours before cooking from a cold start 7 Always load a new charge of wood to a glowing hot coal bed about 4 deep Waiting too long to load a new charge means that the dampers will have to opened to get the new charge burning well This results in e...

Page 24: ...othewaterinthereservoirwillnotgetashot as when the oven damper closed HelpfulHint Whenlightingyourstovefromcoldorwhenthe stoveisrelativelycoolrememberthewaterinthereservoirwill be at the same temperature The cold water will tend to absorb the heat that you are attemptingtousetoheatthechimneytostartthestove Close the reservoir damper during this period The same theory applies when heating the oven ...

Page 25: ...havethesameinternalareaas the flue collar of the appliance Chimney Height Tallerchimneystendtoproducestrongerdraft Werecommend that the top of the chimney should be at least 36 900 mm higher than the highest point at which it contacts the roof and 24 600 mm higher than any roofline or obstacle within a horizontal distance of ten feet three metres These figures produce the minimum allowable chimney...

Page 26: ...tic roofspace orcloset Flue pipe assemblies should be stable and secure To check the stability of a flue pipe assembly grasp it at its mid point andgiveitagoodshake Ifitisproperlyconstructed itwillhave little or no movement Masonry chimneys should be checked for deterioration including damaged bricks crumbling and missing mortar cracks in the drip cap at the top of the chimney and loose flashings ...

Page 27: ...chimney Your dealer can help you correct this Follow this procedure when cleaning around the flue passage 1 Clean the oven flue chamber by removing the top lids and scraping the ash to the sides 2 Then scrape the sides so the ash falls to the bottom 3 All the ash may then be scraped into a metal container through the ash cleanout door with the ash scraper 4 Follow the procedure for ash disposal wh...

Page 28: ...eepratherthanclimbingontheirroofstocleanthechimney Anexperiencedchimneysweepcancompletethejobquickly and will leave no mess behind The sweep will also report on the condition of the chimney Referrals are the best way to select a chimney sweep Check with your neighbours to see if they are satisfied with the sweeping services they have received Cooking Surface Aftertheinitialfiring yourstovetopwills...

Page 29: ...gseasonedfirewood Formula for Equivalent Hearth Extension Hearth extension may be fabricated from non combustible materials as long as the materials are at least 1 2 thick and have a thermal conductivitey factor K of 0 43 or lower Formula Units of K btu ft h F in Example for determining thickness of equivalent material K of equivalent material x 0 5 thickness required 043 The thermal conductivity ...

Page 30: ...op which is lifted for fuel loading or to make repairs in the firebox Key Plate Lift Handle The handle used to lift the key plate to allow access to load the firebox Lid The removable round cast iron disks on the stove top Can be removed to allow access to clean the flue chamber abovetheoven Lid Lifter The tool used to remove the lids open and close the firebox doors and adjust the bell and oven d...

Page 31: ...meter in the smoke pipe Topreventcreosotebuildupinthepipes thestoveshouldberunbetween800 F and 900 F for 30 45 minutes each burning day 3 Exceptfortheinitialperiodafterlighting 5 10minutes donotoperateyourstove with the door open 4 Ensuretheashpandooristightlyclosedduringoperation Anopenashpandoor will allow excess draft through the firebox causing overfiring When emptying ashes clean thoroughly b...

Page 32: ... Metro 3825 and Legacy 3820 models are available 9720 Built in Dual oven one convection one standard radiant Also available with a self clean oven feature as model 9730 4200 30 Gas Electric kitchen range 4 sealed gas burners electric convection oven fits in a 30 opening Also available with a self clean oven feature as model 4210 5200 48 Gas Electric kitchen range 6 sealed gas burners electric conv...

Page 33: ...07 15 70 15 56 15 21 1184 12 36 1361 13 80 12 89 13 76 12 87 44 05 13 07 10 45 13 00 6029 10 40 10 25 1120 1125 1315 13 20 13 10 13 25 13 30 1107 10 05 1095 1110 1115 13 51 1 352 101 5 1 010 134 6 1155 1159 1651 16 56 1660 1 297 167 2 1674 1551 1 536 158 8 1610 1575 1545 1596 1 631 1629 ...

Page 34: ...iption 1599 1546 1592 4607 4570 1556 4523 4369 1236 1361 4405 4289 4370 4286 1391 4305 4045 4300 4041 4107 6029 4120 1125 4315 4310 1325 1330 4012 1110 1115 1352 4455 1320 6029 4012 1155 1159 1651 1656 1660 1629 1631 4297 4672 1674 1551 4536 1588 1610 4545 1596 4575 ...

Page 35: ...rts Diagram see page 33 for part description 1127 1460 4465 1361 4271 1440 1415 1420 1425 4277 1277 8452 4449 9449 8449 1270 1445 4445 1224 4225 1228 4228 1232 4222 4223 4221 1255 1237 1232 1258 Fire Brick Kit 1234 1258 ...

Page 36: ...an Oval only 1460 6 Dia Oval flue weldment 1521 Splash back 1536 Warming cabinet body 1545 Cresting panel 1546 Heartland nameplate w clips 1551 Right cabinet bracket 1556 Left cabinet bracket 1570 Lower cabinet front trim strip 1575 Upper cabinet front trim strip 1588 Right cabinet corner 1592 Left cabinet corner 1596 Right cresting corner 1599 Left cresting corner 1607 Cabinet door 1610 Cabinet d...

Page 37: ...r existing hot water heater OvalWater Jacket Kit 1506 SweetHeart Water Jacket Kit 4506 Coal Burning Kit Contains everything you need to convert your wood burner into a coal burner Oval Coal Kit 1500 SweatHeart Coal Kit 4500 Heat Shield Kit Need more room Cut your rear clearance requirements in half with this kit Oval Heat Shield Kit 1241 SweetHeart Heat Shield Kit 4241 Fresh Air Kit If your home i...

Reviews: