1
RS_R4-8-16_SQ
181220
1
9 11
4
7
5
3
2
6
8
R8 backpanel
1
2
9
10
4
7
5
3
6
8
R16 backpanel
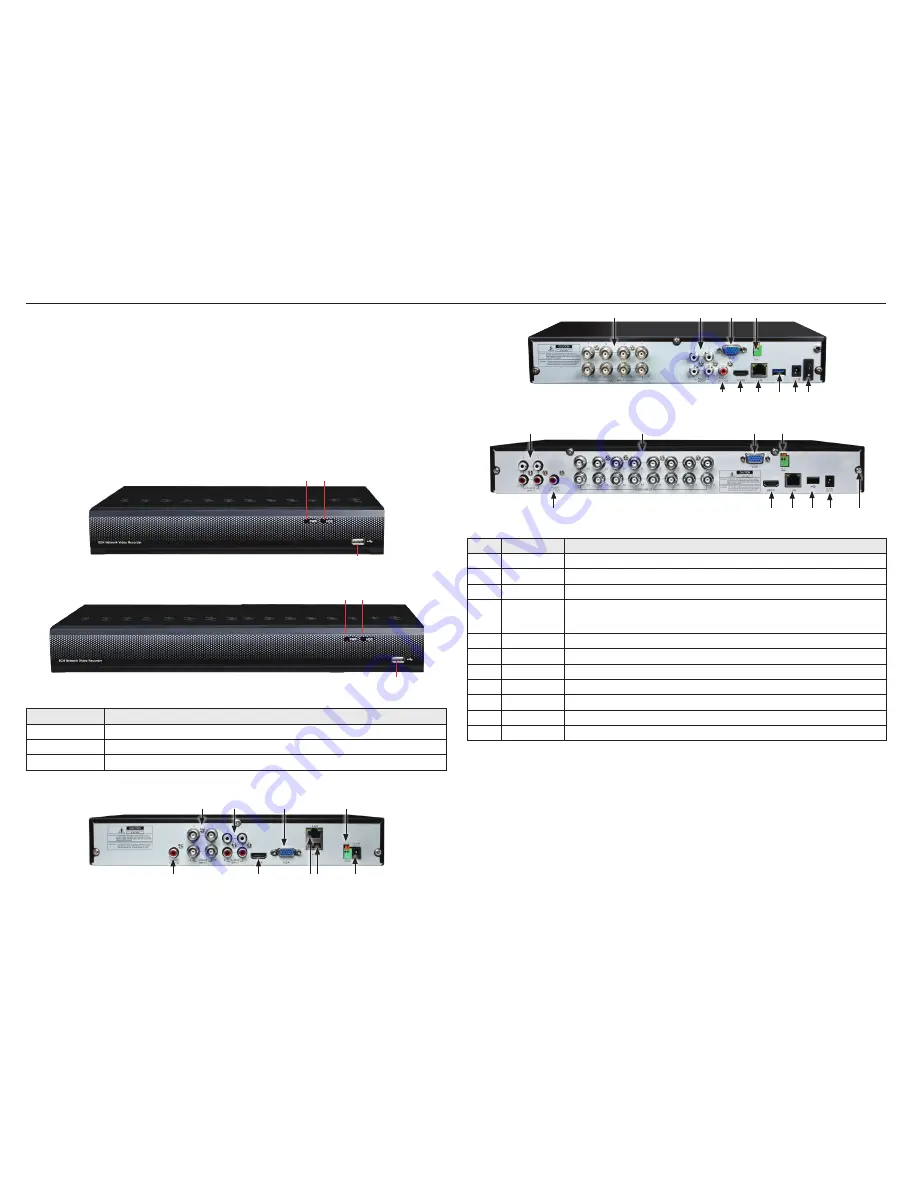
Item
Description
1
AUDIO IN
RCA connector for audio in cable
2
VIDEO INPUT
BNC connectors for camera video channels in
3
VGA
Connector VGA monitor cable.
4
RS-485 terminations
Connector for RS-485 devices. Connect the D+ and D- terminals to T+ and T- of PTZ receiver respectively.
(+, –) pins connect to R+ and R- pins of PTZ receiver respectively. For cascading devices, the first DVR’s +, – pins should be
connected with the +, – pin of the next DVR.
5
AUDIO Out
RCA connector for audio out cable.
6
HDMI
Connector HDMI monitor cable.
7
LAN
RJ-45 connector for Ethernet drop cable.
8
USB
USB (3.0) for a USB mouse or USB memory device such as a flash drive or DVD drive. A USB port is also located on the front panel.
9
12 Vdc
Plug for 12 Vdc power adapter (provided).
10
Ground
Ground terminal. Connect to earth ground.
11
Switch
ON / OFF switch
Mouse control
A standard 3-button (left / right / scroll-wheel) USB mouse can also be used with this DVR. To use a USB mouse:
1.
Plug the USB mouse into the either the front panel or back panel USB connector of the DVR.
2.
When the recorder is powered on, the mouse will be automatically detected. If the mouse is not detected, the mouse may not be
compatible with the DVR. Please refer to the recommended device list from your provider.
This guide provides instructions to initially setup the R16 (16 channel) digital video recorders (DVR). The DVR supports these advanced
features:
•
Self-adaptive HD-TVI / HD-CVI / AHD / CVBS video input
•
Support camera resolution up to 8 MP video input and live view
H.264/H.265 Video encoding
•
Supports HDDs up to 8TB. See specifications.
•
Simultaneous HDMI / VGA monitor output
•
Up to 16-channel synchronous playback
•
Supports
HDVision
mobile app for iOS and Android
•
DDNS, PoE and P2P remote connectivity
DVR Front Panel
USB Interface
Power LED HDD in use
R4, R8 front panel
USB Interface
Power LED HDD in use
R16 front panel
Item
Usage
Power LED
Indicator turns green when DVR is powered up.
HDD in use
Indicator turns red when HDD is reading / writing.
USB Interface
This port can be used for a USB mouse or USB flash memory devices.
DVR Back panel
1
2
9
4
7
5
3
6
8
R4 backpanel
R4, R8, R16 Digital Video Recorders Quick Setup Guide