Fujiko FK-904DVD.H, Operation Instruction Manual
The Fujiko FK-904DVD.H is a high-quality DVD player designed to enhance your entertainment experience. With its sleek design and user-friendly features, this DVD player allows you to enjoy your favorite movies and shows in stunning clarity. Ensure effortless setup and trouble-free operation with the comprehensive Operation Instruction Manual, available for free download from manualshive.com today!
Share
Download


Reviews:
No comments
Related manuals for FK-904DVD.H

PV-900HD
Brand: Lawmate Pages: 1

PDR-400
Brand: Lilin Pages: 34

BUS-WATCH HD800
Brand: Radio Engineering Industries Pages: 85

NVR-3685
Brand: Planet Pages: 95

GD11FVRSD32
Brand: Goodmans Pages: 32
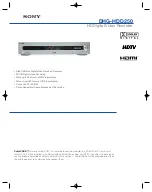
DHG-HDD250 - 30-Hour High-Definition Digital Video Recorder
Brand: Sony Pages: 2

Handycam HDR-CX610E
Brand: Sony Pages: 76

DHG-HDD250 - 30-Hour High-Definition Digital Video Recorder
Brand: Sony Pages: 112

Digital 8 DCR-TRV130E
Brand: Sony Pages: 140

ATX H-264
Brand: Adata Pages: 108

SF8 HD
Brand: Octagon Pages: 80

DVR4T3
Brand: Velleman Pages: 107

16 Channel
Brand: Wireless & Spy Pages: 83

DV Bank
Brand: Datavideo Pages: 28

HDR-100
Brand: Datavideo Pages: 33

DN-400
Brand: Datavideo Pages: 42

ENUTV-2 Series
Brand: Encore Pages: 2

Ambarella A7LA50
Brand: Axis Pages: 20


