HCL Me Y3, User Manual
The HCL Me Y3 User Manual is a comprehensive guide to help you unleash the full potential of your HCL Me Y3 device. This manual provides step-by-step instructions, troubleshooting tips, and helpful insights for maximizing your experience. Download it for free from our website and start exploring your device's features today.
Share
Download


Reviews:
No comments
Related manuals for Me Y3

Pad 9W4 Pro
Brand: Xoro Pages: 2

ES78
Brand: Gold Note Pages: 2

CA-27
Brand: Getac Pages: 133

TT-186 DAB
Brand: auna multimedia Pages: 30

TAB7401
Brand: Salora Pages: 49

SummaSketch II Plus
Brand: IBM Pages: 23

RUSH SA238
Brand: Philips Pages: 2

RUSH SA230
Brand: Philips Pages: 2

AF 729
Brand: Philips Pages: 6

AK530 - annexe 1
Brand: Philips Pages: 10

AK 540
Brand: Philips Pages: 10

RUSH SA238
Brand: Philips Pages: 15

710
Brand: Philips Pages: 12
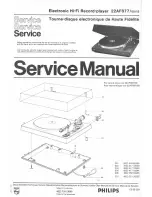
22AF877
Brand: Philips Pages: 18

CDI 220
Brand: Philips Pages: 24
AF 877
Brand: Philips Pages: 45

AG1000
Brand: Philips Pages: 73

Onetouch Pixi3 7
Brand: Alcatel Pages: 27


