Hayward EcoStar, Troubleshooting Manual
Introducing the SEFAM EcoStar Patient Manual - your comprehensive guide to operating this cutting-edge medical device. Discover step-by-step instructions, troubleshooting tips, and essential information for optimal usage. Don't miss out on this invaluable resource, available for free download at manualshive.com. Gain full control of your SEFAM EcoStar experience today!
Share
Download


Reviews:
No comments
Related manuals for EcoStar
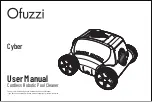
Cyber
Brand: Ofuzzi Pages: 18

CASTEL
Brand: Taiga-Zone Pages: 20

061014
Brand: Steinbach Pages: 230

HIMCOMP 18
Brand: GRE Pages: 62

Pool'N Box Junior
Brand: BWT Pages: 36

Dolphin DX35
Brand: Maytronics Pages: 2

Rectangular Frame Pool Series
Brand: SUMMER WAVES Pages: 14

side deck
Brand: Swim'n Play Pages: 16

60 CYCLE C Series
Brand: STA-RITE Pages: 16

UV-C Tech
Brand: Blue Lagoon Pages: 48

PARASOL
Brand: Nobel Pages: 20

BARACUDA 1500
Brand: Zodiac Pages: 9

Super G+
Brand: Zodiac Pages: 14

Panama I
Brand: Konifera Pages: 40

FloPro VS
Brand: Zodiac Pages: 23

DuoClear
Brand: Zodiac Pages: 24

Affinity mocha corner
Brand: Blagdon Pages: 4

In-Pool Ladder
Brand: Main Access Pages: 1


