Hang ups Teeter EP-950, Руководство по сборке
Скачайте бесплатно руководство по сборке и инструкцию к использованию для Teeter EP-950 на нашем сайте. Assembly Instructions Manual и другие подробные сведения доступны для загрузки с manualshive.com. Получите максимум выгоды от вашего устройства с помощью нашего руководства.
Поделиться
Скачать


Отзывы:
Нет отзывов
Похожие инструкции для EP-950

MODENA
Бренд: Panlux Страницы: 2

QX1
Бренд: Yamaha Страницы: 46

MBT Series
Бренд: MAHA Страницы: 21

PRS-20
Бренд: MAGUIRE Страницы: 47

MAGNUM 5
Бренд: Cannon Страницы: 70

544
Бренд: Sakai Страницы: 31

VALIANT
Бренд: Accurate Technology Страницы: 10

GB924
Бренд: Gage Bilt Страницы: 28

Cryostat TN60
Бренд: TANNER Scientific Страницы: 44

CS-5000 Series
Бренд: Iwatsu Страницы: 234

DURO-A RC
Бренд: Rohm Страницы: 91

Slide 4004 M
Бренд: PFM Medical Страницы: 26

S7M
Бренд: Rottler Страницы: 96

K60
Бренд: WIFO Страницы: 24
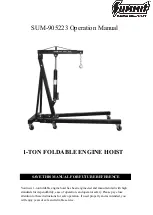
SUM-905223
Бренд: Summit Страницы: 3

TL3AM
Бренд: WPG Страницы: 4

Vac Checker
Бренд: DD Compound Страницы: 18

151.265
Бренд: Beamz Страницы: 20


