Hand Held Products Quick Check 200 Series, User Manual
The Hand Held Products Quick Check 200 Series is an innovative and user-friendly device that guarantees superb scanning performance. Unlock the full potential of your Quick Check 200 by easily obtaining the comprehensive User Manual, available for free download at our manualshive.com. Maximize your experience with step-by-step instructions and troubleshooting tips.
Share
Download


Reviews:
No comments
Related manuals for Quick Check 200 Series

5800
Brand: Youjie Pages: 52

PAYD
Brand: Moneris Pages: 25

QuickScan QBT21 Series
Brand: Datalogic Pages: 56

PCD-47
Brand: Microtech Pages: 35

Star RF30
Brand: IDTECK Pages: 12

BV1000CL
Brand: Globalcom Pages: 24

TDP-245 Series
Brand: TSC Pages: 2

POWERSCAN PBT7100 guide
Brand: Datalogic Pages: 352

Monarch Pathfinder Ultra Platinum 6039
Brand: Avery Dennison Pages: 12

E03E
Brand: Billow Pages: 98

ATS1190
Brand: Aritech Pages: 22
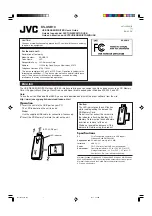
KS-USB10
Brand: JVC Pages: 2

FX915SC-ASK
Brand: FAMOCO Pages: 39

AT10Ki
Brand: Gemalto Pages: 41

iDC9607AW
Brand: RIOTEC Pages: 8

LS6000B series
Brand: RIOTEC Pages: 33

iLS6303XBU
Brand: RIOTEC Pages: 4

FS5020E
Brand: RIOTEC Pages: 33


