background image

Please read this manual carefully 
before operating the unit, and keep 
it for future reference. 

 TFT-LCD COLOUR  TELEVISION  RECEIVER

OWNER'S MANUAL

This User's Manual is applicable for the following models:
L26A9-AK,L37A9-AK,L37A9-AKF

Summary of Contents for L37A9-AK

Page 1: ...his manual carefully before operating the unit and keep it for future reference TFT LCD COLOUR TELEVISION RECEIVER OWNER S MANUAL This User s Manual is applicable for the following models L26A9 AK L37A9 AK L37A9 AKF ...

Page 2: ...cifications must be followed if it is to be replaced Warning To avoid fire or electric hazards never place your television receiver in an area with heavy moisture Attention should be paid to avoid accidental scratches or impacts onto the LCD screen Please read this manual carefully before using your television and keep this manual in a good place for future reference To achieve the best performanc...

Page 3: ...Prog Setting the function Language and OSD position Menu timeout and menu background option PIP Child lock De interlace PC setup Setting the other function Picture still sleep timer and program edit Stream media broadcast system Connecting additional equipments Antenna connection How to connect the signal with other equipments How to connect the video input terminal How to connect the component in...

Page 4: ...t sources to avoid electric shocks or fire hazards Do not connect excessive sockets in parallel or share the same socket by multiple plugs to avoid fire hazards The product must be placed on a solid and stable surface to avoid collapse Unauthorized disassembly of the television is prohibited to avoid electric shocks or fire hazards Contact authorized after sales service if technical service is nee...

Page 5: ...hen antenna is used measures should be taken to prevent water from flowing down along the cable into the television Unplug the television use soft fabric never chemicals if you are going to make cleaning of the product Make sure that no water drops in the product The plug and electric cable must be kept clean to avoid electric shocks or fire hazards Disconnect the television from power supply and ...

Page 6: ...ontroller and television set As strong light may interfere the signals change your position to operate the remote controller if the television cannot be turned on or off as you expect Keep the remote controller away from heat source or humid area to ensure effective performance of the remote controller Make sure that two 7 1 5V alkaline batteries are loaded The batteries must be of the same type T...

Page 7: ...lti media input program minus and plus menu options volume decrease and increase menu reset and entry all input source select menu display Power on off and indicator in red when standby mode in blue when display Remote control signal receive window 8 1 2 3 4 5 7 6 TV AV MENU Rear terminal Audio L Audio R Video USB VIDEO AUDIO L R VIDEO AUDIO L AUDIO R 4 ...

Page 8: ...tput external YUV YCbCr YPbPr audio input external S VIDEO VIDEO audio input external D SUB DVI audio input Connect antenna or CATV 75 Ω coaxial cable to receive TV CATV signal AUDIO L OUT External audio output 3 WOOFER External woofer output D SUB IN Computer input S VIDEO IN S VIDEO input 6 VIDEO IN 7 YCbCr YPbPr 8 DVI IN 9 R AUDIO L OUT 10 VIDEO OUT 11 L HD R IN 12 L V S R IN 14 ANT 5 ANT DVI I...

Page 9: ...reactivate the sound Sound also reactivated if the power is turned off then on or if press VOL button 6 PIC SIZE Press to select the display the size of the screen never see the 4 3 picture for long time it would burn in the screen 7 S VIDEO Press it to select S terminal input 8 DVD DTV Select YUV input 9 TV AV Press this key to select the sources 10 PC DVI Press it to select inputs as follows TV ...

Page 10: ...9 AK There are some OSD on screen display following for you to reference Picture Audio Tuner Func PC Time Bass 50 Treble 50 Balance 50 Surround Off SubWoofer Switch Off SubWoofer 50 AVL Off B C A Picture Audio Tuner Func PC Time Audio menu Tuner menu Prog 0 Color Sys PAL Sound Sys DK Skip Off Prog Name Search Set Auto Search Exchange B C A Picture Audio Tuner Func PC Time OSD Position OSD Timer 60...

Page 11: ...de you could press POWER button on remote controlleror POWER button on the TV to turn on the TV 3 If you want to switch off the TV to standby mode press POWER button on TV or POWER button on remote controller 4 Disconnect the power supply or unplug the television if it is intended to completely cease the television performance POWER ...

Page 12: ...re 160 channels from 0 to 159 9 It might be because the color or sound system has been set improperly you may follow the instruction below to adjust it press MENU and VOL to select Tuner menu you can see the form then press CH to enter Press CH to Color Sys then press VOL to select the proper system AUTO PAL NTSC443 and NTSC M will appear in sequence Enter the Tuner as above and CH to Sound Sys it...

Page 13: ...N button then the television will start scanning from the present channel with a rate of three seconds per channel and until all the preconcerted programs have been displayed once 0 1 2 If you want to terminate this function during the scanning press the SCAN or MENU button again and the program will stay at the present channel 18 8 10 0 1 For example if you have viewed channel 8 just now and you ...

Page 14: ...o check the channels If the color or sound is abnormal in a certain channel it may be the color or sound system has not been set properly so you should adjust it to the proper system Reference to page 9 Freq 308MHz CH 9 Auto Search 11 If you want to stop the search just press MENU button The order of the automatic search is due to the frequency of the program generally speaking it is used only at ...

Page 15: ...l Repeat the steps until you find the channel you need 1 Press CH button or the Direct digit choosing button to select a channel directly take channel 1 for example 3 Press CH to move to Search Set then press VOL to enter 1 2 Press MENU and VOL to select Tuner menu then press CH to enter 4 Press CH to move to Search Fine 32 Search Freq 112 28MHz 12 Prog 0 Color Sys PAL Sound Sys DK Skip Off Prog N...

Page 16: ...1 for example 3 Press CH to move to Search Set then press VOL to enter the menu 1 2 Press MENU and VOL to select Tuner then press CH to enter 4 Press CH to move to Fine 13 VOL button is used to search the lower frequency channel VOL button is used to search the higher frequency channel VOL B C A Picture Audio Tuner Func PC Time Fine 32 Search Freq 112 28MHz Prog 0 Color Sys PAL Sound Sys DK Skip O...

Page 17: ...the skipped channel 1 Use Direct digit choosing button to select the number of the channel to be recovered 2 Do the above steps again 3 Press VOL button to set Skip Off You could also select your favorite channel number in menu 1 Press CH button or Direct digit choosing button to select a channel directly take channel 1 for example 1 2 Press MENU and VOL to select the Tuner menu then press CH to e...

Page 18: ... the programs of the two channel will be exchanged 1 Press MENU and VOL to select the Tuner menu then press CH to enter Current Prog 009 Exchange Prog 006 Exchange Program edit function This function can enable you to rename your favorite channel 1 Press MENU and VOL to select the Tuner menu then press CH to enter 2 Press CH to select Prog Press VOL to set the channel number 3 Press CH to select P...

Page 19: ...e preset modes and one individual mode Press the PSM button to select a mode you like STANDARD SOFTNESS USER and BTIGHTNESS totally four picture modes can be selected alternately You could set it just by your favorite 16 MODE SOFTNESS STANDARD USER BRIGHTNESS OPTION Brightness BRIGHT DARK Contrast STRONG WEAK THICK LIGHT Hue GREEN PURPLE Sharpness SHARP SOFT Color Temp Std Cool Warm Saturation VOL...

Page 20: ...hen press VOL button to do the adjustment 1 Press MENU and VOL to select Audio menu then press CH to enter You could set the parameter if you select USER mode Note SubWoofer can only be adjusted when SubWoofer Switch is set On SubWoofer and SubWoofer Switch is not available in L26A9 AK 17 Mode Sound quality OPTION VOL VOL Bass 50 Treble 50 Balance 50 Surround Off SubWoofer Switch Off SubWoofer 50 ...

Page 21: ...L button Sound limit 2 Press VOL to select Audio menu 3 Press CH to enter it 1 Press MENU to display the menu 4 Press CH to select AVL 5 press VOL button to adjust the parameter you expect or set On or Off X 18 Note If you have pressed VOL button in the condition of the mute mode the value of the volume would decrease but the sound of the TV is still in mute mode Bass 50 Treble 50 Balance 50 Surro...

Page 22: ...k whether the Clock is the same with the standard time of the area you are being in if not please adjust it as follows 2 Press CH to move to Clock and press VOL to enter the digital position you want to adjust then press CH to adjust the value 3 After the setting press OK to confirm When timer on function is used the TV set can automatically turn the power on at the preset time in the standby stat...

Page 23: ...ect Time menu 3 Press CH to move to On Prog 20 Using this function the TV set can display the preset program automatically when the TV set is turned on Clock 0 00 Off Time Off Off Time 0 00 On Time Off On Time 0 00 On Prog 0 B C A Picture Audio Tuner Func PC Time Clock 0 00 Off Time Off Off Time 0 00 On Time Off On Time 0 00 On Prog 0 B C A Picture Audio Tuner Func PC Time ...

Page 24: ...L to select the Func menu OSD H Position 50 OSD V Position 50 21 Using this function you could select the position of the OSD on the screen you want 2 Press CH move to OSD Position 3 Press VOL to enter submenu of the OSD Position 4 Press CH to select the item you want to adjust and then press VOL to adjust After all press MENU to back to the main menu OSD Position OSD Timer 60S OSD Language Englis...

Page 25: ...s VOL to select the time 1 Press MENU and VOL to select the Func menu 2 Press CH to move to Transparency 3 Press VOL to adjust the value you want You could press MENU to back to the main menu OSD Position OSD Timer 60S OSD Language English PIP Transparency 0 De interlace Child Lock Off B C A Picture Audio Tuner Func PC Time OSD Position OSD Timer 60S OSD Language English PIP Transparency 0 De inte...

Page 26: ...ss source buttons eg TV AV to change the main input The signal of PIP can be changed in the submenu of PIP If Child Lock is set On the keys on the TV will be locked that means you could not operation the TV with these buttons 1 Press MENU and VOL to select the Func menu 2 Press CH and move to Child Lock 3 Press VOL to set On or Off You could press MENU to back to the main menu OSD Position OSD Tim...

Page 27: ...DE To improve the image while filming LADI To decrease the sawtooth 24 1 Press MENU and VOL to select the Func menu 2 Press CH and move to De interlace 3 Press VOL to enter the submenu 4 Press CH to select the item you want to adjust then press VOL to adjust it B C A Picture Audio Tuner Func PC Time OSD Position OSD Timer 60S OSD Language English PIP Transparency 0 De interlace Child Lock Off B C ...

Page 28: ...CH and move to the item you want to adjust 3 Press VOL to adjust the item or enter its submenu according the item setting 4 If enter the submenu press CH and move to the item you want to adjust and then press VOL to adjust Then you could press MENU to back to the main menu Auto Clock 0 Phase 0 H_Position 0 V_Position 0 I P Info VGA B C A Picture Audio Tuner Func PC Time ...

Page 29: ...reeze frame the current screen And press the button again to continue playing 1 Press CH EDIT button to display the current program diagram 2 There are ten channels per page You could select the channel on this page with CH also you could press VOL to turn to the other page you could press CH to select the channel you want to watch then press OK to confirm Press or MENU to exit CH EDIT 3 You could...

Page 30: ...n does not support NTFS and the file systemsof other format 4 Many moviefiles usesuffix ofAVI and MPG However manykinds offormat are used for internal files This television can only play some AVI and MPG files of this format Those files with suffix of dat are not movie files but data files used by computers and cannot be played for movies 5 External card reader supports most digital cards availabl...

Page 31: ... compatible with the card of SD MMC CF MS SM format How to use Card jack jack jack jack Note 1 Please note chooses uses the digital memory card with you corresponds the receptacle 2 Card reader in 1 cannot simultaneously insert two kind of cards in the graphical representation position Note 1 the card insertion time after the flows media system starts 2s insert the card to numerical code card read...

Page 32: ...h the terminals on the back of the card Always insert a card in the correct direction Failure to do so may result in damage to the card and the unit Do not subject the card to excessive pressure or strong impacts Malfunctions of the unit or card may result in data loss or damage to the card Haier shall not accept any liability for damage or loss of stored data Warning Memory cards can be swallowed...

Page 33: ...t the media play 1 Press USB button to enter media play system 2 Press up or down button to select the desired option 3 Press ENTER button to enter desired option 4 Press to return the previous menu 5 If to exit USB system you need to return to the main menu to protection card data ü ý RETURN SETUP File Copy Card USB Remove USB Press ENTER key to play this devices To operate the menu AAA Multimedi...

Page 34: ...P button to exit the display and then press or or or to move and enjoy the picture detail ü ý ü ý To select stream media broadcast system 1 Press up or down button to select Card or USB The device be inserted and identified 2 Press ENTER button to enter adjusted option Picture Music Movie Music and Pic F 007 JPG F 008 JPG F 009 JPG F 010 JPG F 011 JPG F 012 JPG To make the picture overturn 0 Each ...

Page 35: ...revious music 6 Press RETURN button to exit the playing Note 1 DISC Repeat mode press up or down button the DISC Repeat will appear on the screen and then press ENTER to ensure it 2 Program mode press or button to select the music in right list and press ENTER button to program in turn and then press button to select Done and then press ENTER button to ensure it To enjoy music The day went away MP...

Page 36: ...ect in turn File PlayBack Control Audio channel Play Mode 5 Press or button to set speed press ENTER button to resume to standard mode 6 Press or button to select the next movie or previous 7 Press RETURN button repeatedly to return To play Movie E08 8SOBTILES 1 Picture Music Movie Music and Pic AAA Multimedia Player AAA Multimedia Player Stream Media Broadcast System USB ZOOM RETURN HELP ENTER US...

Page 37: ...swap the next and previous picture press or button to select the music Note press pause button to stop playing the picture 5 Press repeatedly RETURN button to return F 007 JPG F 008 JPG F 009 JPG F 010 JPG F 011 JPG F 012 JPG MP3 The day you went away MP3 JPEG 0016 JPG Play Play mode standard IMAGE 00 01 43 Picture Music Movie Music and Pic AAA Multimedia Player AAA Multimedia Player Note On the m...

Page 38: ... PASTE then press ENTER button to paste in this time the File already exits overwrite it will appears on the screen and press or button to select YES NO and then press ENTER button to confirm 5 Press ENTER to cancel Copy file function Card Select source Port USB F 007 JPG F 008 JPG F 009 JPG F 010 JPG F 011 JPG F 012 JPG Root F 007 JPG F 008 JPG F 009 JPG F 010 JPG F 011 JPG F 012 JPG Root COPY PA...

Page 39: ...oaxial to remove the disturbance caused by airwave Do not lay the twin lead cable under the TV set You need the suitable coaxial cable and plug to receive the best picture and sound 300 twin lead cable 75 coaxial cable Antenna adapter additional purchase Plug additional purchase VHF UHF Mixer additional purchase AC power socket Antenna input 75 standard coaxial type AC cable Connecting Additional ...

Page 40: ...dditional Equipments Some additional equipments could connect with this set There is some description about this following You could check the input after the connection Note You could also use the TV AV button on the front panel of the TV to change the inputs How to connect the signal with other equipments DISPLAY MUTE STILL I II PIC SIZE TV AV S VIDEO DVD DTV PC DVI OK Q VIEW CH CH VOL VOL MENU ...

Page 41: ...r Pr R AUDIO L OUT L HD R IN L V S R IN PC DVI AUDIO IN S VIDEO IN VIDEO IN L V S R IN ANT DVI IN D SUB IN VIDEO OUT S VIDEO IN VIDEO IN Y R AUDIO L OUT POWER WOOFER Cb Pb Cr Pr R AUDIO L OUT L HD R IN L V S R IN PC DVI AUDIO IN Y Cb Pb Cr Pr L HD R IN Video output Connecting Additional Equipments How to connect the video input terminal Output signal How to connect the component input terminal Out...

Page 42: ...ct the PC input terminal Note The computer above is just an example The other equipments and coaxial are not included in the TV set PC input terminal is the DDC1 2B If the computer is not provide with DDC1 2B you should adjust it when connecting Some models of PC can not be connected with this TV set The D sub 15P terminal of DOS V need not adapter for the computer The H V scan frequence can not e...

Page 43: ...eaker cable to the speaker terminal of LCD TV and the speaker terminal and insert the connecting cable into the terminal slot Release the speaker terminal and ensure that the white connecting cable is inserted in the terminal slot marked red and black connecting cable is inserted in the black terminal slot and that anode and cathode poles are correctly connected 1 Take the woofer out and place it ...

Page 44: ...f the problem can be solved Poor sound Verify if sound system is correct Refer to some chapter for adjust No picture in some channel Verify if correct channel is selected Adjust the antenna Make adjustments by Fine Tune and Manual Search No color for some channel program black and white Verify if the same problem exists in other channels Check out of picture and sound systems Refer to relative ins...

Page 45: ...bPr 0 35Vp p VGA Analog RGB 0 7Vp p 75ohm TTL DVI DVI D USB 2 0 1151mm mm mm X124 X664 42 Video L26A9 AK 861mmX300mmX526mm stand including Average º140W standby consumption º 3W size º26 inch 66 03cm viewing angel º 170 ã Following are some reference specifications which may vary from that of the television that you have just purchased due to technical innovations Design and specifications contain...

Page 46: ...800x600 60 75 1024x768 60 75 Resolution Vertical Hz Horizontal KHz Clock MHz 60 31 5 25 2 640x480 75 37 5 31 5 60 37 9 40 0 800x600 75 46 9 49 5 60 48 4 65 0 1024x768 75 60 0 78 75 1600x1200 60 75 0 162 0 Specification continued DVI supporting PC supporting ...

Page 47: ...01 0090507703 ...
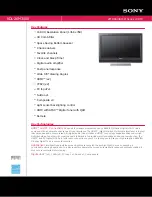
Reviews: