


01
01
HTG457H
Connection / Raccordement /
Anschluss / Podłączenie / Ligações /
Conexión / Aansluiting / Förbindelse /
连接
6LE002000B
z
USB to RJ45 Ethernet interface
a
Adaptateur USB vers Ethernet RJ45
e
USB-/RJ45-Ethernet-Schnittstelle
m
Adapter RJ45 Ethernet - USB
t
Interface USB / Ethernet RJ45
r
USB a la interfaz Ethernet RJ45
i
USB naar RJ45 Ethernet-interface
s
USB till RJ45 Ethernet-gränssnitt
n
以太网
RJ45 USB
适配器
Z
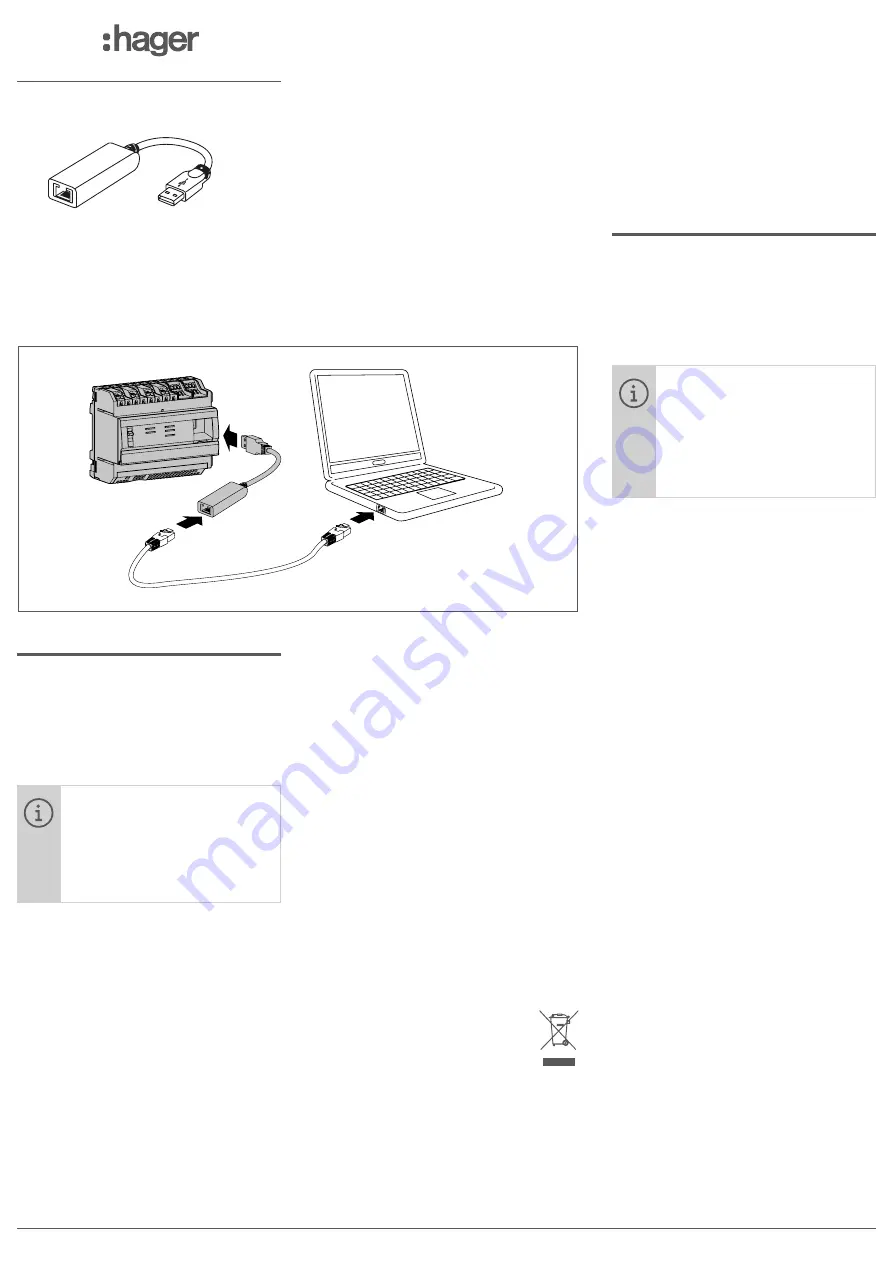
The HTG457H is an USB to RJ45 Ethernet
interface, especially suitable for the connec-
tion with the multienergy data logger & server
HTG410H / HTG411H. It allows direct connec-
tion on the front panel, avoiding any dismant-
ling of box or cabinet.
Implementation
Ensure that the Ethernet network
installation is not connected on
the port “Setup - Ethernet1”, but
on the Port “Ethernet 2”. Note: In
“Setup ON” mode, the HTG410H
activates its DHCP server on
“Setup - Ethernet 1” port.
1. Turn switch “Setup” in “ON” position on
HTG140H / HTG411H.
2. Execute a reset for HTG410H / HTG411H by
switching off the power supply and on again.
3. Wait until the “Power” LED is uninterrupted
green.
4. Connect the accessory on the USB port
located on front of HTG410H / HTG411H.
5. Connect the Ethernet port of the HTG457H
to the Ethernet port of the computer with an
Ethernet cable (crossed / uncrossed).
6. Set the TCP/IP connection on the computer :
Example for Windows 7 Professional:
- Open “Network and Sharing Center”.
- Click on “Change adapter settings”.
- Click on “Local Area connection”.
- Click on “Properties”.
- Select “Internet Protocol Version 4 (TCP/
IPv4)” and click on “Properties”.
- On “General” tab, make sure “Obtain an IP
address automatically” and “Obtain DNS
server address automatically” are checked.
Otherwise, write down your current settings
before making any changes, and check the
2 boxes.
- Click on “OK” to close window “Internet Pro-
tocol Version 4 (TCP/IPv4) Properties”.
- Click on “Close” to close window “Local Area
Connection Properties”.
7. Activate the Web browser on the computer.
8. Enter https://192.168.2.1 as the url and
connect you to the product HTG410H /
HTG411H as usual.
Total disconnection
1. Exit SETUP mode by selecting “Setup”
switch in “OFF” position.
2. Disconnect the accessory on USB port.
3. Restart HTG410H / HTG411H by switching
off the power supply and on again.
4. If applicable, reset the TCP / IPv4 settings
on the computer - those recorded before
modification.
Correct Disposal of This product
(Waste Electrical & Electronic Equip-
ment). (Applicable in the European
Union and other European countries
with separate collection systems).
This marking shown on the product or its lite-
rature indicates that it hould not be disposed
with other household wasted at the end of its
working life. To prevent possible harm to the
environment or human health from uncon-
trolled waste disposal, please separate this
from other types of wastes and recycle it res-
ponsibly to promote the sustainable reuse of
material resources.
Household users should contact either the
retailer where they purchased this product,
or their local government office, for details of
where and how they can take this item for envi-
ronmentally safe recycling.
Business users should contact their supplier
and check the terms and conditions of the
purchase contract. This product should not
be mixed with other commercial wastes of
disposal.
A
Le HTG457H est un adaptateur USB vers
Ethernet RJ45, spécialement adapté au raccor-
dement du serveur de données multi-énergies
HTG410H / HTG411H.Il permet un raccorde-
ment direct en face avant, évitant tout démon-
tage de coffret ou d’armoire.
Mise en oeuvre
S’assurer que le réseau Ether-
net de l’installation ne soit pas
raccordé au port „Setup - Ether-
net1“, mais bien au port „Ethernet
2“. Nota : En mode „Setup ON“, le
HTG410H / HTG411H active son
serveur DHCP sur le port „Setup
- Ethernet 1“.
1. Mettre le sélecteur «Setup» du produit
HTG410H / HTG411H en position «ON».
2. Redémarrer le HTG410H / HTG411H en
coupant son alimentation, puis le remettre
sous tension.
3. Attendre que la Led «Power» soit au vert fixe.
4. Raccorder l’accessoire au port USB situé en
face avant du HTG410H / HTG411H.
5. Raccorder avec un câble (croisé ou non)
Ethernet, le port Ethernet de l’accessoire au
port Ethernet de l’ordinateur.
6. Paramétrer le lien TCP / IP sur l’ordinateur :
Exemple pour Windows 7 Professionnel :
- Ouvrir le «Centre Réseau et partage».
- Cliquer sur «Modifier les paramètres de la
carte».
- Cliquer sur «Connexion au réseau local».
- Cliquer sur «Propriétés».
- Sélectionner «Protocole Internet version 4
(TCP / IPv4)» et cliquer sur «Propriétés».
- Sur l’onglet «Général», s’assurer que «Obtenir
une adresse IP automatiquement» et «Obtenir
les adresses DNS automatiquement» soient
cochés. Sinon, notez vos paramètres actuels
avant toute modification, et cochezHTG411H
as usual.
ces 2 cases.
- Fermer la fenêtre «Propriétés de Protocole
Internet version 4 (TCP / IPv4)» en cliquant sur
«OK».
- Fermer la fenêtre «Propriétés de Connexion
au réseau local» en cliquant sur «OK».
7. Lancer le navigateur internet sur l’ordinateur.
8. Saisir comme url https://192.168.2.1 et
connectez-vous au produit HTG410H /
HTG411H comme habituellement.
Déconnexion totale
1. Sortir du mode SETUP en mettant le sélec-
teur «Setup» en position «OFF».
2. Débrancher l’accessoire du port USB.
3. Redémarrer le HTG410H / HTG411H en
coupant son alimentation, puis le remettre
sous tension.


