LAST UPDATED: 01/28/2020
Haas Bar Feeder
- Installation - NGC
AD0406
Applies to machines built from: June, 2017
Introduction
The Haas Bar Feeder is for ST10/15/20/25/30/35
and DS-30 lathes. It is not for ST-30/35 or DS-30
lathes with a gearbox. This procedure tells you
how to install a bar feeder that was made after
June, 2017. If you have CHC machine please
follow the procedure below.
HAAS BAR FEEDER - INSTALLATION -
Machine Compatibility:
• NGC software 100.17.000.2030 or
higher
• Haas Bar Feeder installation kit
• ST-10/15/20/25/30/35 NGC lathes built
after Jan 14, 2019 are equipped with I/O
PCB (34-3490B). This I/O PCB does not
have the circuitry to power the Bar
feeder DC motor. Bar feeders built after
Jan 14, 2019 will have a tool changer
PCB kit included in the bar feeder
electrical installation kit. If you receive
a bar feeder that does not have the tool
changer PCB kit you need to order P/N:
(93-32-5502)
• Liner guide adapter kit
•
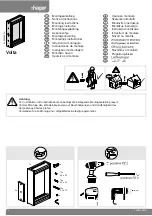
Note:
Do not remove the red shipping
brackets before the bar feeder installation.
Note:
Do not discard the anchor kit.
Haas Bar Feeder - Installation - NGC - AD0406
Page 1 of 13 pages