GW Instek APS-7050E, User Manual
The GW Instek APS-7050E is a high-performance programmable AC power supply. Ensure optimal usage with our detailed User Manual, available for free download from manualshive.com. This comprehensive manual provides all the necessary instructions and guidelines to maximize the potential of your APS-7050E.
Share
Download


Reviews:
No comments
Related manuals for APS-7050E
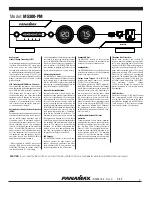
M5300-PM
Brand: Panamax Pages: 12

Elite-16 PF E
Brand: Furman Pages: 28

AP21000uk3M
Brand: Belkin Pages: 28

PSR529 Series
Brand: CAYMON Pages: 4

PowerBrite Pro7
Brand: Samson Pages: 16

WBI-VG 200
Brand: Whisper Power Pages: 4

Ormazabal cgm.3
Brand: Velatia Pages: 28

furse ESP 120 D1
Brand: Thomas & Betts Pages: 21

8/PWR-220 v4/SMS
Brand: NetPing Pages: 160

LIS-0816
Brand: Lanbe Pages: 40

105-AMX
Brand: Pacific Power Source Pages: 114

Isobar
Brand: Tripp Lite Pages: 2

93-2024
Brand: Tripp Lite Pages: 7

APS 2012
Brand: Tripp Lite Pages: 18

93-2007 (200106010)
Brand: Tripp Lite Pages: 22

VM-3HN
Brand: Kramer Pages: 16

SSI CSM 40 Series
Brand: Ilsco Pages: 5

PLS485PE
Brand: Abocom Pages: 2


