background image

OPERATOR'S  MANUAL

Liquid  Propane  Gas  (LPG)  Grill
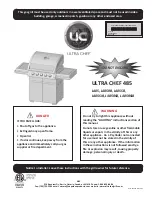
Model  CGE06ALP

NOTE TO ASSEMBLER / INSTALLER:

Leave this manual with the consumer.

NOTE TO CONSUMER:

Keep  this manual for future reference.

RECORD YOUR SERIAL #

 __________________

(see silver CSA label on main body of grill)

Manual  #  P80170001A  -  Date:

2006/01/17


Grill Information Center:

Call us first 

if you have any problem with this

product. We can help you with questions about
assembly  and  grill  operation  or  if  there  are
damaged or missing parts when you unpack this
unit from the shipping box. Please call before
returning to the store.

               1-800-761-5456

8am-4:30pm CST, Monday through Friday

Ÿ

Ÿ


IMPORTANT:

Ÿ


FOR YOUR SAFETY

Do not store or use gasoline or other
flammable  vapors  or  liquids  in  the
vicinity of this or any appliance.

!

!

Before  using  this  gas  appliance  read
all  instructions  and  perform  all  gas
leak-check  procedures  even  if  the
product  was  pre-assembled  by  the
retailer or manufacturer.

Improper  installation,  adjustment,
alteration, service or maintenance can
cause property damage, injury or death.
Read  the  installation,  operating  and
maintenance  instructions  thoroughly
before installing or servicing this equip-
ment.

    WARNING

Summary of Contents for CGE06ALP

Page 1: ...tswhenyouunpackthis unit from the shipping box Please call before returning to the store 1 800 761 5456 8am 4 30pm CST Monday through Friday Ÿ Ÿ IMPORTANT Ÿ FOR YOUR SAFETY Do not store or use gasoline or other flammable vapors or liquids in the vicinity of this or any appliance Before using this gas appliance read all instructions and perform all gas leak check procedures even if the product was ...

Page 2: ...workmanship for set periods below from the date of purchase when used under normal outdoor use and correct assembly Full Warranty on Grill 1 year except for paint loss rusting and ignitor battery Stainless Steel Parts and Tube Burners 5 years no rust through Cooking Grids 3 years no rust through Savor Plates 2 years no rust through Grand Hall will require reasonable proof of your date of purchase ...

Page 3: ...cardboard sheet on floor and use as a work surface to protect floor and grill parts from scratches You may slice the carton front corners with a utility knife to lay open the carton front panel This allows you to raise the grill head Lid and remove the components packed inside making it easier to lift Use the Hardware and Part Diagrams to ensure all items are included and free of damage Do not ass...

Page 4: ...hillips Head Screw 1 4 x3 8 4 Installs Tank Holders on the Cart Frame S112G04081 Phillips Head Screw 1 4 x1 2 8 Installs Casters on the Cart Frame S112G04081 Phillips Head Screw 1 4 x1 2 8 Secures Cart Bracket onto the Cart Frame S372G06111 S411G06081 S211G06531 Lock nut 3 8 Spring Washer 3 8 Wheel Bolt 3 8 x5 5 16 2 2 2 Secures 8 Wheels onto the Cart Frame S112G03061 Phillips Head Screw 3 16 x3 8...

Page 5: ...5 Parts Diagram for Model CGE06ALP 24 39 39 a b 44 33 28B 28A 27 26 36 37 40 38 20 18 20 41 35 34 32 29 25 12 31 30 20 23 21 19 10 16 13 43 4 22 42 11 14 7 9 8 6 5 15 17 3 1 2 45 ...

Page 6: ...21 Hose Bracket P05341002E 2 22 Gas Valve Manifold Assembly Bracket P03324002H 1 23 Regulator with Hose Two Stage LPG P03624003A 2 24 Gas Valve Manifold Assembly Left Y0060314 1 25 Gas Valve Manifold Assembly Right Y0060315 1 26 Control Panel Upper P02911553S 1 27 Control Panel Lower P02911561S 1 28a Control Knob P03429012J 8 28b Control Knob Seat P03415054A 8 29 Electric Ignitor 4 port P02502164C...

Page 7: ...ormation is required to ensure you receive the correct parts 1 Model and Serial Number see CSA label on grill 2 Part Number 3 Part Description 4 Quantity of parts needed Important Use only factory authorized parts The use of any part that is not factory authorized can be dangerous and will also void your product warranty Keep this Operator s Manual for convenient referral and for part replacement ...

Page 8: ...each side Right Cart Leg Tighten securely using 8 Phillips Head Screws Install Cart Brackets to each side Left Cart Leg using 4 Phillips Head Screws 1 4 x1 2 and attach 8 Wheels using 2 Wheel Bolts 3 8 x5 1 8 2 Spring Washers and 2 Flange nuts and tighten securely Phillips Head Screw 1 4 x3 8 QTY 4 Part S112G04061 Lock Nut 3 8 QTY 2 Part S372G06111 Wheel Bolt 3 8 x5 5 16 QTY 2 Part S211G06531 Scal...

Page 9: ...nstall Lid Handles to Left and Right Lid Tighten securely using 4 Phillips Head Screws 3 16 x3 8 Install Cart Handles to each Bowl Support Bracket Tighten securely using 12 Phillips Head Screws1 4 x1 2 Install Handles Phillips Head Screw 1 4 x1 2 QTY 12 Part S112G04081 Phillips Head Screw 3 16 x3 8 QTY 4 Part S112G03061 Latch ...

Page 10: ...Tray from Bottom Bowl panel Reinstall Grease Tray and Grease Receptacle Attach the Grease Tray to the Bottom Bowl panel using the Wing bolts and tighten securely The Grease Tray is required to be present and centered for your safety Slide the Grease Receptacle over Grease Tray Bracket Note Preassembled Grease Tray and Grease Receptacle CART REAR VIEW Wing Bolt Grease Receptacle ...

Page 11: ... the Electrode Tips are properly positioned If no spark is seen the Spark Gap needs to be adjusted as follows Using an adjustable wrench loosen the Inside Nut until the Gas Collector Box can be turned upward If the gap between the Spark Electrode Tip and Receiver is more than 3 16 use long nose pliers to gently squeeze the Gas Collector Box to narrow gap Return the Gas Collector Box to its origina...

Page 12: ...relief device that has a direct connection with the vapor space of the tank The tank supply system must be arranged for vapor withdrawal The LP Gas tank used must have a collar to protect the tank valve Never connect an unregulated LP gas tank to your gas grill The gas regulator assembly supplied with your gas grill is adjusted to have an outlet pres sure of 11 water column W C for connection to a...

Page 13: ...oors in a well ventilated area away from ignition sources such as gas fired or electrical appliances During the leak test keep your grill away from open flames or sparks Do not use household cleaning agents Damage to gas assembly components can result Ÿ Ÿ Ÿ Ÿ Ÿ If growing bubbles appear do not use or move the LP Gas tank Contact an LP Gas Supplier or your fire department WARNING Before using this ...

Page 14: ...n both left and right Lids as shown before lighting your grill If you have a gas leak that cannot be repaired by tightening turn off the gas at the source disconnect fuel line from your grill and call 1 800 761 5456 or your gas supplier for repair assistance Never disconnect the gas regulator or any gas fitting while your grill is lit A lit grill can ignite leaking gas and cause a fire or explosio...

Page 15: ...ft side burners repeat step 7 and 8 then press the left side Electric Ignitor 10 11 12 13 9 6 Before each use check all hoses for cracks nicks cuts burns or abrasions If a hose is damaged in any way do not use your grill before replacing the hose with an authorized part from the Parts List Also make sure all gas supply connections are securely tightened For optimum performance this grill should be...

Page 16: ...try to light the grill WeakAAbattery Correction Unscrew the Ignitor Cap and replace the battery If the grill still does not light you may need to purge air from the gas line or reset the regulator excess gas flow device Note This procedure should be done every time a new LP Gas tank is connected to your grill To purge air from your gas line and or reset the regulator excess gas flow device Turn Co...

Page 17: ... solution Rinse thoroughly and let dry Remove aluminum foil from Orifices and check each Orifice for obstruction Check each Spark Electrode adjusting as needed The space between the Spark Electrode Tip and Spark Receiver should be approximately 3 16 Replace the Burners and adjust the Gas Collector Box The edge of the collector box should be overlapping the Burner Port Replace Savor Plates and Cook...

Page 18: ...tly placed inside the ends of the Burner Tubes Also check the position of your Spark Electrode WARNING For safe operation ensure the Gas Valve Assembly Orifice is inside the Burner Tube before using your grill See figure If the Orifice is not inside the Burner Tube lighting the Burner may cause explosion and or fire resulting in serious bodliy injury and or property damage METHOD 1 Bend a stiff wi...

Page 19: ...el source every time will help eliminate air pockets in the manifold Note This procedure should be done every time a new LP Gas tank is connected to your grill Turn all Control Knobs to the OFF position Turn off the LP Gas tank at the tank valve Disconnect regulator from LP Gas tank Let unit stand for 5 minutes Reconnect regulator to the LP Gas tank Open grill Lid or on select models the Side Burn...

Page 20: ...g and searing meats cast iron or steel grids offer better heat conductivity To protect against the natural rusting process steel or cast iron cooking grids offer a porcelain finish which requires routine maintenance to keep the grids well seasoned Stainless steel is popular with those who prefer less maintenance A new innovative solution is available on select models called Stainless Clad Therma C...

Reviews: