background image

Instructions

Fusion

 CS

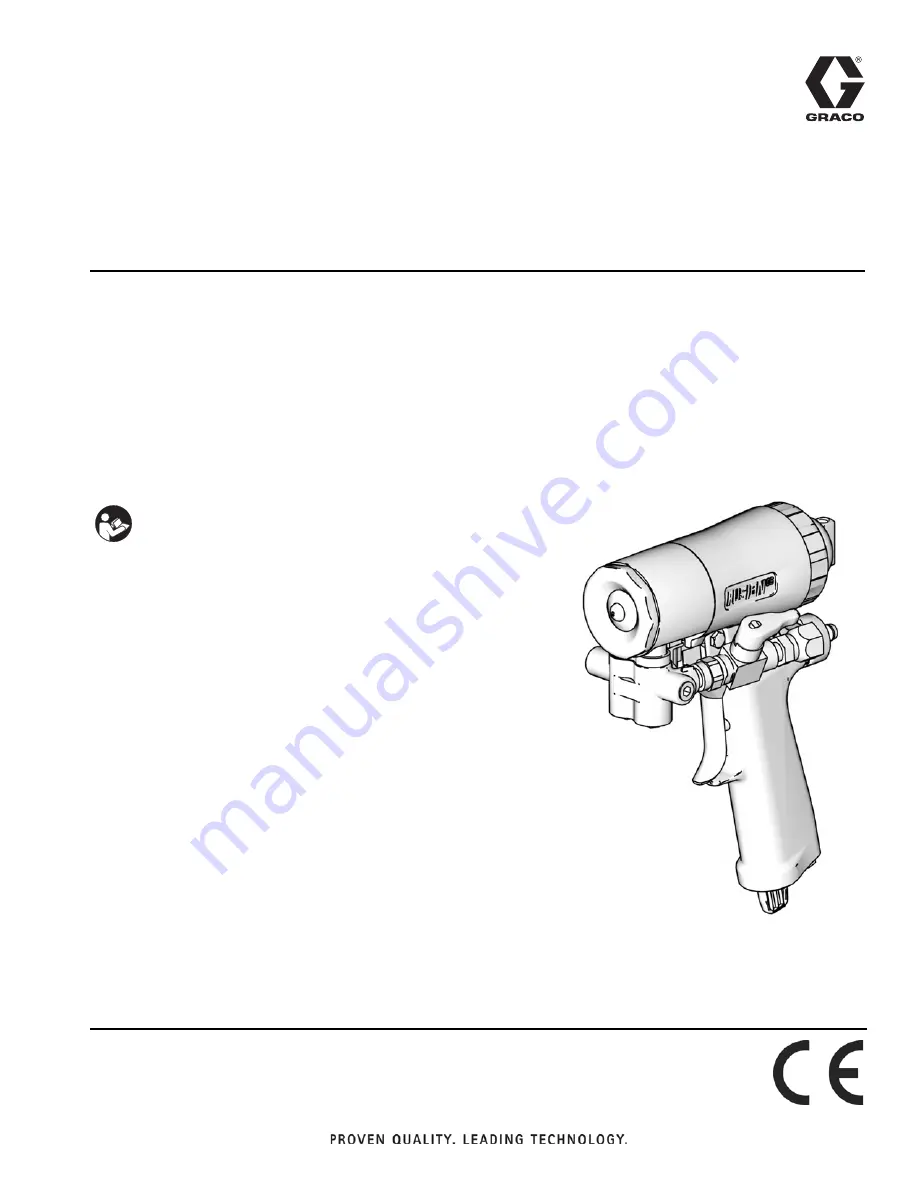
For plural component, impingement mix air purge spray gun with ClearShot

 Liquid 

technology. For professional use only.
For use with non-flammable foam and polyurea. Not for use in explosive atmospheres.

3500 psi (24.5 MPa, 245 bar) Maximum Fluid Working Pressure
80-130 psi (0.56-0.9 MPa, 5.6-9.0 bar) Air Inlet Pressure Range
200° F (94° C) Maximum Fluid Temperature

See page 4 for model information.

Important Safety Instructions

Read all warnings and instructions in this 
manual. Save these instructions.

TI11323a

312666W

EN

Summary of Contents for WD0000

Page 1: ... foam and polyurea Not for use in explosive atmospheres 3500 psi 24 5 MPa 245 bar Maximum Fluid Working Pressure 80 130 psi 0 56 0 9 MPa 5 6 9 0 bar Air Inlet Pressure Range 200 F 94 C Maximum Fluid Temperature See page 4 for model information Important Safety Instructions Read all warnings and instructions in this manual Save these instructions TI11323a 312666W EN ...

Page 2: ...sh Gun 25 Clean Outside of Gun 25 Clean or Replace Front Cover and Retainer 25 Clean Breather Plug 25 Clean Fluid Manifold 26 Adjust Fluid Valve Packings 26 Clean Mix Chamber Nozzle 27 Clean Passages 28 Clean Impingement Ports 28 Troubleshooting 30 Theory of Operation 33 Cutaway View 34 Repair 35 Tools Required 35 Lubrication 35 Remove Front End 35 Attach Front End 36 Mix Chamber and Side Seal Ass...

Page 3: ...glish Description 309572 Power Lock Heated Hose Instructions Parts Manual 309963 Solvent Flush Kits Instructions Parts Manual 313058 256566 Circulation Manifold Kit Instructions Parts Manual 313121 256569 TP100 Kit and 256570 Stud Wall Foam Kit Instructions Parts Manual 313129 256526 Cleanout Tool Kit Instructions Parts Manual 3A6242 Clearshot Liquid Refill Kit Instructions Parts Manual ...

Page 4: ... 01 SST CS02RD B RD0202 0 052 1 30 02 SST CS03RD B RD0303 0 060 1 50 03 SST RD4747 0 047 1 19 SST FLOW RATE in gpm lpm PRESSURE in psi MPa bar 5 0 18 9 4 0 15 1 3 0 11 4 1 0 3 8 2 0 7 6 0 RD0101 01 WD 0101 RD0000 00 WD0000 500 3 5 35 1000 6 9 69 1500 10 3 103 2000 13 8 138 2500 17 4 172 4 3000 20 7 207 3500 24 1 241 To calculate flow in lb min multiply gpm rate by 10 Example 2 gpm x 10 20 lb min R...

Page 5: ... 0 038 0 97 CS00F6 B FL0000 0 029 0 70 00 FT0848 16 18 406 457 0 048 1 22 CS01F1 B FL0101 0 042 1 00 01 FT0424 8 10 203 254 0 024 0 61 CS01F2 B FL0101 0 042 1 00 01 FT0438 8 10 203 254 0 038 0 97 CS01F3 B FL0101 0 042 1 00 01 FT0624 12 14 305 356 0 024 0 61 CS01F4 B FL0101 0 042 1 00 01 FT0638 12 14 305 356 0 038 0 97 CS01F5 B FL0101 0 042 1 00 01 FT0838 16 18 406 457 0 038 0 97 CS01F6 B FL0101 0 ...

Page 6: ...flow in lb min multiply gpm rate by 10 Example 2 gpm x 10 20 lb min FL0202 with FTXX48 tip FL2020 with FTXX24 tip Mix Chamber Pattern Diameter at 24 in 610 mm to Target in mm Equivalent Flow to Mix Chamber Size Reference Part No Gun Kit Series Part Impingement Port Size in mm Equivalent Size CS22WD B WD2222 0 022 0 56 N A 8 9 203 229 4 5 lb min at 1000 psi CS00WD B WD0000 0 028 0 71 00 15 381 0 RD...

Page 7: ... fitting respirator which may include a supplied air respirator chemically impermeable gloves protective clothing and foot coverings as recommended by the fluid manufacturer and local regulatory authority Protective eyewear and hearing protection SKIN INJECTION HAZARD High pressure fluid from gun hose leaks or ruptured components will pierce skin This may look like just a cut but it is a serious i...

Page 8: ...ed the maximum working pressure or temperature rating of the lowest rated system component See Technical Specifications in all equipment manuals Use fluids and solvents that are compatible with equipment wetted parts See Technical Specifications in all equipment manuals Read fluid and solvent manufacturer s warnings For complete information about your material request MSDS forms from distributor o...

Page 9: ...y protection Always wear a properly fitting respirator which may include a supplied air respirator Ventilate the work area according to instructions in the fluid manufacturer s SDS Avoid all skin contact with isocyanates Everyone in the work area must wear chemically impermeable gloves protective clothing and foot coverings as recommended by the fluid manufacturer and local regulatory authority Fo...

Page 10: ... applied too thick Read material manufacturer s warnings and Safety Data Sheet SDS Cross contamination can result in cured material in fluid lines which could cause serious injury or damage equipment To prevent cross contamination Never interchange component A and component B wetted parts Never use solvent on one side if it has been contaminated from the other side NOTICE Partially cured ISO will ...

Page 11: ... ensure it is thoroughly clean Always clean the fluid inlet strainers after flushing Check with your material manufacturer for chemical compatibility When changing between epoxies and urethanes or polyureas disassemble and clean all fluid components and change hoses Epoxies often have amines on the B hardener side Polyureas often have amines on the B resin side Read material MSDS to know specific ...

Page 12: ...nder cover H Handle L Piston Safety Lock Flow Selector Knob M Gun Fluid Manifold N Mix Chamber Nozzle P Optional Fluid Inlets A Side Shown R ClearShot Liquid Cartridge S Fluid Inlet Swivels A Side Shown T Trigger U Front Cover V Gun Air Whip Hose W Air Valve X Variable Flow Adjustment Knob Y Manifold Check Valve Inlet Screen Housing FIG 1 TI11324a A P T M H L D V W U N S C F E R X Y ...

Page 13: ...ly hose Piston Safety Lock Engage piston safety lock whenever you stop spraying to avoid accidental triggering Engage To engage piston safety lock push knob in and turn clockwise If engaged gun will not actuate Disengage To disengage piston safety lock push knob in and turn counterclockwise until it pops out There will be a gap between knob and gun body FIG 2 Engaged TI11326a FIG 3 Disengaged TI12...

Page 14: ...sure fluid valves A and B are closed before turning front cover retainer C Loss of Air Pressure In event of loss of air pressure gun will continue to spray To shut off gun do one of the following Push in piston safety lock see page 13 Close fluid valves A and B FIG 4 TI11327a A C FIG 5 TI11327a A ...

Page 15: ...uid manifold check valves 4 Engage piston safety lock page 13 5 Install ClearShot Liquid cartridge See ClearShot Liquid Cartridge Installation Removal page 22 6 Connect gun air whip hose V air valve W to main air hose Assemble fluid manifold M to gun by hand and then tighten bolt 7 Connect air line to quick coupler D Turn on air Open air valve W Air should flow from nozzle N 8 Apply layer of lubri...

Page 16: ...uid valve Then open A ISO fluid valve 14 Disengage piston safety lock page 13 15 Test spray onto cardboard Adjust pressure and temperature to get desired results 16 The gun is now ready to spray Shutdown Overnight Shutdown 1 Follow Pressure Relief Procedure page 17 2 See Maintenance page 24 FIG 10 FIG 11 FIG 12 TI12240a TI11326a TI11333a FIG 13 FIG 14 CAUTION Air supply is required for gun actuati...

Page 17: ...ation Do not disconnect gun air supply until fluid pressure is relieved FIG 16 TI11326a TI11327a A W FIG 17 FIG 18 Fluid in the hose and proportioner is still under pressure Follow the Pressure Relief Procedure in the proportioner manual To relieve pressure in the hose manifold after the gun is removed place the fluid manifold over containers facing away from you Ensure fluid valves are closed Ver...

Page 18: ...l inlets P 4 Apply thread sealant to plugs 1e elbows 35 and male threads of fluid valve assemblies Install elbows 35 in optional inlets facing down Install fluid valve assemblies in elbows Be sure to install A fluid assembly in A side Install plugs where swivels had been Torque all parts to 235 245 in lb 26 6 27 7 N m 5 Connect A and B hoses to A and B swivels 6 Attach fluid manifold Connect air R...

Page 19: ...sist damage 6 To clean soak tip in compatible solvent Clean gently with tip cleanout tool 15D234 page 56 for details of tool 7 Reassemble in reverse order a Insert mix chamber 14 from rear of fluid housing b Tighten A and B side seals on fluid housing c Assemble o ring 47 tip 21 and tip retainer 46 to front of mix chamber 14 8 Reposition tip horizontally or vertically or install different tip size...

Page 20: ...d turn flow selector knob to variable flow position See FIG 25 Full Flow To return to a full flow pattern push in and turn flow selector knob to full flow position See FIG 25 Change Variable Flow Adjustment Knob 1 Turn air valve W OFF 2 Turn flow selector knob to variable flow position See FIG 25 FIG 24 TI12240a Safety Stop Flow Selector Knob Variable Flow Adjustment Knob FIG 25 TI11345a Safety St...

Page 21: ...tor knob is in the safety stop position See FIG 25 The variable flow adjustment knob locks into detents every 15 Ensure knob is locked into a detent before proceeding to step 5 4 Turn air valve ON and open fluid valves Verify that flow selector knob is set to the variable flow position See FIG 25 5 Test spray pattern on cardboard Repeat steps 1 through 6 until desired spray pattern is reached FIG ...

Page 22: ...s to swell and stick inside gun handle Install ClearShot Liquid Cartridge 1 Follow Pressure Relief Procedure page 17 2 Remove plastic cap from new ClearShot Liquid cartridge 3 Insert cartridge into gun handle Ensure cartridge tabs are aligned correctly with cartridge tab recesses in gun handle 4 After cartridge is fully inserted turn cartridge 1 4 turn clockwise to lock it into gun handle 5 Turn a...

Page 23: ...ollow Pressure Relief Procedure page 17 2 Turn air valve W OFF 3 Push in and turn cartridge 1 4 turn counterclockwise viewed from bottom 4 Pull cartridge out of gun handle Troubleshooting For ClearShot Liquid cartridge troubleshooting see Troubleshooting on page 30 FIG 31 FIG 32 TI11338a TI11339a ...

Page 24: ...y gun cover page 55 Applying a light coat of lubricant will make cleaning easier As Needed 1 Clean Outside of Gun page 25 2 Clean Mix Chamber Nozzle page 27 a minimum of once a day 3 Clean Breather Plug page 25 4 Clean Fluid Manifold page 26 5 Clean Passages page 28 6 Clean Impingement Ports page 28 7 Adjust Fluid Valve Packings page 26 Daily Follow Shutdown page 16 Weekly to Monthly 1 Clean Mix C...

Page 25: ... solvent flush kit 256510 248229 is available as an accessory Clean Outside of Gun Wipe off outside of gun with compatible solvent Use N Methylpyrrolidone NMP Dynasolve CU 6 Dzolv or an equivalent to soften cured material Clean or Replace Front Cover and Retainer Soak front cover retainer C and front cover U in compatible solvent Brush or wipe clean Replace as needed Clean Breather Plug Remove and...

Page 26: ...ng them from fluid manifold 4 Clean or replace fluid screens See Accessories page 55 5 Carefully inspect o rings and fluid screen surfaces Replace if worn or damaged 6 Liberally lubricate o rings and reassemble Use a hex nut driver to tighten Adjust Fluid Valve Packings Periodic adjustment may be necessary to stop fluid leakage If fluid valve is leaking adjust the packings 1 Follow Pressure Relief...

Page 27: ...t to clean mix chamber nozzle N Table 1 Nozzle Drill Bit Sizes FIG 37 TI11326a FIG 38 Round Spray Flat Spray Mix Chamber Drill Size in mm Mix Chamber Drill Size in mm RD2020 58 0 042 1 00 FL2020 3 32 0 094 2 35 RD0000 55 0 052 1 30 FL0000 3 32 0 094 2 35 RD0101 53 0 060 1 50 FL0101 3 32 0 094 2 35 RD4747 0 045 1 15 RD0202 50 0 070 1 75 FL0202 3 32 0 094 2 35 RD0303 44 0 086 2 15 TI12090a N ...

Page 28: ... in an accessory kit Order kit 256526 for ClearShot Handle Drill Kit see Accessories page 55 Clean Impingement Ports 1 Follow Pressure Relief Procedure page 17 2 Disconnect air D and remove fluid manifold M 3 Flush Gun page 25 If gun will not flush see Mix Chamber and Side Seal Assemblies page 37 4 Remove Front End page 35 FIG 39 TI11330a M D ...

Page 29: ...to position 8 Tighten A and B side seals 9 Attach Front End page 36 10 Attach fluid manifold M Connect air D Return gun to service FIG 40 TI12097d Impingement Port IP CB IP TI3533a Mix Chambers RD and FL 2020 and 2929 Mix Chambers RD and FL 4242 or larger CB Mix Chamber Impingement Port IP Drill Bit Size in mm Counter bore CB Drill Bit Size in mm RD2020 76 020 0 50 53 060 1 50 RD0000 69 029 0 70 5...

Page 30: ...s slowly Plugged breather plug 9 Clean Breather Plug page 25 Damaged piston o rings 4a 4c Replace See Piston page 41 Dirty air valve or damaged o rings 15 Clean air valve or replace o rings See Air Valve page 43 Gun delays then actuates abruptly Cured material around side seals 42 43 Inspect side seals 42c and mix chamber 14 for scratches Replace see Mix Chamber and Side Seal Assemblies page 37 Lo...

Page 31: ...lose valves first Fluid mist from mix chamber Damaged side seals 42 43 Replace See Mix Chamber and Side Seal Assemblies page 37 Damaged side seal o rings 42d 42e Replace See Mix Chamber and Side Seal Assemblies page 37 Damaged mix chamber 14 Replace See Mix Chamber and Side Seal Assemblies page 37 Dosed ClearShot Liquid normal No action required Rapid buildup of material on air cap Plugged front c...

Page 32: ...Replace See ClearShot Liquid Cartridge Installation Removal page 22 Damaged or cracked cartridge Replace See ClearShot Liquid Cartridge Installation Removal page 22 Damaged dosing piston Repair See Piston page 41 Excessive ClearShot Liquid dosing producing less than 1000 doses per cartridge Non regulated air supply to gun Regulate air supply to gun Excessive air pressure at gun Regulate air supply...

Page 33: ...hamber nozzle N Gun Detriggered Air Purging Mix chamber 14 moves forward shutting off fluid flow Impingement ports IP open to air chamber AC allowing purge air to flow through mix chamber nozzle N Air CSL Fluid TI12123a_1 NOTE Flow paths are not shown to scale for clarity CSL is dosed into purge air 14 AC IP N Air CSL CSL Air Fluid NOTE Flow paths are not shown to scale for clarity CSL is dosed in...

Page 34: ...Theory of Operation 34 312666W Cutaway View TI12091a 20 19 42 14 3 45 44 6 5 15 17 15 16 13 9 23 1 Hose Manifold Assembly see page 48 4 Piston Assembly see page 44 2 Fluid Housing Assembly see page ...

Page 35: ...ver to remove fluid manifold M 4 Unscrew and remove front cover retainer C 5 Remove front cover U 6 Turn fluid housing F 1 4 turn counterclockwise to disengage slots Remove fluid housing 7 Inspect fluid housing o rings for wear or damage Replace if necessary Proper attachment of front end is critical Do not operate gun if front end is loose or not snug against handle CAUTION If front cover retaine...

Page 36: ...n socket of piston assembly 4 3 Push fluid housing F flush to handle 4 Turn fluid housing 1 4 turn clockwise to engage slots 5 Replace front cover U 6 Screw on front cover retainer C Proper attachment of front end is critical Do not operate gun if front end is loose or not snug against handle FIG 43 FIG 44 TI11326a TI12129d 2d 2c 14 4 FIG 45 FIG 46 TI12094d TI12092d C U F 2b ...

Page 37: ...t driver to remove side seal assemblies 42 43 7 Push on front of mix chamber 14 to loosen Pull mix chamber out rear of fluid housing F Inspect for damage and Clean Impingement Ports page 28 FIG 47 FIG 48 TI12095a M TI12086a D CAUTION To prevent cross contamination of side seal assemblies do not interchange A component and B component parts The A component assembly is marked with an A FIG 49 CAUTIO...

Page 38: ...ully inspect side seal assembly o rings and surfaces Replace worn or damaged parts Liberally lubricate o rings 42d 42e and reassemble 11 Line up tabs on seal 42c and seal housing 42a insert seal into housing Push down on seal and turn to lock in place FIG 50 CAUTION To prevent cross contamination of side seal assemblies do not interchange A component and B component parts The A component assembly ...

Page 39: ...n 13 Liberally lubricate and reinstall side seal assemblies 42 43 Use hex nut driver to tighten 14 Attach Front End page 36 15 Connect air and trigger the gun a few times to check for leaks If purge air leaks from mix chamber nozzle when gun is triggered inspect mix chamber and side seals Correct the problem before attaching fluid manifold 16 Attach fluid manifold F Connect air Return gun to servi...

Page 40: ...e page 17 4 Disconnect air D 5 Use hex nut driver to remove check valves 44 45 6 Disassemble check valves using a flat head screwdriver FIG 54 FIG 55 TI12095a M TI12086a D CAUTION To prevent cross contamination of the check valves do not interchange A component and B component parts The A component check valve is marked with an A FIG 56 CAUTION Damaged check valve o rings 44e 44f may result in ext...

Page 41: ...te o rings 44e 44f and carefully reinstall in fluid housing F Use hex nut driver to tighten 9 Attach fluid manifold M Connect air D Return gun to service Piston 1 Follow Pressure Relief Procedure page 17 2 Disconnect air D and remove fluid manifold M 3 Remove Front End page 35 4 Unscrew variable flow adjustment knob X and inspect o ring 3a FIG 57 TI12099d 45 44e 44d 44c 44b 44a 44f F FIG 58 FIG 59...

Page 42: ...vent 8 Lubricate dosing piston 4e o rings with ClearShot Liquid prior to reassembly 9 Liberally lubricate piston o ring 4c and lightly lubricate shaft o rings 4a 10 Reinstall retaining ring 4g Press it into groove of dosing piston 4e 11 Reinstall piston Shaft is keyed for proper assembly Push firmly to seat piston 12 Install variable flow adjustment knob X 13 Attach Front End page 36 14 Attach flu...

Page 43: ...rew air valve plug 13 and remove spring 16 Using a small diameter tool push spool 17 out from front Inspect all five o rings 15 4 Liberally lubricate o rings and reassemble Torque plug 13 to 25 135 in lb 14 15 N m 5 Attach fluid manifold M Connect air D Return gun to service FIG 63 FIG 64 TI11330a M D TI12103a 13 15 15 17 16 ...

Page 44: ... application of heat to loosen threadlocker 1 2 3 4 5 Seal Assembly 42 Detail Check Valve 44 Detail TI12104a TI12105a TI12098b 42d 42c 42b 42e 42a 44e 44d 44c 44b 44a 44f 3 5 6 7 8 9 2c 2b 19 13 14 16 17 15 20 4a 4c 4b 4d 4e 4f 4g 32 34 23 43 42 44 45 2f 2d 11 33 2 3 4 1 1 1 1 1 1 1 1 1 1 1 1 1 2 3a 1 see page 48 for details Variable Flow Adjuster 3 Detail 3c 3b r_256366_312666 3a 5 ...

Page 45: ...15C480 WASHER wave 1 9 121540 PLUG breather 1 11 256458 HANDLE kit includes ref 12 1 13 15T897 PLUG air valve 1 14 CHAMBER mix 1 15 O RING 5 16 117485 SPRING compression 1 17 256455 VALVE spool includes 15 1 19 256414 RETAINER cover pack of 5 1 20 256415 COVER front round tip pack of 5 1 256416 COVER front flat tip pack of 5 1 21 TIP spray 1 23 256385 KIT clearshot cartridge pack of 25 1 25 TOOL c...

Page 46: ...ck of 10 1 44c 257419 SPRING compression pack of 10 1 44d 257421 RETAINER ball pack of 10 1 44e 246354 O RING pack of 6 1 44f 256771 O RING pack of 6 1 45 257423 KIT valve check b side includes 45a 45f 1 45a 257428 HOUSING check valve b side pack of 10 1 45b 257420 BALL carbide pack of 10 1 45c 257419 SPRING compression pack of 10 1 45d 257421 RETAINER ball pack of 10 1 45e 246354 O RING pack of 6...

Page 47: ...r Kit FL0000 CS00F2 Order Kit FL0000 CS00F3 Order Kit FL0000 CS00F4 Order Kit FL0000 CS00F5 Order Kit FL0000 CS00F6 Order Kit FL0000 CS01F1 Order Kit FL0101 CS01F2 Order Kit FL0101 CS01F3 Order Kit FL0101 CS01F4 Order Kit FL0101 CS01F5 Order Kit FL0101 CS01F6 Order Kit FL0101 CS02F1 Order Kit FL0202 CS02F2 Order Kit FL0202 CS02F3 Order Kit FL0202 CS02F4 Order Kit FL0202 CS02F5 Order Kit FL0202 CS0...

Page 48: ...il Views Apply lubricant to seals Apply sealant to threads 1 3 2 Hose Fluid Manifold 1 Detail TI12106a TI3870a TI12107c TI12108a 36 37 1a 51b 1d 1g 1k 1e 1n 1f 40 14 47 21 46 25 27 1d 49 50 Fluid Inlet Cover Detail 1 3 3 3 3 3 1d 41 TI12197a 3 1j 51a 51c 51d 51e 51f 3 1p 1p 1m 1r ...

Page 49: ... 060 53 1 50 RD0000 8 203 0 052 55 1 30 0 029 69 0 70 0 060 53 1 50 RD0101 11 279 0 060 53 1 50 0 042 58 1 00 N A N A RD4747 11 5 292 0 0635 1 16 1 55 0 047 1 15 N A N A RD0202 12 305 0 070 50 1 75 0 052 55 1 30 N A N A RD0303 14 356 0 086 44 2 15 0 060 53 1 50 N A N A Kit Part Pattern Diameter at 24 in 609 6 mm to target in mm Equivalent flow to mix chamber size Nozzle Drill Bit Size in mm Imping...

Page 50: ... 2 35 0 020 76 0 50 0 060 53 1 50 FL0000 246360 0 094 3 32 2 35 0 029 69 0 70 0 060 53 1 50 FL0101 246360 0 094 3 32 2 35 0 042 58 1 00 N A N A FL0202 246360 0 094 3 32 2 35 0 052 55 1 30 N A N A RD 01 01 RD round pattern FL flat pattern WD wide pattern A orifice size 0 042 in B orifice size 0 042 in Flat Pattern Model Ref 21 Spray Tip Pattern Size in mm CSxxF1 FT0424 low flow 8 10 203 254 CSxxF2 ...

Page 51: ...on tools and side seal springs Kit Quantity by Reference Number 51b 52b 2b 2c 2d 3a 4a 4c 42d 43d 42e 43e 44e 45e 44f 45f 256490 Complete Kit 2 1 1 1 1 2 1 2 2 2 2 256467 Side Seal 6 278933 Side Seal Only 50 256468 Side Seal Housing 6 256640 Fluid Head Check Valves 6 6 256471 Fluid Head 1 1 1 256470 Air Piston 2 1 256472 Back Cap 1 256469 Hose Manifold Check Valves 6 Reference Number 51b 52b 2b 2c...

Page 52: ...90 in O ring Repair Kits on page 51 for the quantity of each Check Valve Filter Screen Kits Kits include 10 filter screens The 80 mesh filter screen is standard with gun 4c 2b 42e 43e 3a 2d 2c 4a 42d 44e 43d 45e 44f 45f 1b Part Description 246357 40 mesh 0 015 in 375 micron 246358 60 mesh 0 010 in 238 micron 246359 80 mesh 0 007 in 175 micron ...

Page 53: ... 18 246623 3 32 0 116 2 90 246810 3 7 64 0 109 2 77 246813 3 39 0 099 2 51 246624 3 3 32 0 094 2 39 246812 3 43 0 089 2 26 246625 3 44 0 086 2 18 248639 6 2 15 mm 0 085 2 15 249114 6 45 0 082 2 08 246811 3 2 mm 0 079 2 00 246626 6 50 0 070 1 78 249113 6 52 0 64 1 63 248893 6 1 16 0 062 1 59 246627 6 53 0 060 1 52 249112 6 1 45 mm 0 057 1 45 246809 6 54 0 055 1 40 246628 6 55 0 052 1 32 249764 6 1 ...

Page 54: ...sing See Clean Passages page 28 246629 6 58 0 042 1 07 246808 6 60 0 040 1 02 248640 6 61 0 039 0 99 248618 6 63 0 037 0 94 248891 6 66 0 033 0 84 246807 6 67 0 032 0 81 246630 6 69 0 029 0 74 248892 6 70 0 028 0 71 246815 6 73 0 024 0 61 276984 6 74 0 023 0 57 246631 6 76 0 020 0 51 246816 6 77 0 018 0 46 246817 6 81 0 013 0 33 Kit Part Qty Drill Bit Size Illustration nominal in mm ...

Page 55: ...113 gram 10 High adhesion water resistant lithium based lubricant MSDS sheet available at www graco com Flushing Manifold 256641 Manifold Block See page 48 Fluid Inlet Cover Kit 256642 includes 15R910 and 15B221 See page 48 Gun Cleaning Kit 15D546 Kit includes 11 tools and brushes to clean the gun ClearShot Liquid Cartridges See MSD060 Front Cover Retainer Kit Description Qty 256465 SEAL KIT Polyc...

Page 56: ...ifold with individual A and B shutoff valves and air regulator See manual 309963 Tip Cleanout Tool 15D234 Designed to fit CeramTip internal dome and flat tip slits Circulation Manifold 256566 Attach to gun fluid manifold to enable preheating of hose See manual 313058 Fusion AP Manifold Adapter 258996 Allows Fusion CS gun to fit onto existing Fusion manifold TI12110a TI12111a End for Air Purge Tips...

Page 57: ...secure grip or in combination with the Palm Grips to maximize the comfort and anti fatigue properties and minimize the applicator s grip strength Gun Grip Kit Graco Gun Grips are designed to be used on Fusion A CS or Probler P2 Guns Palm Grip Kit Palm Grips are designed to adhere to any disposable removable glove Handle Replacement Kit 24W375 Kit Part No Qty 17G542 10 Pack 17G543 50 Pack 17G544 10...

Page 58: ...Accessories 58 312666W Repair Kit 24X573 Keep bulk spare parts on hand to rebuild Fusion CS gun Packaged in convenient carry case Repair Kit Contents ...

Page 59: ...Size 1 4 npt Quick Disconnect Nipple A Component ISO Inlet Size 5 JIC 1 2 20 UNF B Component Resin Inlet Size 6 JIC 9 16 18 UNF Dimensions 7 5 x 8 1 x 3 3 in 191 x 206 x 84 mm Weight 2 6 lb 1 18 kg Wetted Parts Aluminum stainless steel carbon steel carbide chemically resistant o rings Noise dBa Maximum sound pressure 75 27 dB A using RD0202 at 100 psi 0 7 MPa 7 bar Maximum sound power 73 45 dB A u...

Page 60: ...material or workmanship repairs will be made at a reasonable charge which charges may include the costs of parts labor and transportation THIS WARRANTY IS EXCLUSIVE AND IS IN LIEU OF ANY OTHER WARRANTIES EXPRESS OR IMPLIED INCLUDING BUT NOT LIMITED TO WARRANTY OF MERCHANTABILITY OR WARRANTY OF FITNESS FOR A PARTICULAR PURPOSE Graco s sole obligation and buyer s sole remedy for any breach of warran...

Reviews: