PV Glider Manual v. 2 rev B www.glidebikes.com
1 of 11
Go Glider Manual
Congratulations on your purchase of the Go Glider! Your glider is designed for years of
nearly carefree use by your child. These instructions include how to set up your glider and
maintenance procedures which you should perform to ensure last lasting use and optimal
performance.
Important! Read all of these instructions before assembling or riding the glider. For
questions or help please call Glide Bikes at 888-723-7748.
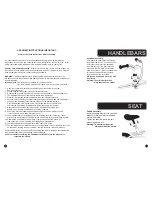
Assembly Instructions
Tools needed for assembly:
Wrench (Figure 1) (Included)