Gfp 663TH, Operation Manual
The GFP 663TH Operation Manual is available for free download at manualshive.com. This comprehensive manual provides detailed instructions on how to use and maintain your GFP 663TH product. Download the manual today and get the most out of your equipment, ensuring smooth operation and optimal performance.
Share
Download


Reviews:
No comments
Related manuals for 663TH
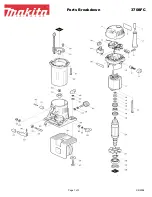
3708FC
Brand: Makita Pages: 3

ALM3222
Brand: AL-MEISTER Pages: 52

Sign EM-S1400C
Brand: Easymount Pages: 16

397
Brand: Martin Yale Pages: 20

EasyLaminator A4
Brand: LEITZ Pages: 31

coldLAM CS9
Brand: LEITZ Pages: 41

Mistral 1650
Brand: kala Pages: 22

TCC1400F+
Brand: Tamerica Pages: 13

A 41
Brand: Hama Pages: 96

425LM-1
Brand: GBC Pages: 5

ULG 300 B1
Brand: UNITED OFFICE Pages: 84

64614A
Brand: ACCO Brands Pages: 38
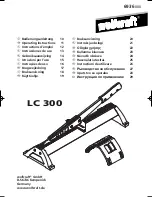
LC 300
Brand: Wolfcraft Pages: 32

A 390
Brand: Olympia Pages: 39

DIN A3/250
Brand: Hama Pages: 42


