Summary of Contents for 076P054-001
Page 43: ......
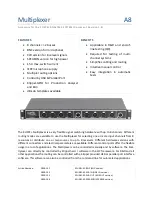
The General DataComm 076P054-001 is a cutting-edge product designed to streamline your data communication needs. Ensure seamless installation and operation by downloading the free Installation & Operation Manual from our website. Access this comprehensive manual now to easily set up and utilize your device effectively.
Page 43: ......