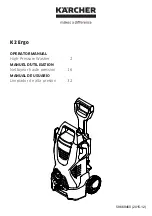
1
175D6576P001
Pub No 31-16589
FOR SERVICE TECHNICIAN ONLY―DO NOT REMOVE OR DESTROY
IMPORTANT
Electric Discharge (ESD)
Sensitive Electronics
ESD problems are present everywhere. ESD may damage or weaken
the electronic control assembly. The new control assembly may appear
to work well after repair is finished, but failure may occur at a later date
due to ESD stress.
•
Use an anti-static wrist strap. Connect wrist strap to ground connection
point or unpainted metal in the appliance.
–OR–
Touch your finger repeatedly to ground connection point or unpainted
metal in the appliance.
•
Before removing the part from its package, touch the anti -static bag to a
green ground connection point or unpainted metal in the appliance.
•
Avoid touching electronic parts or terminal contact; handle electronic
control assembly by edges only.
•
When repackaging failed electronic control assembly in anti-static bag,
observe above-mentioned precautions.
IMPORTANT
Electrical Shock Notes
• The power must be disconnected before servicing by unplugging
the machine or disconnecting the circuit breaker.
• The machine must be electrically grounded through the lead
in the 3-prong power cord. The cord must be plugged into a
grounded appliance outlet that has been properly installed.
If local codes require an additional ground connection, use a
16-gauge or larger wire to connect the washer cabinet to an
established ground. In all cases, the grounding method must
comply with all local electrical codes and ordinances.
DIAGNOSTIC GUIDE
Before testing washer operation, check the following:
•
Is the power cord firmly plugged into a live circuit?
•
Has a household fuse blown or circuit breaker tripped? Time delay fuse?
•
Are both hot and cold water faucets open and water supply hoses
unobstructed? Before opening the unit make sure the washer is unplugged
from power outlet.
•
Check all connections before replacing components. Look for broken or loose
wires, failed terminals, or wires not pressed into connections far enough.
•
The most common cause for control failure is corrosion on connectors.
Therefore, disconnecting and reconnecting wires will be necessary
throughout test procedures.
•
Connectors: Look at top of connector. Check for broken or loose wires.
Check for wires not pressed into connector far enough to engage metal
barbs.
•
Resistance check must be made with power cord unplugged from outlet,
and with wiring harness or connectors disconnected.
SERVICE MODE
To ENTER service mode: Press (while the unit is idle):
Signal - Extra Rinse - Signal - Extra Rinse
To EXIT service mode: Press Power Button
General Navigation
-
Upon entering the service mode, the SSD shall display the first test number
t01.
-
Rotating the knob counter-clockwise (CCW) decrement the test number in
the display.
Rotating the knob clockwise (CW) increment the test numbers in the
display.
-
Once the test number is selected, pressing Start/Pause begin the selected
test.
SYSTEM DRAWING
Service Mode
Service mode test
Sequence
T01
Version Display Enter
Display software version
Power
Returns to service mode screen
T02
Error Codes
Enter
Displays error codes
Start/Pause
Clears highlighted error code from machine
Power
Returns to service mode screen
T03
User interface
test
Enter
Turn all remaining LED
Power
Returns to service mode screen
Enter
Display “U”
T04
Water valve
and dispenser
test
Soil Button On
Turn on cold water valve and All Soil Level LEDs
turn On
Soil Button Off
Turn off cold water valve and All Soil Level LEDs
turn Off
Temp Button On Turn on hot water valve and All Temp LEDs turn
On
Temp Button Off Turn off hot water valve and All Temp LEDs
turn Off
Spin Button On
Turn on bleach valve and All Spin speed LEDs
turn On
Spin Button Off
Turn off bleach valve and All Spin speed LEDs
turn Off
Signal Button On Turn on bleach valve + cold valve together and
signal LED turns on
Signal Button Off Turn off bleach valve + cold valve together and
Signal LED turns Off
Power
Returns to service mode screen
T05
Water level
sensor test
Enter
Turn on the cold water valve, the water level
frequency continue updating on SSD
Power
Drain and return to service mode screen
T06
Drain Pump
test
Enter
Turn on the drain pump
Power
Returns to service mode screen
T07
Heater and
Thermistor test
Enter
On entry, the control will display the estimated
temperature (0 F) turn on the cold valve and
heater is turn on
The water temperature sensor test displays the
water temperature trend in the display, if the
sensor is reading falling temperature from the
baseline it will blink the numbers in the display,
if it senses raising temperatures it will solid the
numbers in the display.
Power
Returns to service mode screen
T08
Tumble test
Enter
Unit tumbles
Power
Returns to service mode screen
T09
Spin test
Enter
Displays “estimated” and “current” rpm
Power
Returns to service mode screen
Disconnect power before servicing.
Replace all parts and panels before operating.
Failure to do so can result in injury or death.
Electrical Shock Hazard
FILTER-EMI
WATER VALVE(COLD)
SUB PCB
DOOR SWITCH
MAIN PCB
MOTOR
DOOR LOCK SWITCH
HEATER & THERMISTER
TRANS REACTOR
DRAIN PUMP
PRESSURE SENSOR
WATER VALVE(HOT)
DC68-02670A.indd 1
2009-08-12 ¿ÀÈÄ 2:07:31