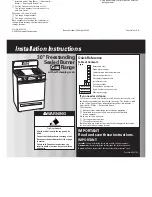
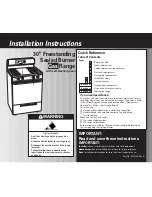
background image

 Range

Contents

Aluminum Foil

12

Roasting, Roasting Guide 14

Anti-Tip Device

3,6,28

Self-Cleaning Instructions 20-22

Appliance Registration

2

Shelves

9, 19

Care and Cleaning

16-23

Thermostat Adjustment 25

Clock

10

Vent Duct

10

Consumer Services

31

Problem Solver

26

Electronic Controls

10

Safety Instructions

2-5

Features

6,7

Surface 

8,9

Flooring Under the Range

5

Burner Grates

18

Leveling

5

Burners

17

Lift-Up Cooktop

16

Control Settings

8

Minute/Second Timer

10

Cookware 

9

Model and Serial Numbers

2

Drip Pans

18

Oven

9

Flame Size

8

Air Adjustment

24

Lighting Instructions

8

Baking, Baking Guide

12, 13

Toe Space Filler

27

Broiler Pan and Rack 15, 19,23

Warranty

Back Cover

Broiling, Broiling Guide

15

Control Settings

10, 11

Door Removal

18

Light; Bulb Replacement

9, 19

Oven Bottom Removal

24

Oven Timer

10,11


Preheating

13

Summary of Contents for JGSP20GEP

Page 1: ...9 Flooring Under the Range 5 Burner Grates 18 Leveling 5 Burners 17 Lift Up Cooktop 16 Control Settings 8 Minute Second Timer 10 Cookware Tim 9 Model and Serial Numbers 2 Drip Pans 18 Oven 9 Flame Siz...

Page 2: ...his book We re proud of our service and want you to be pleased If for some reason you are not happy with the service you receive here are three steps to follow for further help FIRST contact the peopl...

Page 3: ......

Page 4: ...igniting top burners and a carbon monoxide level abcwe e 0 nut leave plastic items on that Wowed by current standards themoktop they may melt if N e leave s rfa e bum resuhi g in a heaith hazard left...

Page 5: ...b damage or move it Do not use oven cleaners No commercial oven cleaner or oven liner protective coating of any kind should be used in or around any part of the oven o Before self cleaning the oven re...

Page 6: ...Features of Your Range Mode JGsP20GEp with Brushed Chrome Cooktop shown 6...

Page 7: ...Pans 8 17 18 10 OVEN CANCEL button push it to cancel any oven operation 11 11 Electronic Display Panel 12 Oven On Indicator 10 9 10 10 11 13 Set Knob lets you set oven temperature clock timer and HI o...

Page 8: ...r ignites turn the knob to adjust the flame size After Lighting a Burner Check to be sure the burner you turned on is the one you want to use Do not operate a burner for an extended period of time wit...

Page 9: ...ignition To light either burner push the button for the desired function and turn the SET knob until the desired temperature is displayed The burner should ignite within 60 seconds Power Outage CAUTIO...

Page 10: ...the electronic controls To Set the Clock 1 Push CLOCK button 2 Turn SET knob to correct time of day Clock is now set The clock must be set to the correct time of day for accurate automatic oven timing...

Page 11: ...ssages in the display show you which fimction is currently being displayed While the function is displayed you can change it with the SET knob You can change any programmed function at anytime If a de...

Page 12: ...nd or filling to cool sufficiently before filling pie shell Filling may be too thin or juicy Filling allowed to stand in pie shell before baking Fill pie shells and bake immediately Ingredients and pr...

Page 13: ...lls Shelf B maybe used For thin rolls Shelf B mav be used Cakes without shortening Angel food Jelly roll Sponge Cakes Bundt cakes Cupcakes Fruitcakes Aluminum Me Pan Metal Jelly Roll Pan Metal or Cera...

Page 14: ...ure 325 325 325 325 325 325 350 325 Doneness Rare Medium Well Done Rare Medium Well Done Well Done Well Done To Warm Well Done Well Done Well Done Step 4 Most meats continue to cook slightly while sta...

Page 15: ...helf 3roil 14mition HI c HI c HI B B B B B B LO A HI c c HI c HI B LO c HI B B HI B B B B HI c lst Side Time Minutes 3 5 Quantity andlor Thickness V2 lb about 8 thin slices nd Side Time Minutes z 5 6...

Page 16: ...oil with a clean soft cloth A good appliance wax will help protect this finish Porcelain Cooktop on model so equipped There are a number of precautions you can take to avoid marring the porcelain enam...

Page 17: ...ter Orifice the burners for 20 to 30 minutes If the fmd doesn t rinse off completely scrub them with soap and water and a brush or plastic pad Do not use steel wool or abrasive cleaners because they w...

Page 18: ...ool they ll scratch the surface Instead soak the drip pans for about 20 minutes in slightly diluted liquid cleanser or mild solution of ammonia and water 1 2 cup of ammonia to one gallon of water Afte...

Page 19: ...ose while the meal is being served Do not store a soiled broiler pan and rack in the oven Do not clean in self cleaning oven Oven Light Bulb The light bulb is located in the upper right corner of the...

Page 20: ...baking results or near the self cleaning oven Replace the gasket if you notice it A combination of any of these becoming worn frayed displaced products plus the high clean cycle or damaged in any way...

Page 21: ...the oven turns on by pushing and holding the CLEAN button To Stop a Clean Cycle 1 Press the CANCEL button 2 Wait until the oven has cooled below locking temperature about 20 30 minutes and the word LO...

Page 22: ...il and reset the clean cycle Q Is the crackling sound I hear during cleaning normal A Yes This is the sound of the metal heating and cooling during both the cooking and cleaning functions Q Should the...

Page 23: ...of the oven door Oven Gasket HydrogenPeroxide Soak with bydrogen peroxide Frequent soaking helps prevent soil build up Do not rub See self clean section for more information Oven Liner Soap and Water...

Page 24: ...slide the front tab to the right to lock the oven bottom into place The oven bottom has a porcelain enamel finish To make cleaning easier protect the oven bottom from excessive spillovers This is part...

Page 25: ...just temperature 1 Push the BAKE button 2 Select a temperature between 500 F and 550 F with the SET knob 3 Quickly within two seconds before the BAKE function energizes push and hold the BAKE button f...

Page 26: ...artially bloekingthefree air fiowrieeded for combnstiun muve pan and try agaiq Mwnerlmle onskleofbtumwmay b clogged Rwmreand clcanthem 13urnem not seated m rl cm bwxwrm rts Reirxmtllthtm see a 517 mym...

Page 27: ...ded to provide a toe space of 2fib to 3 After the range is installed with the longer legs and is in position and level measure from the bottom of the bodyside to the floor This will be the required he...

Page 28: ...wall or one o the studs in the wall see Fig 1 Whether you attach the chain to the wall or floor be certain that the screw is in at least 3 4 thickness of wood other than baseboard and that there are n...

Page 29: ...Notes 29...

Page 30: ...Notes 30...

Page 31: ...Pur chase a GE contract while your war ranty is still in effect and you ll receive a substantial discount With a multiple year contract you re assured of future semice at today s prices F Telecommuni...

Page 32: ...l costs to your home All warranty service will be provided by our Factory Service Centers or by our authorized Customer Care servicers during normal working hours Look in the White or Yellow Pages of...

Reviews: