GE 31-16222, Installation Manual
The GE 31-16222 Installation Manual is a comprehensive guide that provides step-by-step instructions on how to set up and utilize your product. This manual is available for free download from manualshive.com, ensuring easy access to the information you need to effortlessly install and operate your GE 31-16222.
Share
Download


Reviews:
No comments
Related manuals for 31-16222

CHD Series
Brand: JC LAB Pages: 2

RemScan
Brand: ziltek Pages: 6

40AV
Brand: Anets Pages: 26

Fry delight FX1000
Brand: TEFAL Pages: 12

Unimatic TSL WP
Brand: V-ZUG Pages: 44

AquaChef
Brand: Kitchen Advance Pages: 10

MDE9601
Brand: Maytag Pages: 28

Dual Blaze 6.8
Brand: Cosori Pages: 24

Pneudri Maxi MX102c
Brand: Domnick Hunter Pages: 14

900377
Brand: Taurus Pages: 56

PROFESSIONAL TDC111VG
Brand: Asko Pages: 28

M14A
Brand: Mediclinics Pages: 72

130 FG-m
Brand: AEG Pages: 32

950 008 672
Brand: AEG Pages: 44
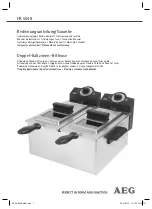
FR 5548
Brand: AEG Pages: 54

FR 5553
Brand: AEG Pages: 54

FT 350 FRITESSE PROFI
Brand: AEG Pages: 8

TM 565 C
Brand: Tricity Bendix Pages: 21


