


Reviews:
No comments
Related manuals for GT1000DC

GJ
Brand: Chamberlain Pages: 20

ALTO100C
Brand: Nice Pages: 35

Gate Control BASE 1000 Series
Brand: tell Pages: 55

E-S 1000D Series
Brand: Estate Swing Pages: 48

770 Lento
Brand: FAAC Pages: 17
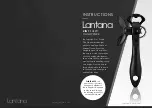
2-IN-1 SAFETY CAN OPENER
Brand: Lantana Pages: 2

77201
Brand: West Bend Pages: 20

595 I
Brand: FAAC Pages: 54

UNIGATE 24V
Brand: SEA USA Pages: 64

CarGO 500
Brand: Garaga Pages: 36

ILT Series
Brand: Palfinger Pages: 6

GOLD400D Series
Brand: V2 Pages: 172

SWV2GS2
Brand: G.S.M Activate Pages: 7

RI.15K
Brand: Beninca Pages: 18

XT2
Brand: FAAC Pages: 4

BX704AGM
Brand: CAME Pages: 96

Rallye MC 120K
Brand: Bernal Pages: 23

Orca GarageAce
Brand: RCA Pages: 8


